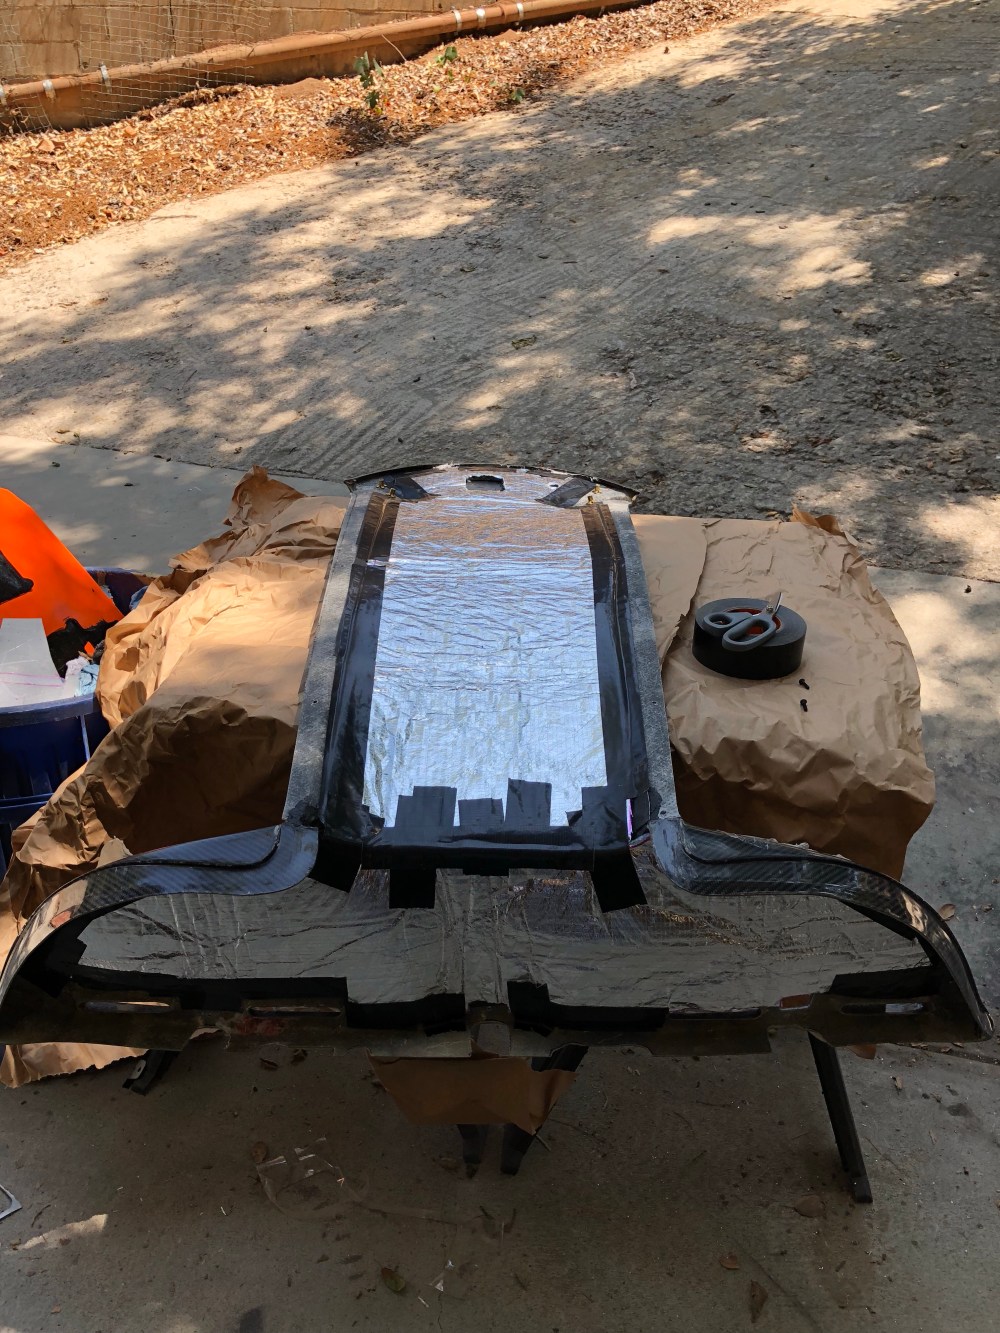
With the Damplifier and Mega’Zorbe installed on the spider I turned my attention to the ceiling panel. Unfortunately there isn’t enough room between the two panels to install something as thick and heavy as Luxury Liner Pro – that would have been much more effective at blocking noise than Mega’Zorbe. So the strategy for the space above my head was to install a layer of Damplifier Pro on the ceiling panel followed up by a layer of Heat Wave Pro. Between the spider and ceiling panel I’ve got Damplifier/Mega’Zorbe/Heat Wave Pro/Damplifier Pro – that’s a lot of sound and heat product! At one point earlier in the week I had the body sitting outside, exposed to the sun. The black from the carbon fiber REALLY attracts the heat and I’m concerned about how much heat transfer into the cabin is coming from the roof, hence the Mega’Zorbe/HWP combo.
Recall I purchased a large box of Damplifier Pro and a 40# box of B-stock Damplifier. I thought I had purchased way too much but as I’m nearing the end of the sound deadening work I find myself down to just a few sheets – and I’ve still got to do the doors! I’ve been more selective with where I use the Damplifier Pro because there’s a very definite difference in material and weight between the Pro and standard stuff. If I had to do it over again I’d instead purchase a box of the Damplifier Pro B-stock (they didn’t have these available when I purchased my material). Use the Pro material on any surfaces facing the cabin and the remainder on external surfaces.
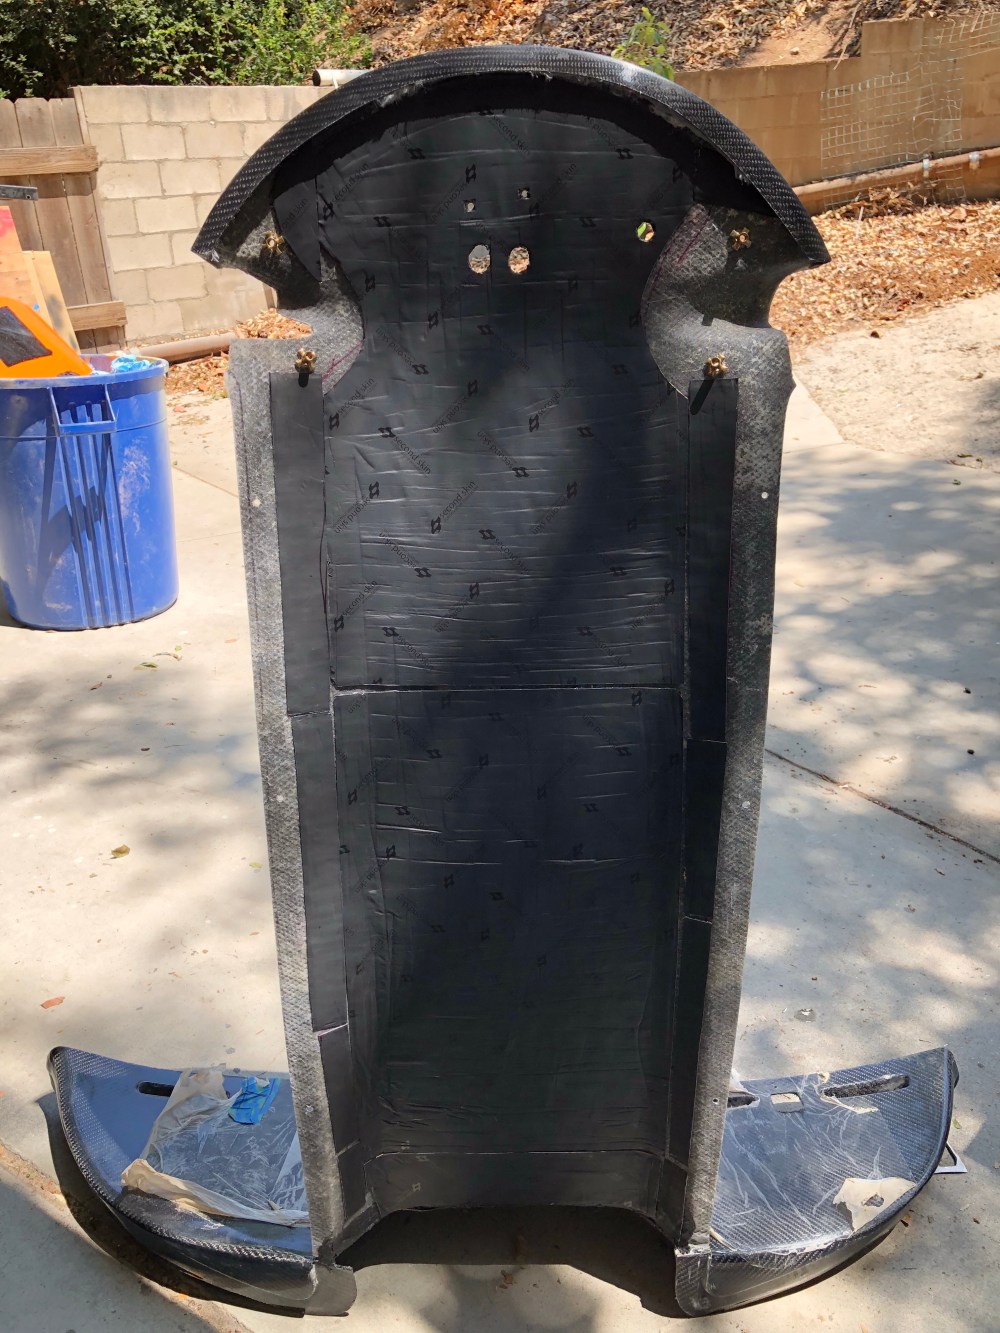

The engine bay is likely to be the worst source of heat and sound so I really pimped the upper engine closeout with heat and sound material. Starting at the engine and moving toward the passenger compartment I have:
(engine bay) => Thermal Block / Damplifier / (closeout panel) / Damplifier / Luxury Liner Pro / Heat Wave Pro / Damplifier Pro / (ceiling panel) => (passenger cabin)
The wiki recommends the use of McMaster’s expanding foam tape to fill in the gaps to help seal the cabin from external air and heat sources. I picked up a roll of PN 7650A11 and this stuff is really nice. It’s made from a tough polyurethane based material and the adhesive is pretty sticky. It can be compressed to something thinner than the 1/4″ and expands to 1″ – so you can shove it into little nooks and crannies (there’s a few places along the edges of the upper closeout panel that the optional edge seals don’t cover). I also used a long strip of this to seal the forward portion of the spider from air coming in at the front of the car.
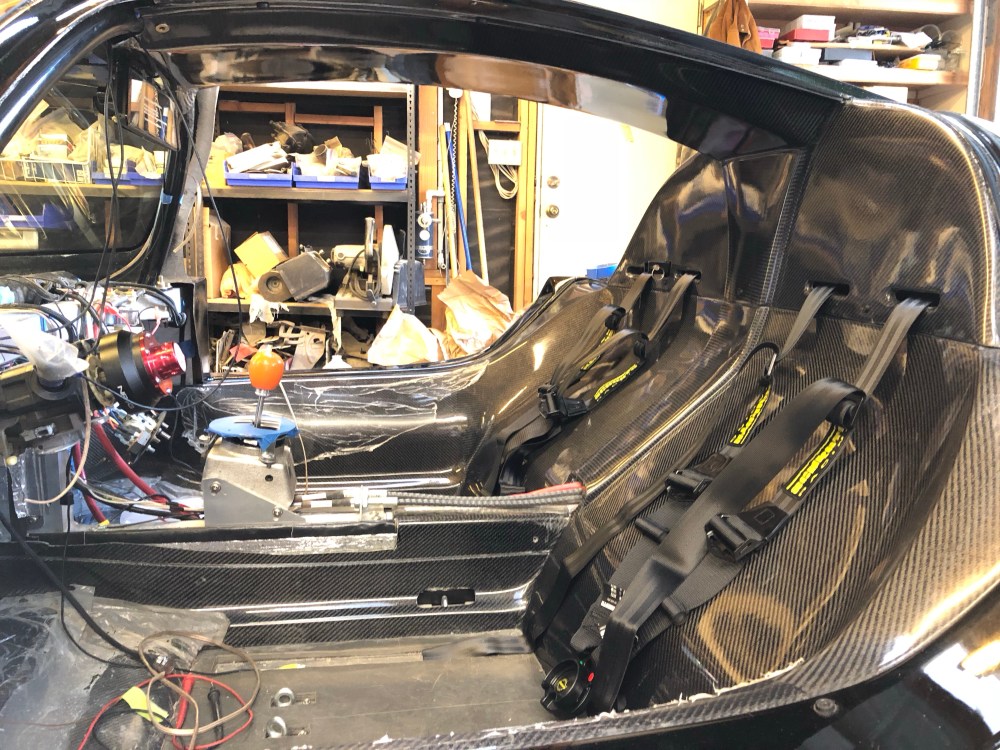
Before final installing the ceiling panel you’ll have to thread your shoulder straps.
The ergonomics of a short driver:
Most driver height related questions concerning the SLC tend to start with “I’m 6′, will I fit in an SLC?”. I’m on the other end of the spectrum – at 5’4″ I’m probably one of the shorter SLC owners out there – do I fit?
Yes, easily, but I have other issues to contend with. My short arms, legs, torso – well, just about everything mean my seat position puts me closer to the steering wheel and at a more upright seating angle. Most SLC seats are reclined way way back, almost at the same angle as the tub to accommodate taller drivers. In my case, reclining the seat means my eye level sinks fairly low and it then becomes difficult to see over the dash – even if it is only 25″ off the ground ;). The issue with having a more upright seating angle is having the seat/headrest foul the ceiling panel or doors. Since I wanted to run an adjustable seat track, it meant my seat would be even closer to fouling.
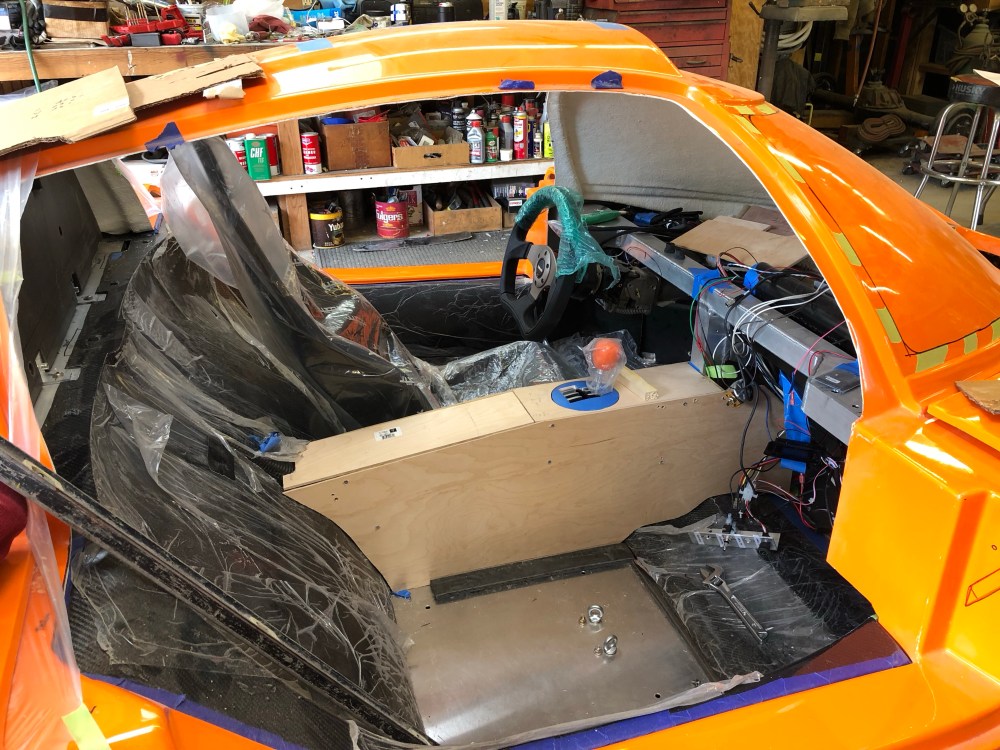
It was a bit of a tricky game getting everything to fit well; I made 2 seat risers from rectangular tube steel which are directly bolted to the floor boards. My Tillett adjustable seat rails are then bolted to the risers with the seat brackets sitting on top of the rails. When determining the orientation for the seat, I used my trusty laser to line my seat up with the steering wheel. This sets the seat at a pretty noticeable angle relative to the vehicle centerline; time will tell if this is too weird. Almost all production cars are produced with seats in-line with the vehicle centerline, with steering wheels offset. As I’ve driven my other cars more I’ve noticed just how much my steering wheel is offset relative to the seating position. It might be too weird to have the steering wheel centered!


Safety harnesses:
I’m running Schroth 6-point hybrid II-H harnesses for both the driver and passenger. I’ve had some good experiences with Schroth in the past and several of my friends have used (and crashed) in them and made it out without injury. These belts feature 2″ webbing at the shoulder and lap areas; for a smaller person such as myself, this means less chance of the belt digging into my neck and pelvis. Schroth has done a lot of research and shown that the 2″ lap belts are superior for preventing belt slippage off the pelvic bone during a crash event. The shoulder straps start out as 2″ then transition to 3″ from the mid-chest down to the cam mechanism. The thinner 2″ strap is recommended for those wearing a HANS device as the strap will fully seat on the HANS yoke. The hybrid belt design takes the two sub belts and secures them to the lap belts via loops instead of through a metal plate that’s inserted into the cam mechanism. This means a more compact cam mechanism (less digging) and improved energy transfer into the cam in the event of an accident.
Positioning of the anchor points for these harnesses is absolutely critical! You MUST read and follow the manufacturer’s instructions as they may differ. For instance, I compared the installation instructions for a Simpson 6-point harness to the Schroth instructions and had I followed the Simpson instructions I would have installed them incorrectly per Schroth’s requirements. These belts are designed and tested to work within very specific installation configurations – don’t go making up your own attachment points!
(Soap box mode off, back to more rambling …)
With the cage installed and the ceiling panel in place, I marked the pre-defined cutouts for the shoulder belt pass-thrus and noted that anything larger than a 2″ shoulder strap either needs to have the pass-thru enlarged or needs to be pinched together at the hole (not a good idea).


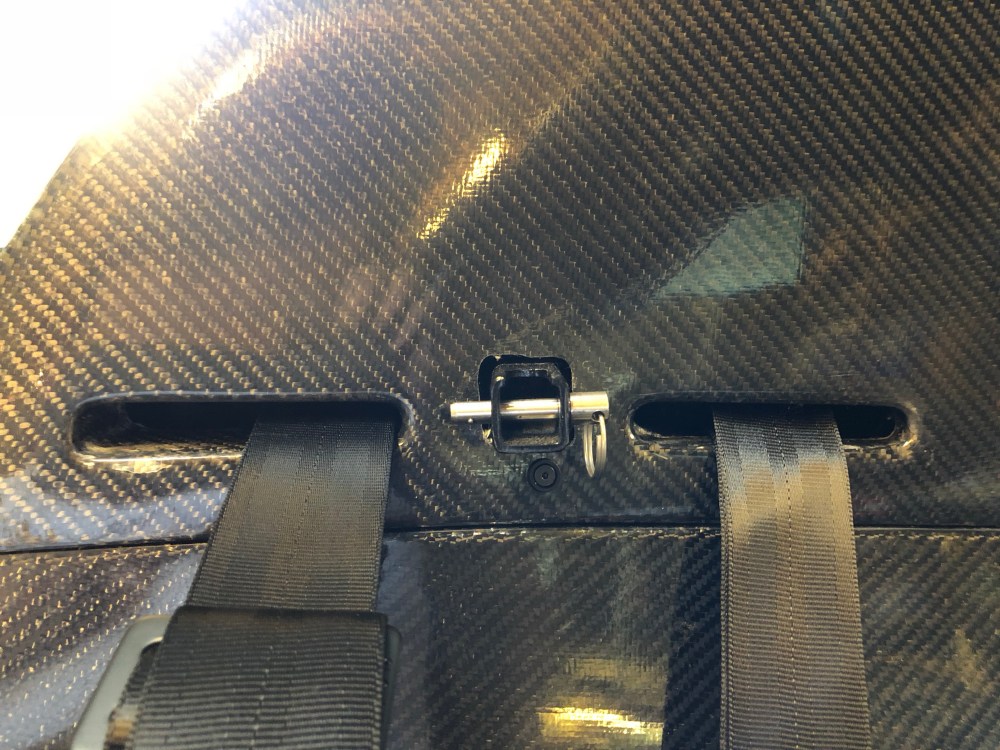
If you’re planning on using 3″ shoulder belts be prepared for some trimming of your tub (or some other modification).
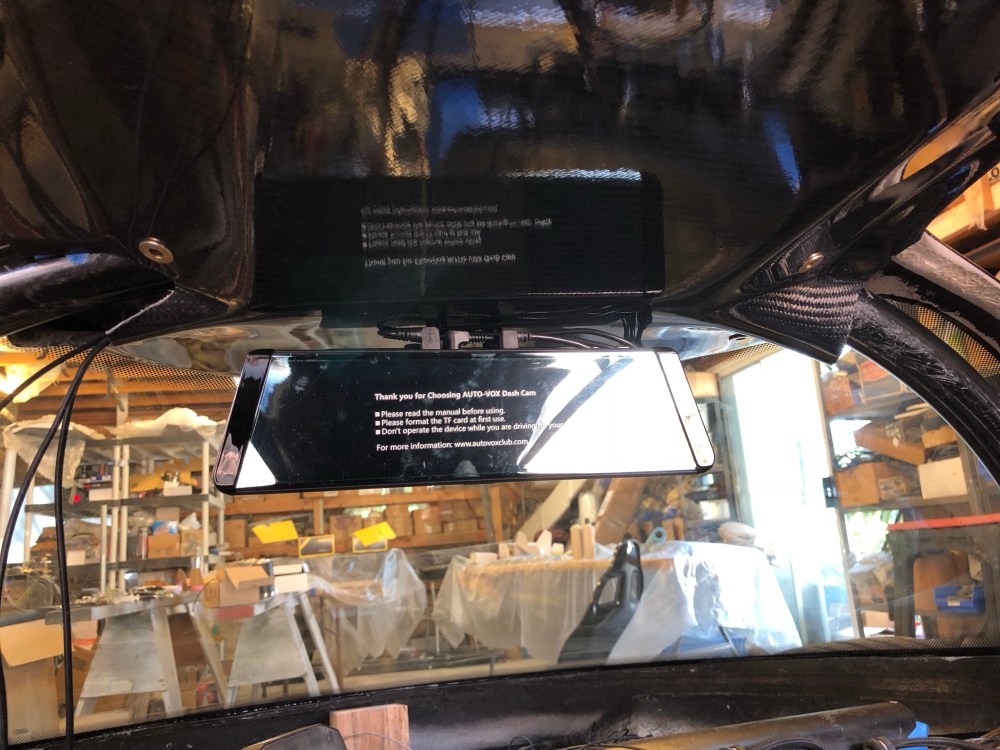
With my ceiling panel installed I could now install my rear view monitor. I picked up an Auto Vox X2 dash cam system. I had actually purchased 2 other monitor systems but I didn’t like them:
- Dewel 8.9″ TFT monitor
- Sucked.
- Resolution was pretty terrible
- Didn’t work correctly when I tried feeding it a second camera source (I’m running 1 camera at the front and another at the rear).
- Form factor was decent – similar to a standard rear view mirror, but still fairly bulky.
- Coolwoo 7″ dual backup camera system
- Actually pretty good.
- The cameras don’t use the standard RCA plug type connection. They provide a higher resolution than the cheap-o cameras.
- The monitor brightness was good.
- Form factor sucked. It’s a lot bulkier than the Dewel system above. I had actually mounted this to my car but due to the height of the monitor I pushed it further rearward, closer to my head, to avoid blocking too much of my forward view. This location was OK but I had to turn my head slightly to get a look at the monitor. Messing around sitting in my seat and making vroom vroom noises, this was OK at first, but after awhile it got a bit annoying having to take my eyes off the front and turn to see the monitor.
The Auto Vox X2 system is really full featured and I’m looking forward to getting some driving experience with it. There’s a few YouTube reviews out there that’ll walk you through the various features so I won’t go into any detail here since I don’t have much first-hand experience yet. Here’s what I like:
- Integrated front and rear dash cam system
- GPS
- Responsive touchscreen
- Good resolution
- Good brightness
- Great form factor – the size of a standard rear view mirror
I only have 2 gripes:
The first is the mounting method. It’s designed to be mounted over a standard rear view monitor via rubber straps. That’s fine if you have an existing mirror but in a setup like our cars, that type of mounting system isn’t stable enough. To mount my monitor I cut away the straps and bonded 4 bolts to the back of the monitor – I’d recommend adhesive mount studs if you’re going to do the same, just be really careful with where your adhesive goes as the rear of the housing has openings. I then bolted it to a piece of L-metal which I mounted to a plate that was welded to the front of my forward roll hoop. This setup “floats” relative to the ceiling panel and is hard mounted to the cage. It’s not much of a gripe but if there’s something to be picky about I guess that’s it.
The second is that that the rear camera can’t be rotated. It’s designed to be mounted underneath a horizontal surface (like in the area above a license place recess). Due to that, the rear image would be upside down if the housing were mounted with its flat surface toward the ground (like say on the roof of your car). I opened the camera housing to see if I could pull the guts out and either rotate it within the housing or move everything to something like a shark fin housing – no go, everything is fully potted into the supplied housing and any attempts to play with the camera will likely destroy it. So I’ve got to somehow mount it on a flat surface, upside down.
Oh, and the price – it’s an expensive sucker at $259 but I think it’s got the right set of features to make it a good value. If I hadn’t spent money on the other two systems the cost of this system wouldn’t have stung quite so much.

Time to work on my dash panel once again!
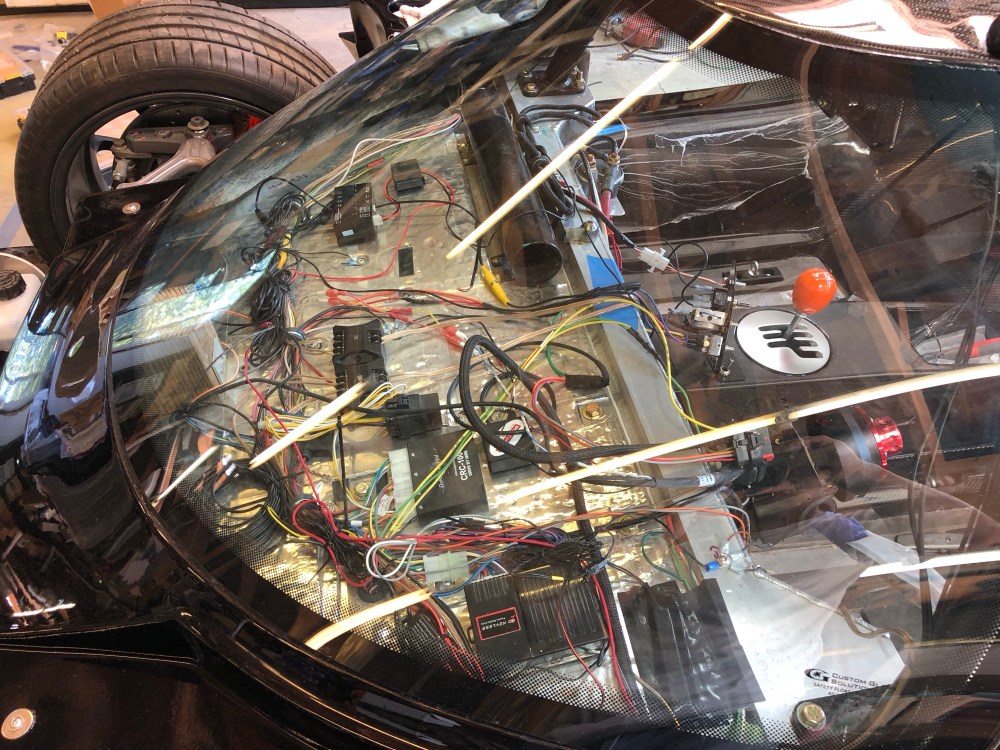
I used a good number of zip ties and clamps to route and secure all the wiring above the footbox. It’s going to be a pain in the butt to have to remove the dash again so any electronics I didn’t think I’d ever want to touch again I installed above the footbox. For items I might need to get to on occasion (such as for programming purposes), I installed them on the underside.
Recall I used a 2″ pipe to manifold the air coming out of my Vintage Air blower. This mates well to the 2″ ducting used to direct air to the various vents. The 2″ Ys available via Vintage Air weren’t going to fit well with my remaining space so a trip down to Home Depot yielded these 2″ PVC street 90s. The OD of 2″ PVC piping is just a bit small to work well with the Vintage Air ducting so I wrapped a piece of 1/16″ thick rubber around each piece of PVC – this now mates well with the flex ducting.

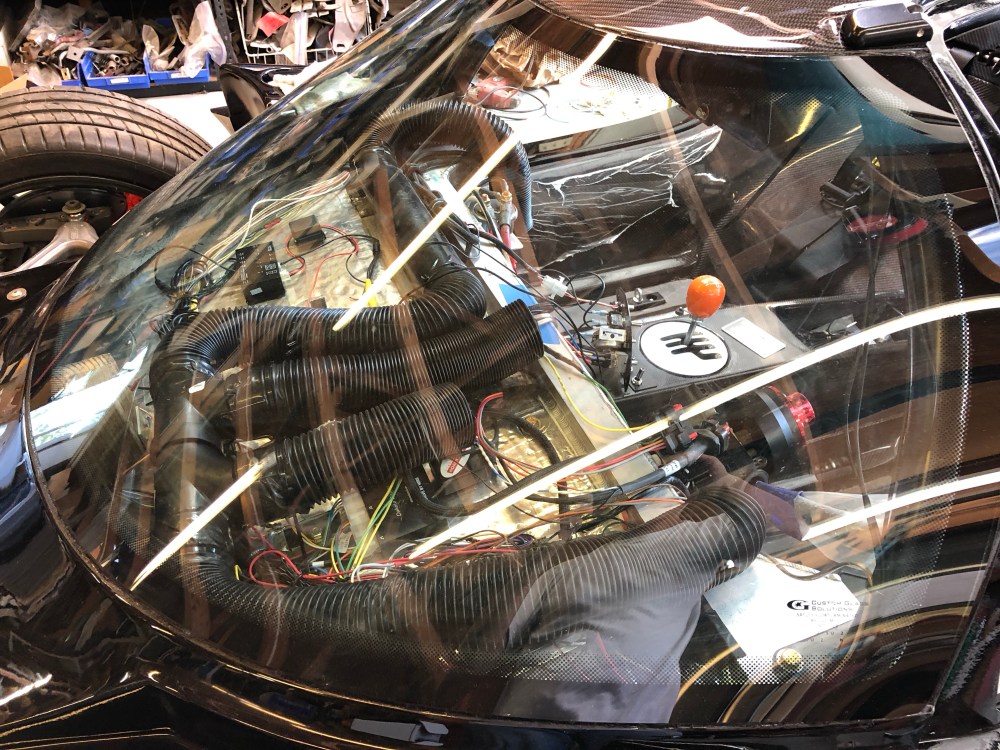
Installing the flex ducting onto the dash vents is a serious pain in the ass. Like… terrible. The cutout size needed to give the duct a snug fit is *just* slightly larger than the section that mates with the flex duct. When you secure the flex duct to the rear of your vent the overall diameter is LARGER than your cutout. How the heck are you supposed to shove that assembly back through the hole? I have no idea. I guess I’m super lucky that I have tiny hands and thin arms because I had to reach UNDER my dash and secure the ducts onto the vents by feel only. Yeah, it’s pretty terrible and my hands got cut up pretty good. The top mounted defrost vent I created was especially sucky.
Then it was a matter of installing all my switchgear and the Alpine iLX-107 radio. I used the Pioneer ADTVA133 installation kit to mount the Alpine head unit. You’ll need to use the surround supplied with the Pioneer kit as it pushes the head unit out too far to be used with the Alpine supplied piece. The Pioneer surround looks a bit cheap but it works, whatever. You can tell I’ve shifted into DGAF mode when it comes to certain things.


Getting closer each day! The end is finally starting to feel more real – getting the initial painting completed and this interior filled out has been a really great pick-me-up. It was really rough doing all that bodywork and not really seeing much progress. The paint and interior are really big visual changes which makes it feel like the project is finally back on track. Kind of like when you’re framing a house; all the work prior seems so slow but it looks like you’re really making progress when the timber goes up (even though you’ve made a ton of progress prior). All the pre-work I’ve done up to this point has made final installing the various pieces go smoothly, hopefully the rest of the project continues in the same way.

One Comment Add yours