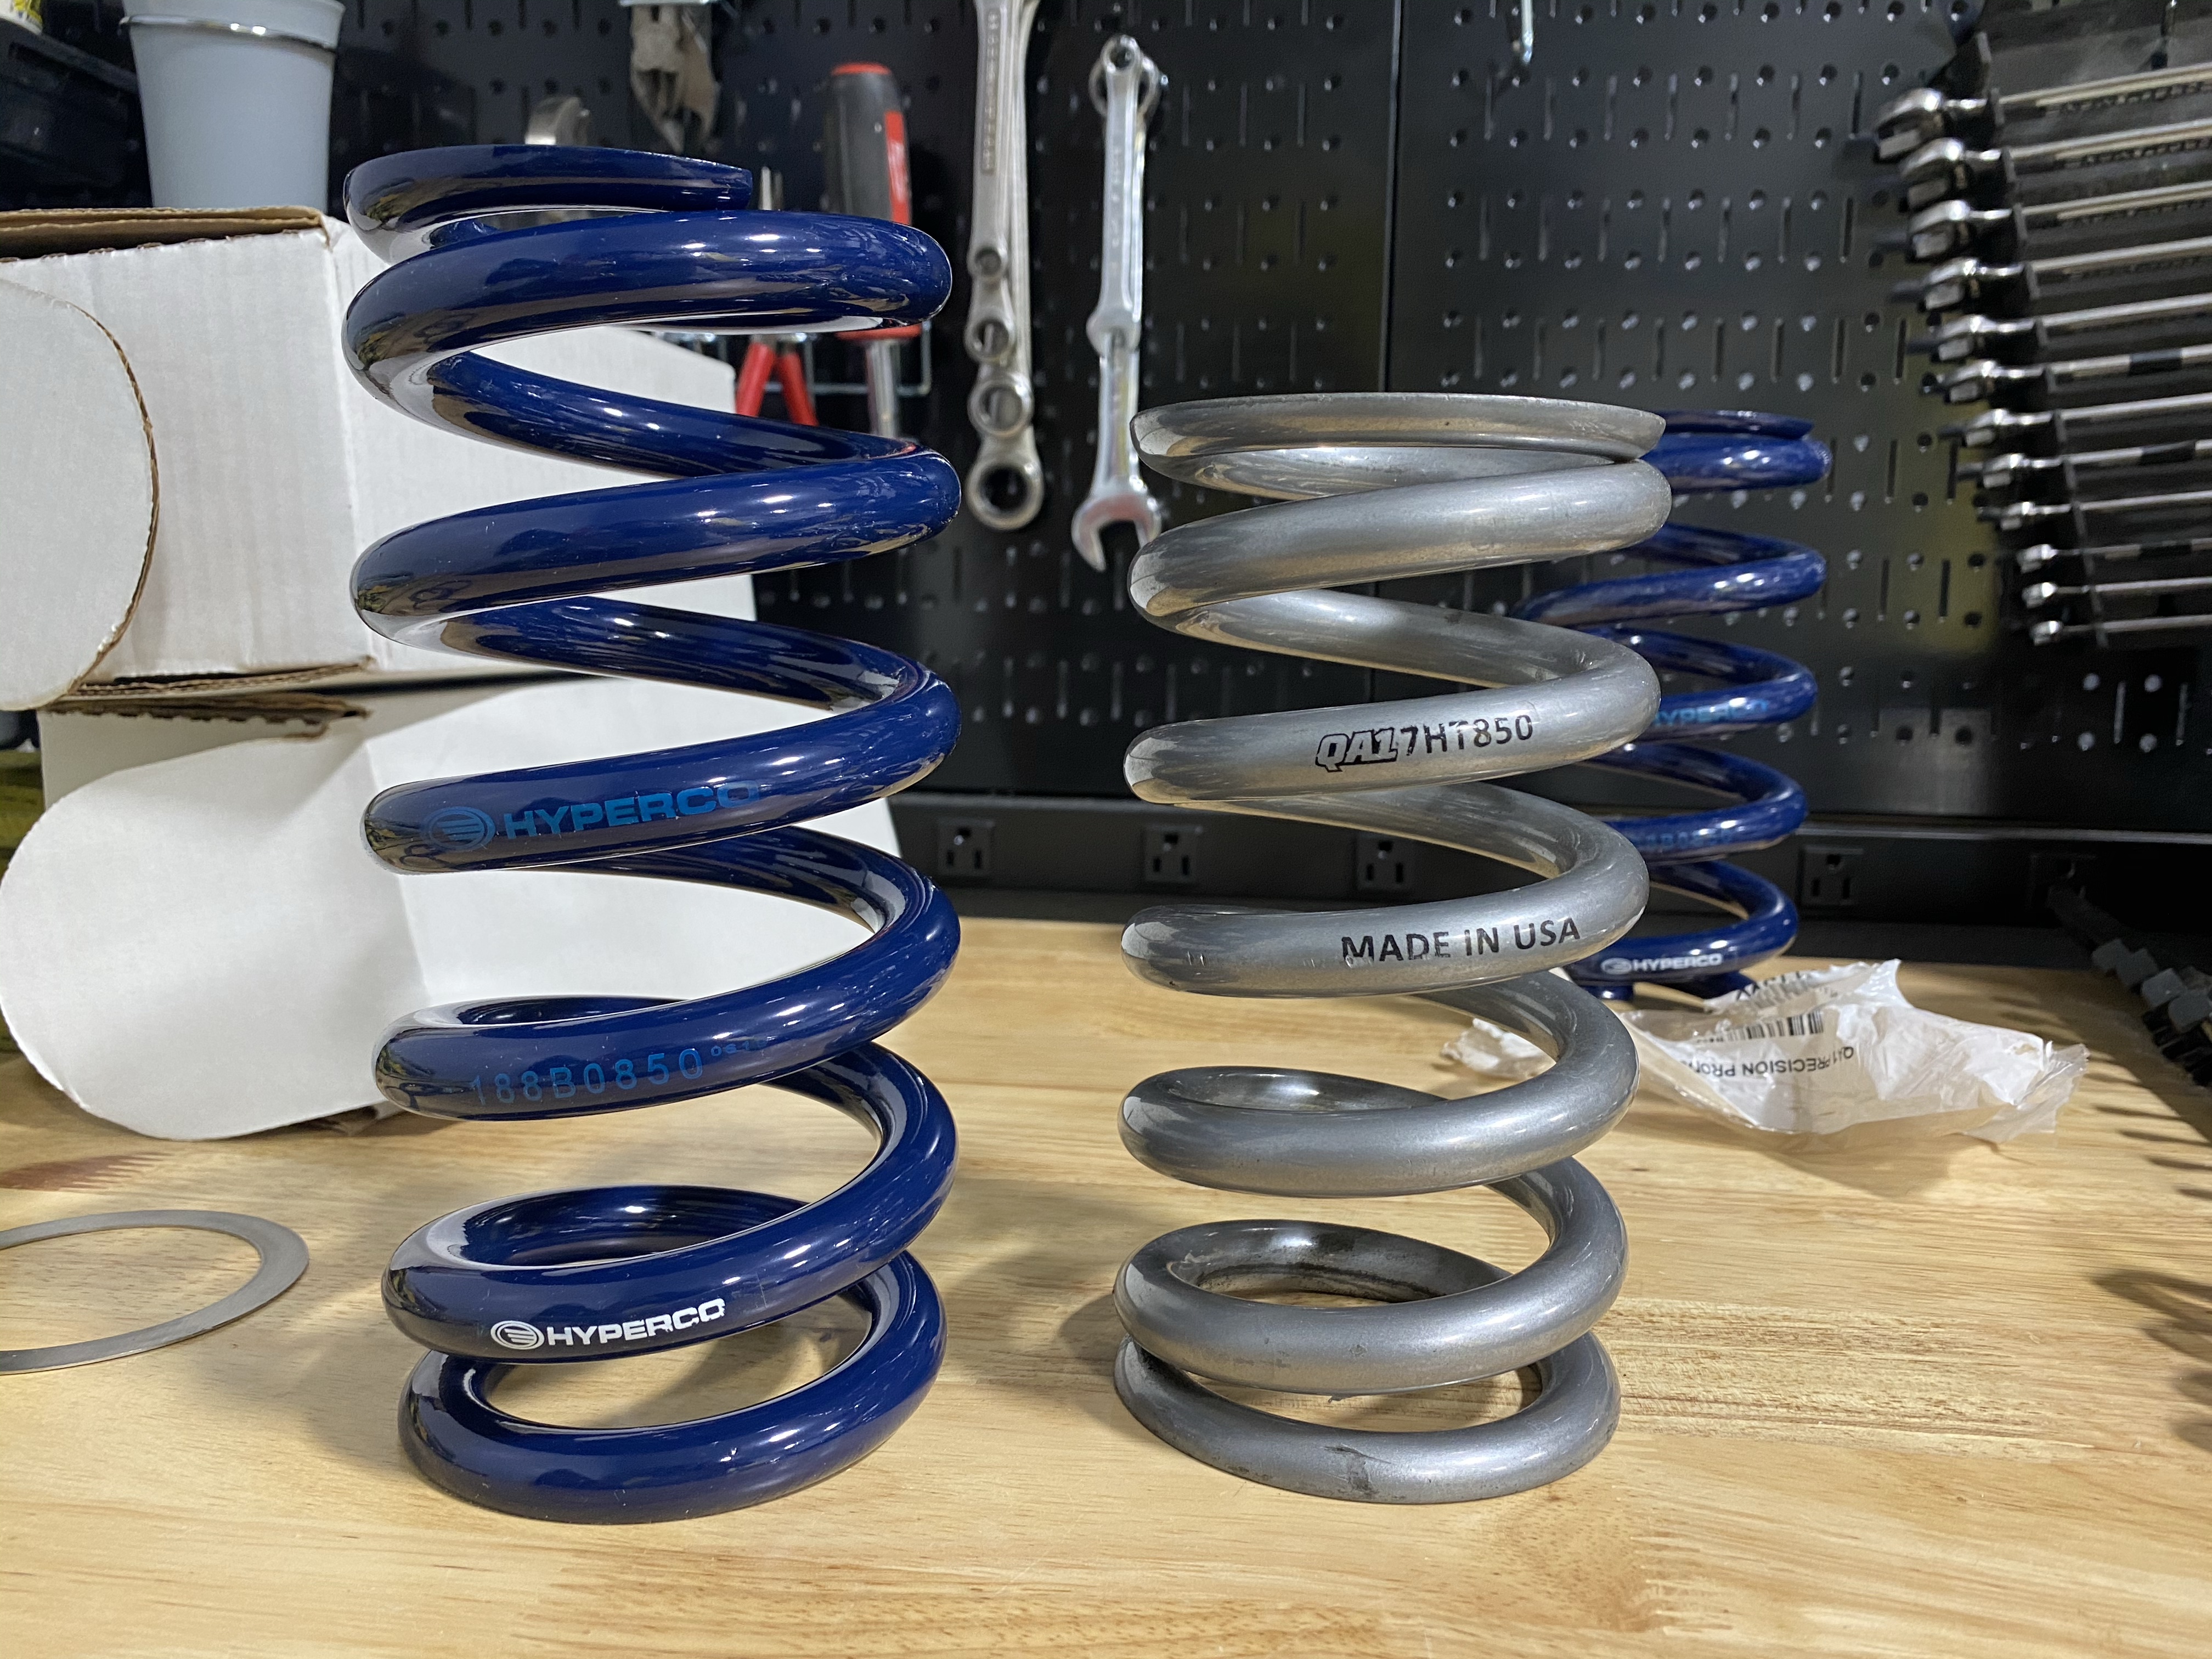
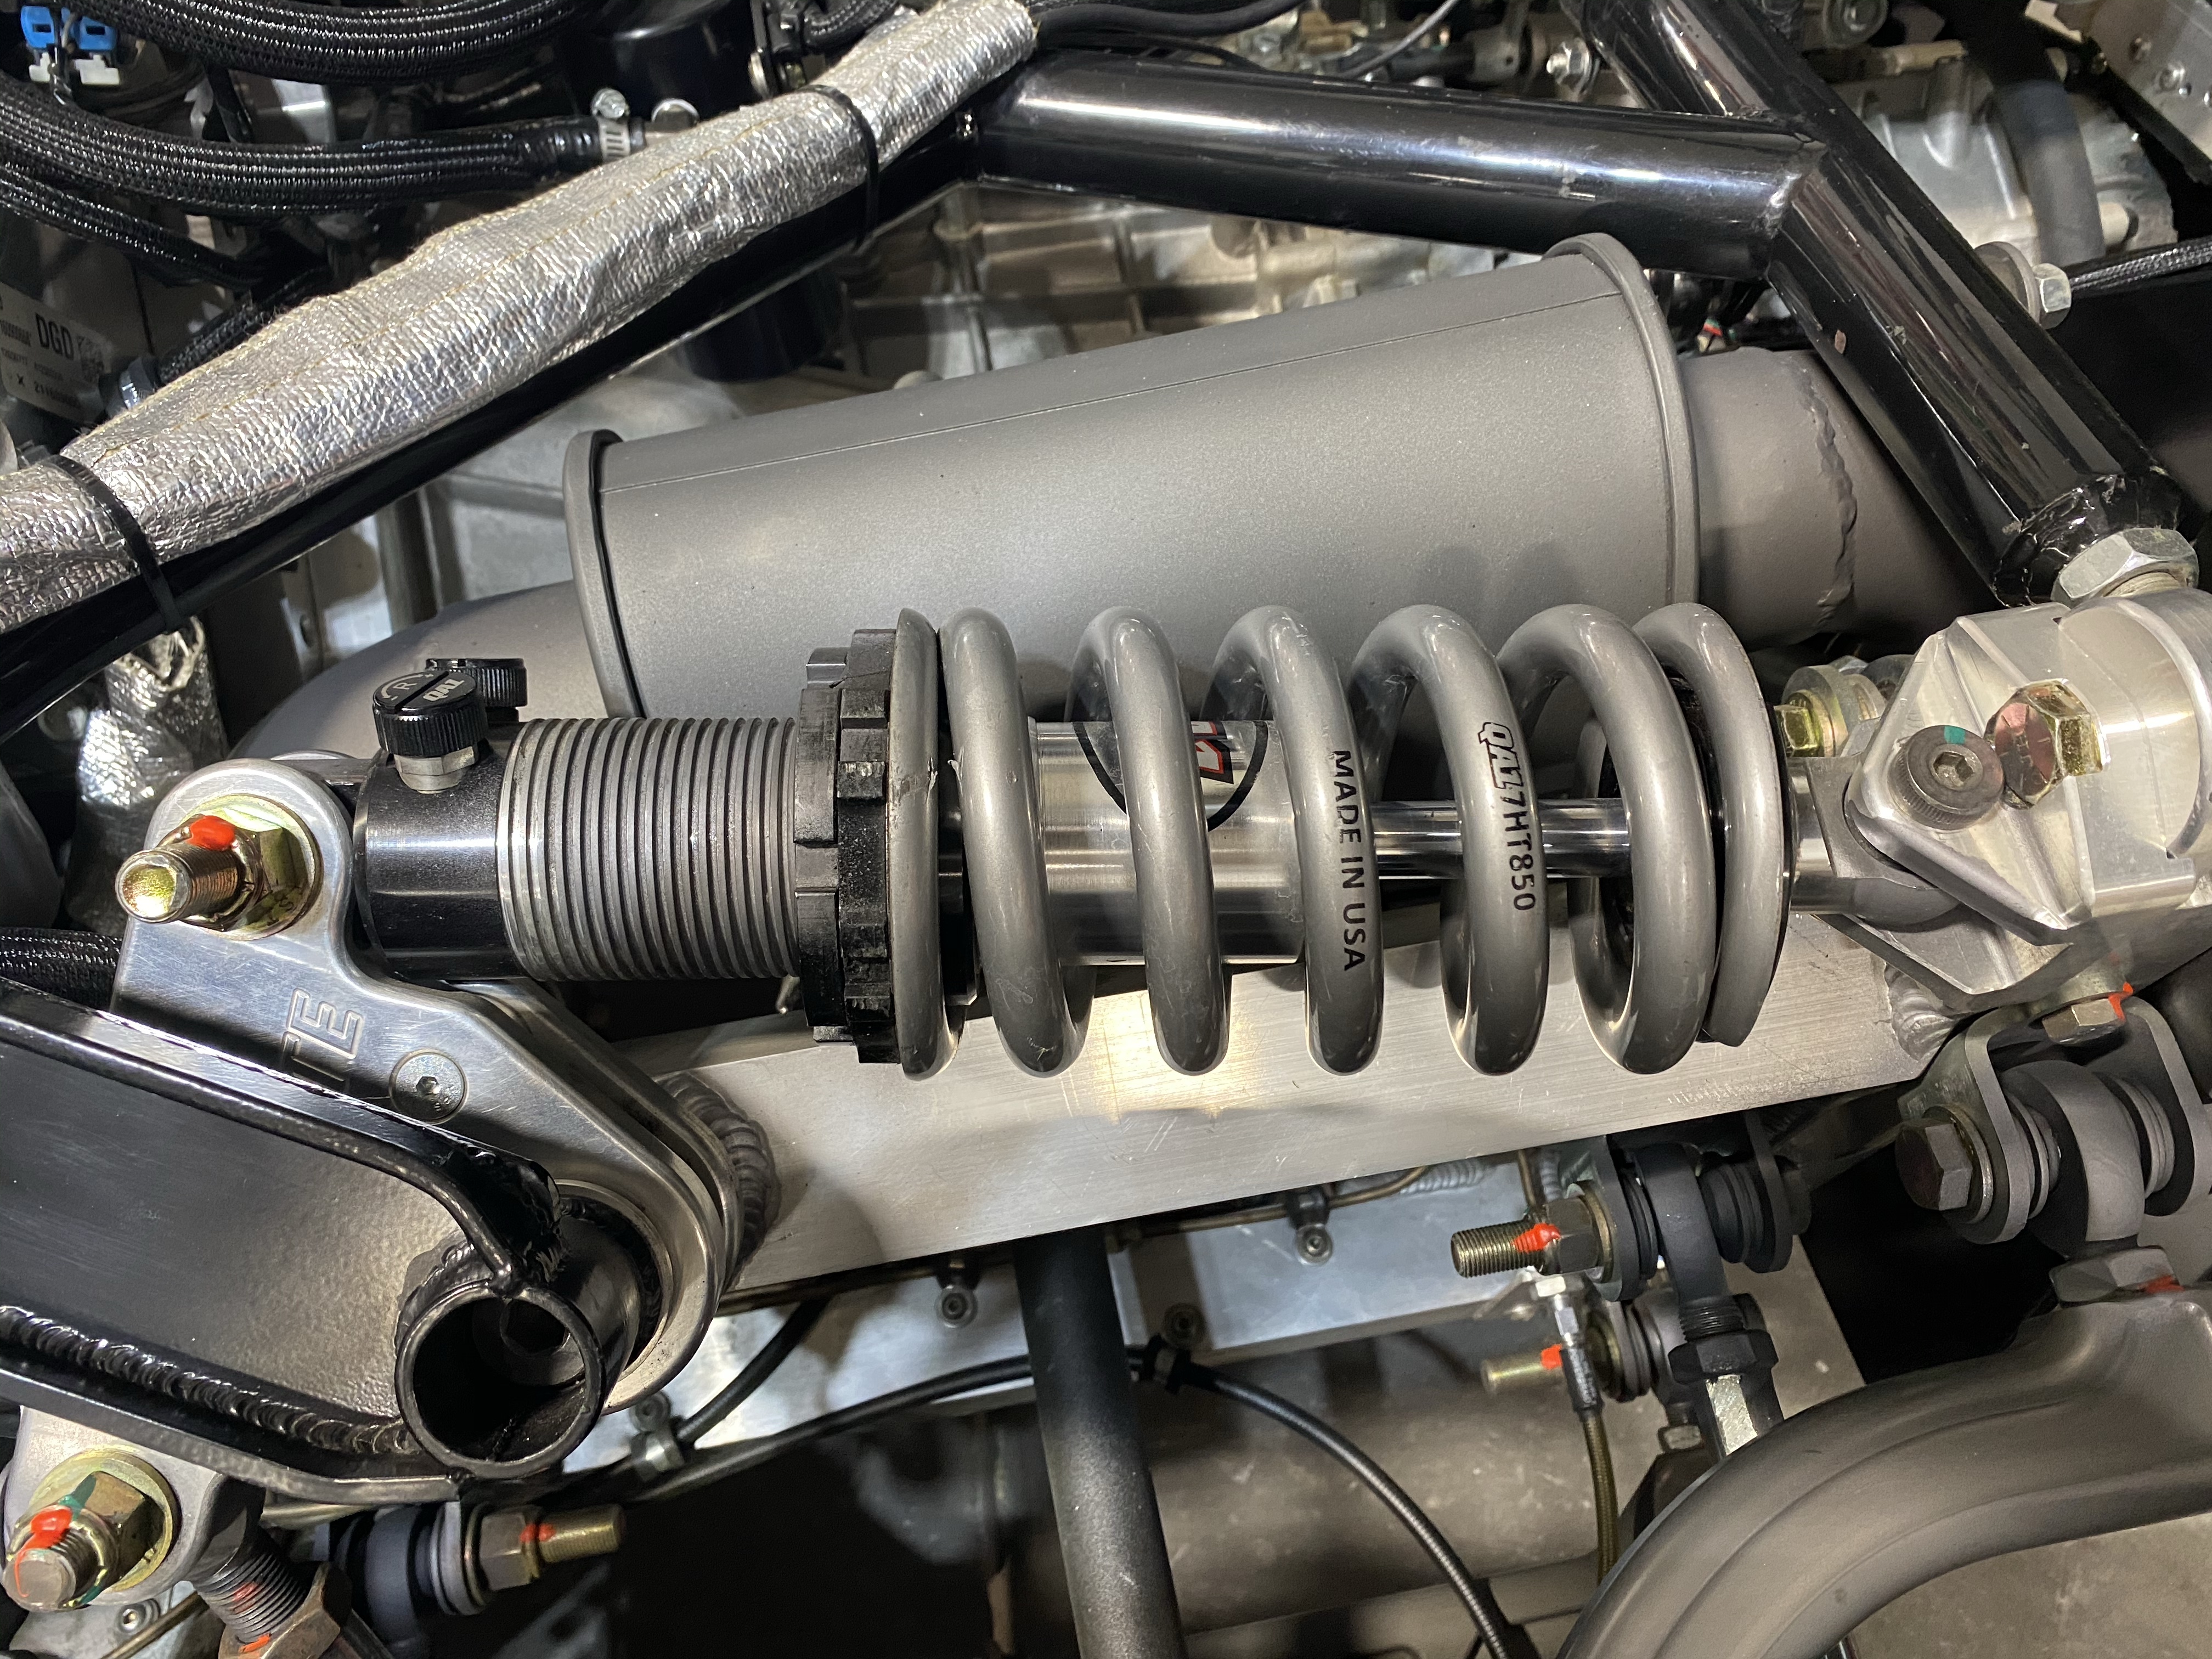
The factory kits include (at the time I purchased my car) 7″ 850# springs for the rear dampers. Many builders going with an aluminum block based LS motor and Graz will find themselves running the spring adjustment collars almost all the way just to get a reasonable ride height. In my case, I’m running a 5″ rear ride height as measured from the engine frame rail to the ground, located along the spindle centerline (or thereabouts). I’ve been running the car in this way since I originally completed it. I figured I’d need to go to a different spring rate but I wanted to drive the car as-is for a while before going with a new spring. Turns out, after a few thousand miles, that I like this spring rate just fine. I feel the rear is planted well enough and it doesn’t feel squishy or bottoms out while I’m tooling around at my pedestrian canyon pace. Some searching on GT40s led me to a thread discussing alternate spring rates and lengths and here’s where I learned that you can install an 8″ spring relatively easily, but anything longer and you’re likely to need a spring compressor to get the collars started.
I ordered a set of HyperCo springs, PN 188B0850 from Amazon.
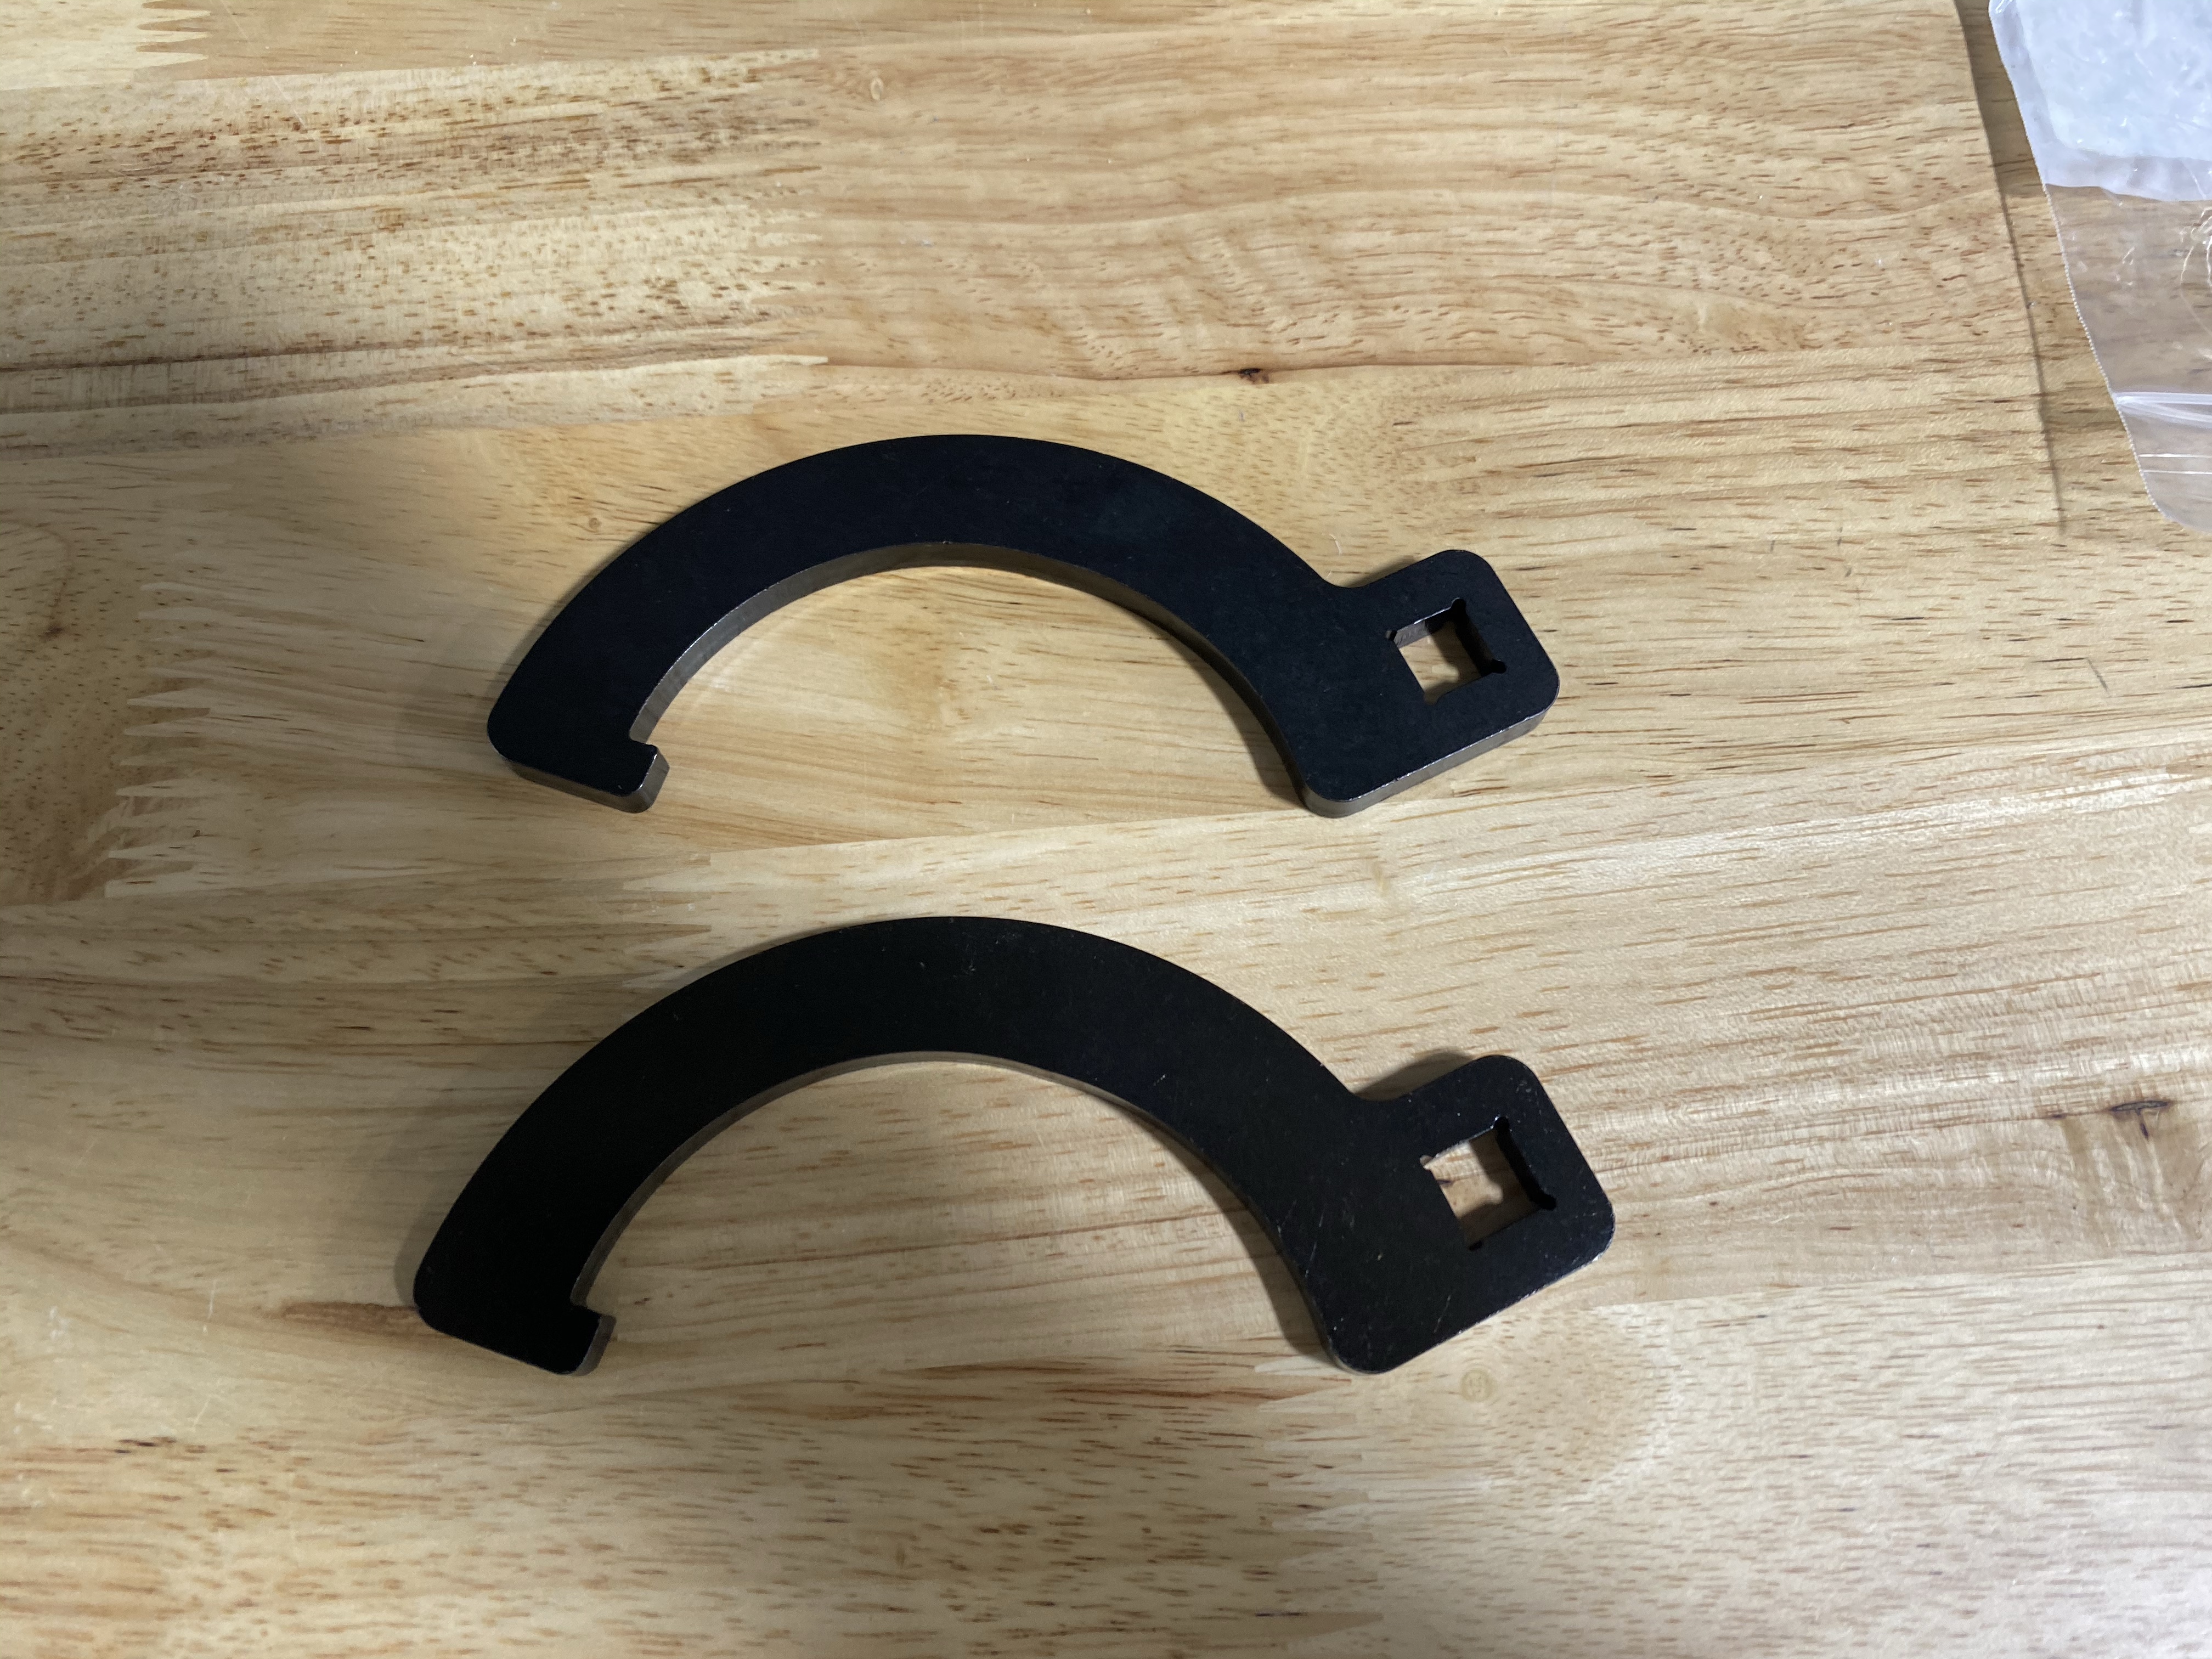
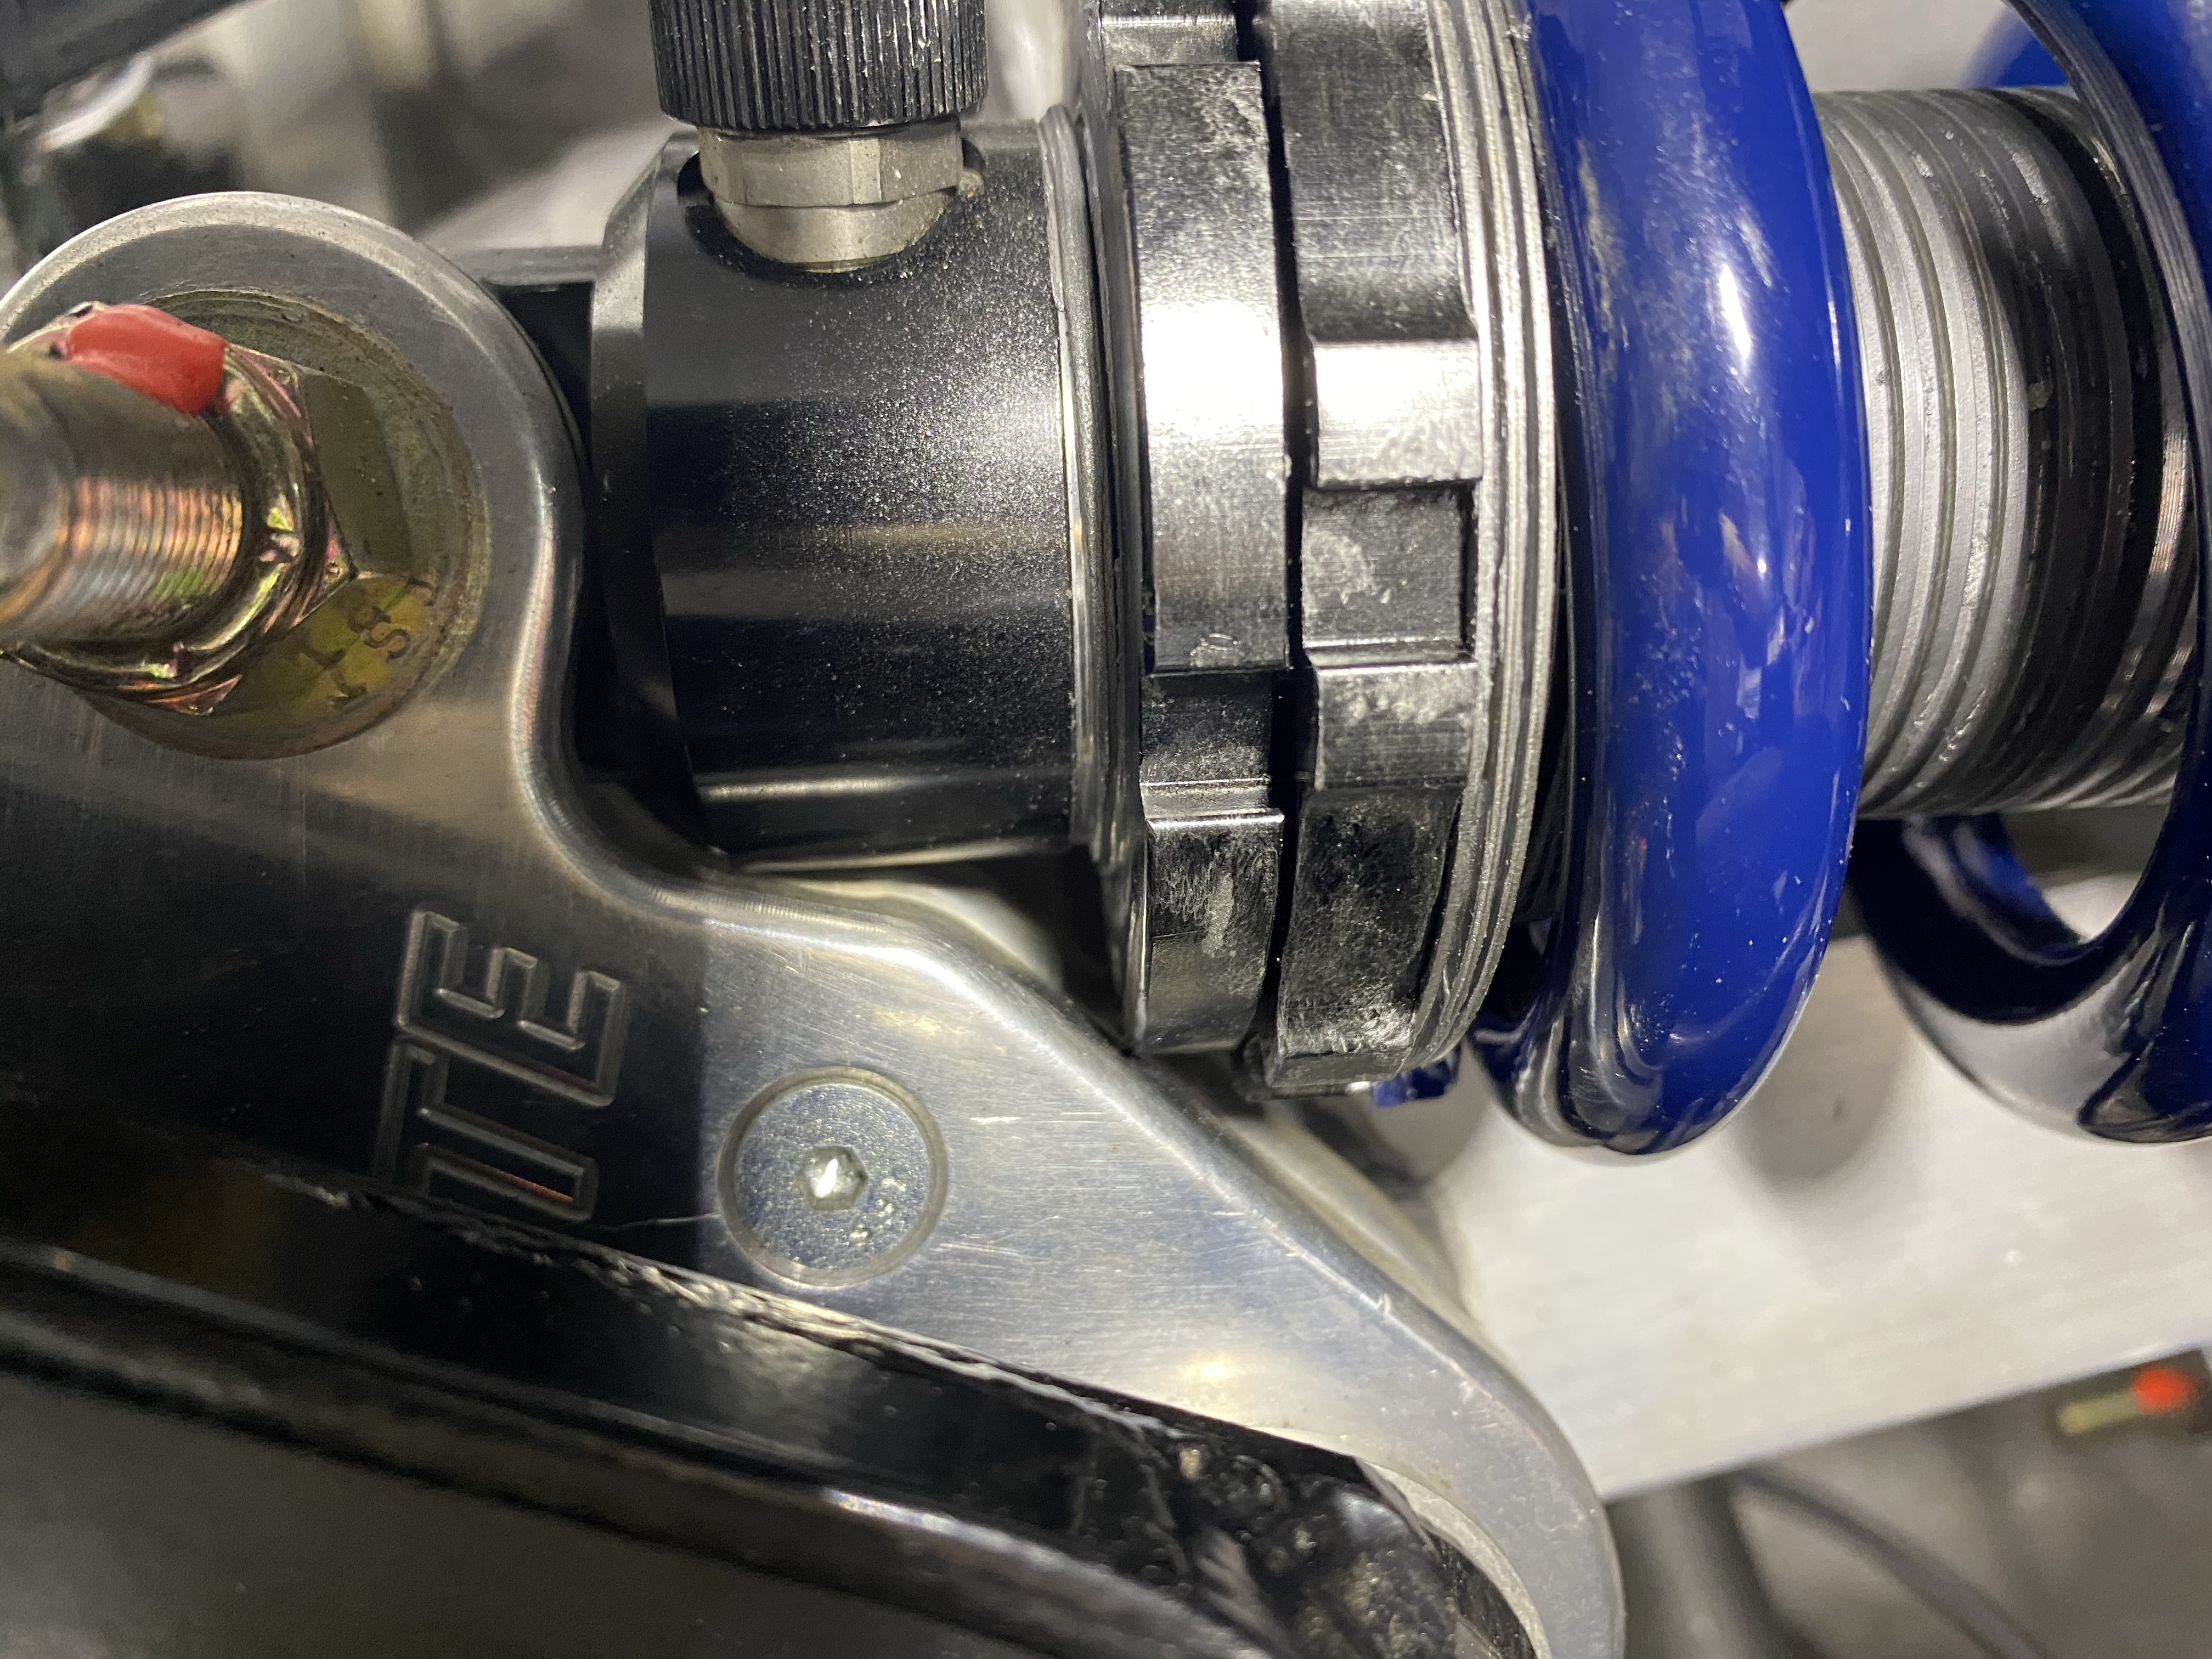
Adjusting the ride height on these coilovers is a real PITA, especially if you have the wrong-sized spanner wrench (which is what I’ve been using since I started working on the car). I had a set of wrenches from my Audi’s suspension so I was making due with those – mistake; the incorrect sizing led me to marring my collars. I figured at some point I was going to rebuild these shocks and I’d replace the collars at that time. I’ve since gotten cheaper and lazier so when I discovered a new set of collars cost $30 per corner, I decided to skip this part of my to-do list. However, I decided I’d finally spend a few bucks to get the correct spanner wrenches – PN T115W, also from Amazon.

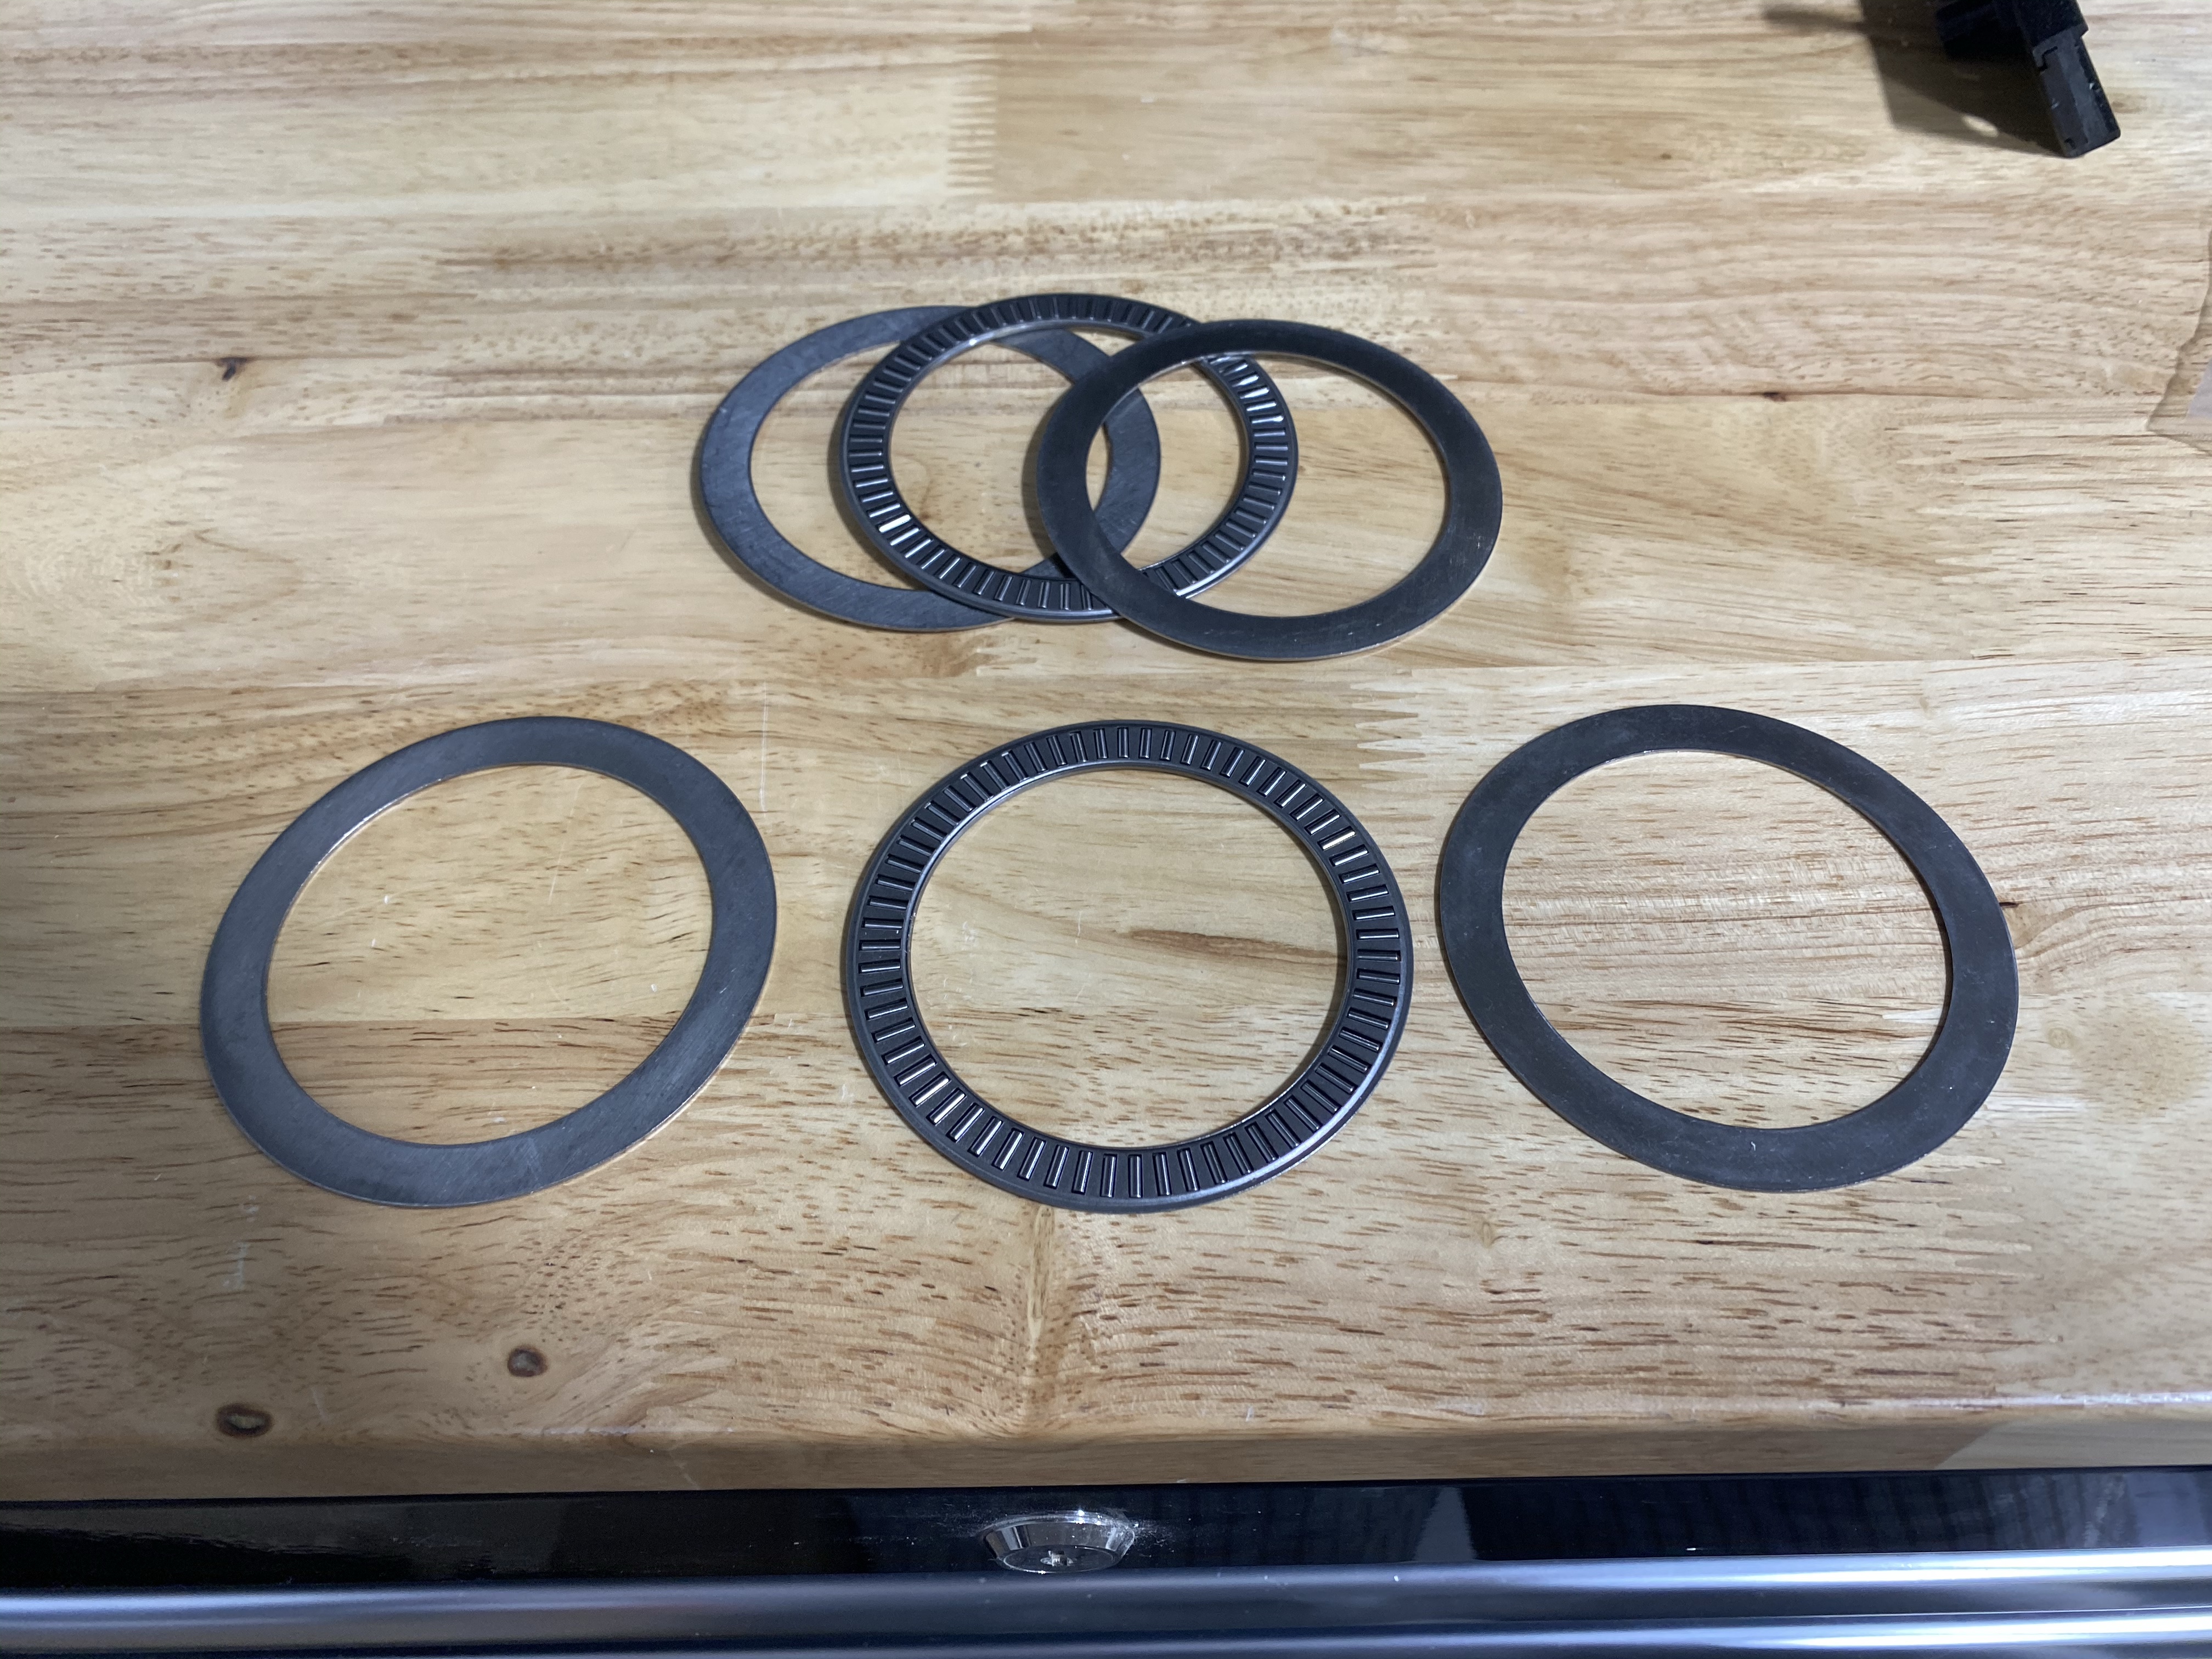
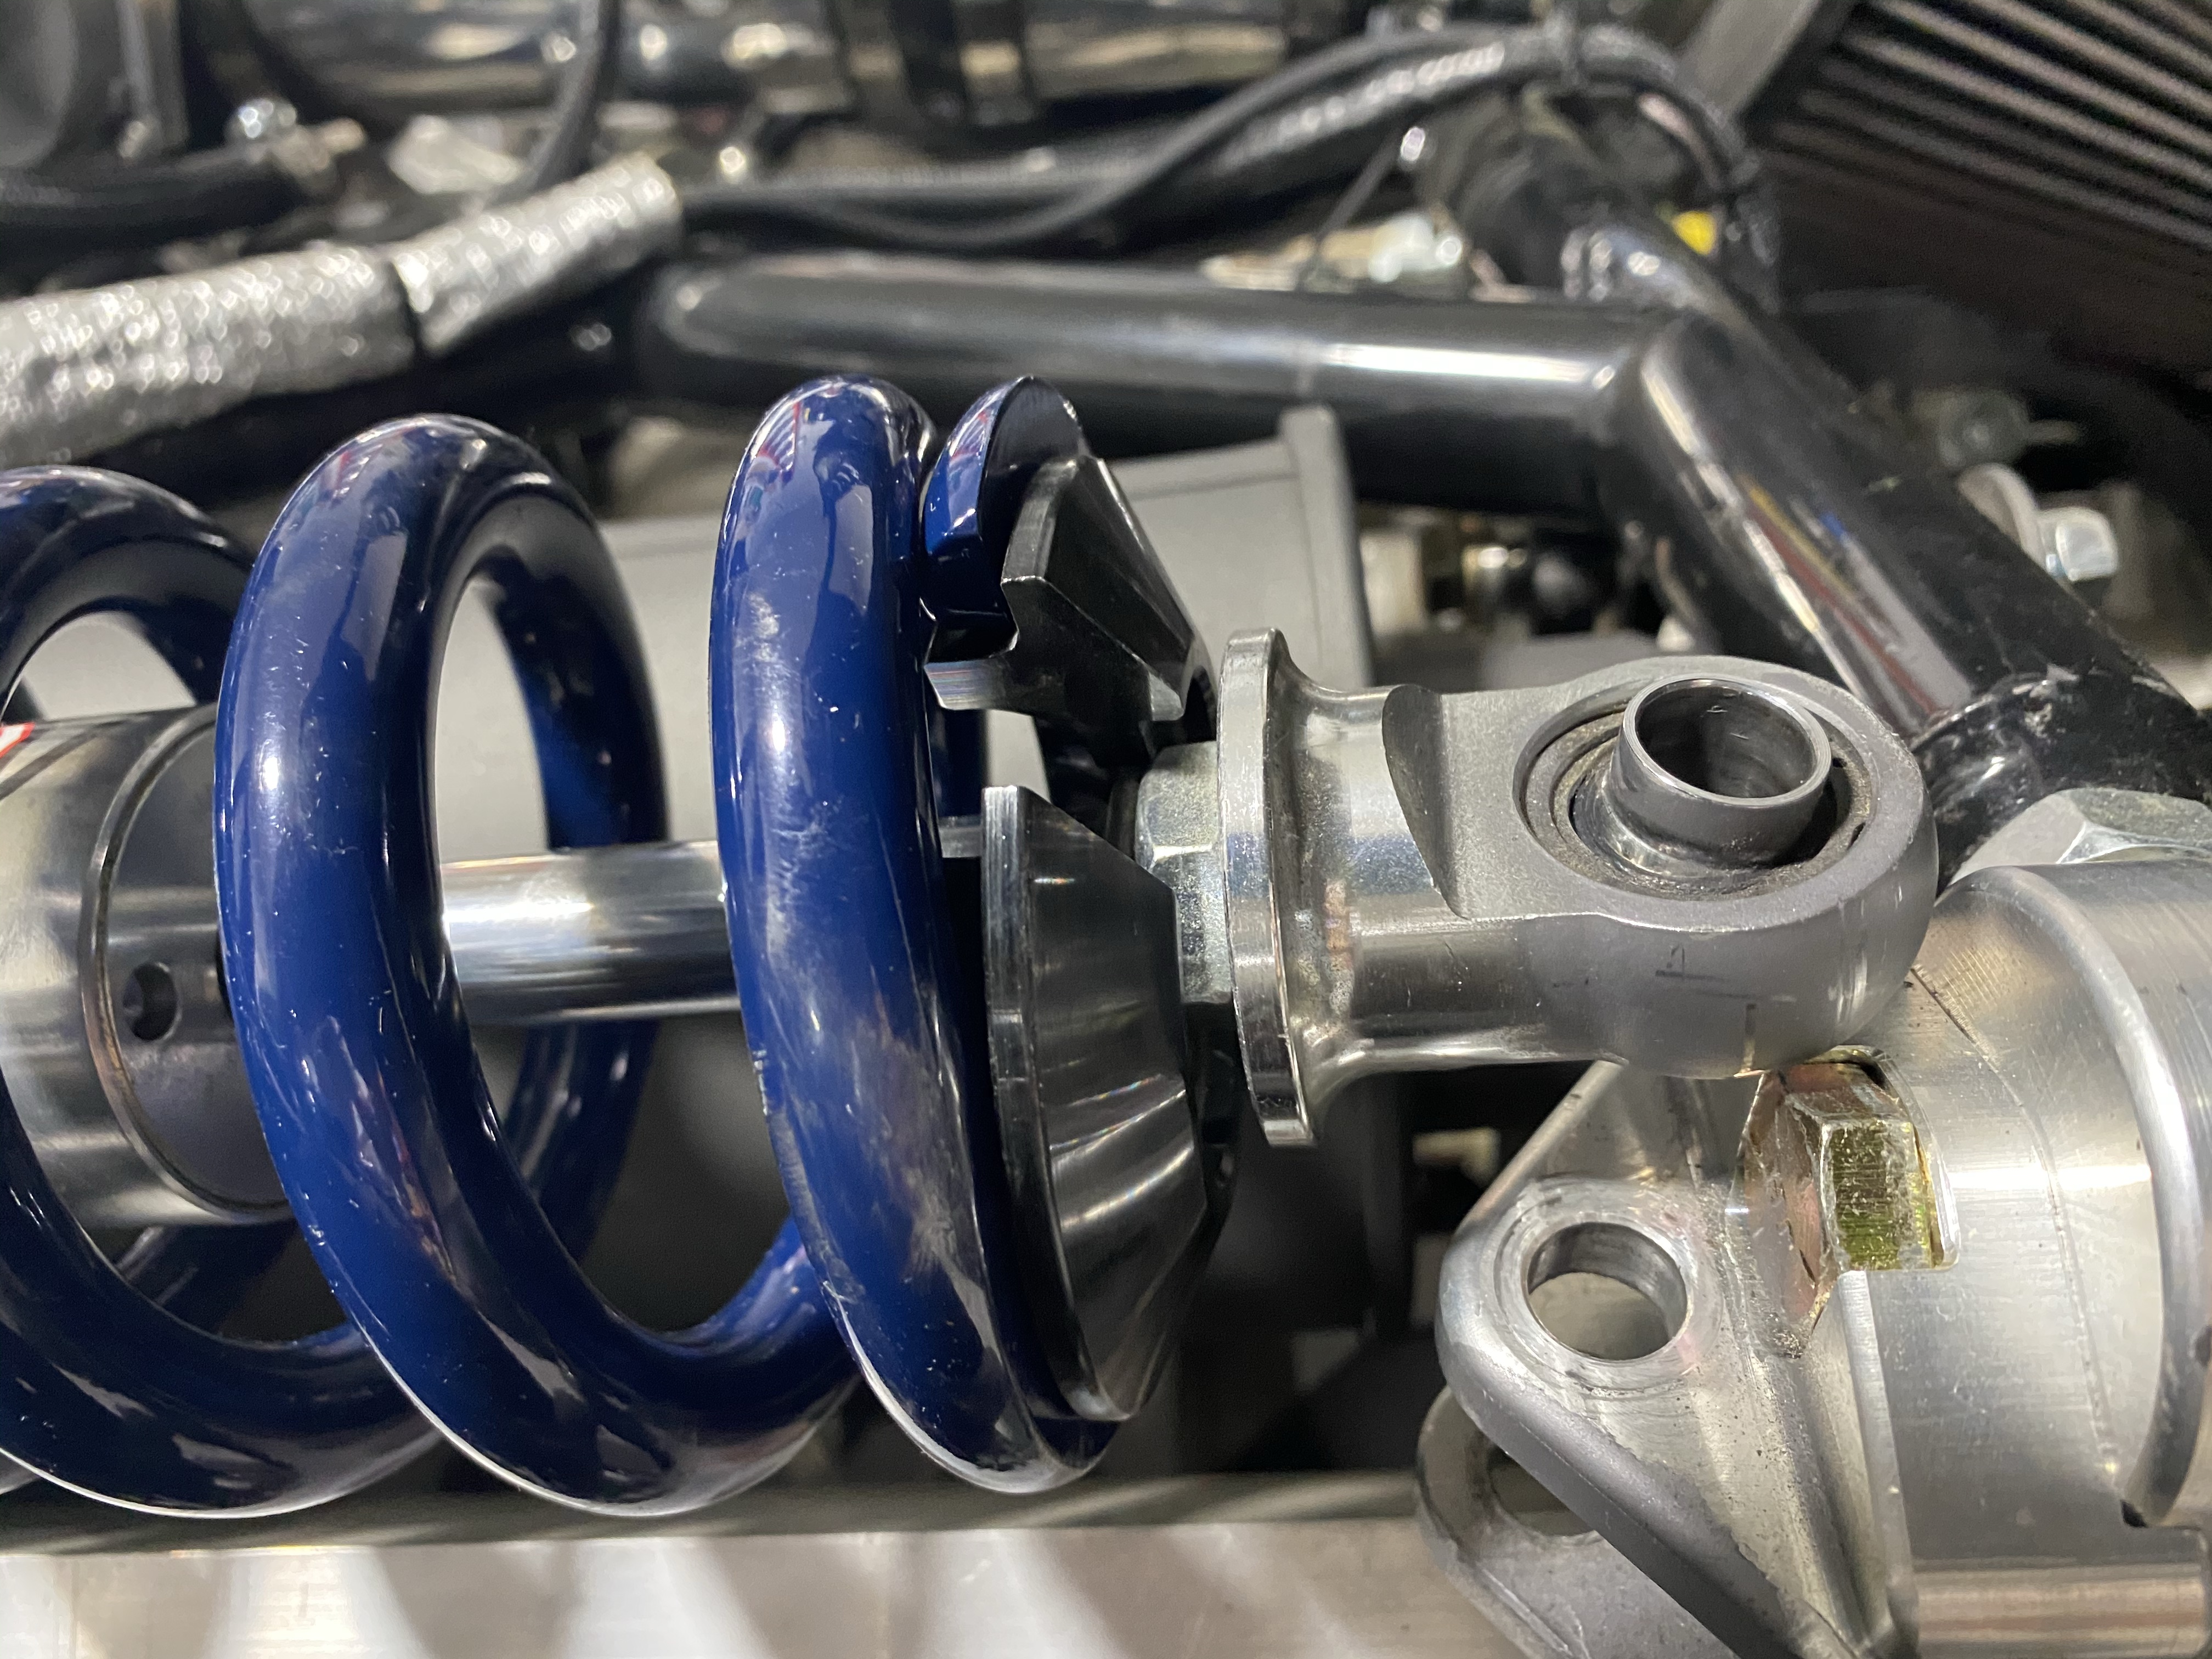
The last bit of updating I wanted to do to the rear shocks while I had everything apart was to install a set of bearing thrust washers between the inner collar and spring seat. Adjusting the collars when you’re nearing your final setting takes a good bit of torque on the spanner wrench – even if you’ve gobbed on a bunch of anti-seize, which is required if you want to maintain your warranty from QA1. The addition of washer kit PN 7888109 makes this a low friction, low drama affair. One set of thrust washers will service 2 corners. These were also purchased from Amazon.
Damn, Amazon really is A-to-Z.


The before and after in a side-by-side; use the slider to see the difference. It’s subtle but helps keep my OCD in check. Worth the trouble and expense? Yeah, I think so.
