I have to admit it – ever since I dipped my SLC Nio Green 2 years ago, I’ve regretted it.
Simply – it was the wrong color for the car. I tried to convince myself that I liked it but deep down, I knew I’d screwed up. No, the screw-up wasn’t that I plastidipped it (I still think that’s the smart way to go), no – it was the color, it just didn’t suit the car.
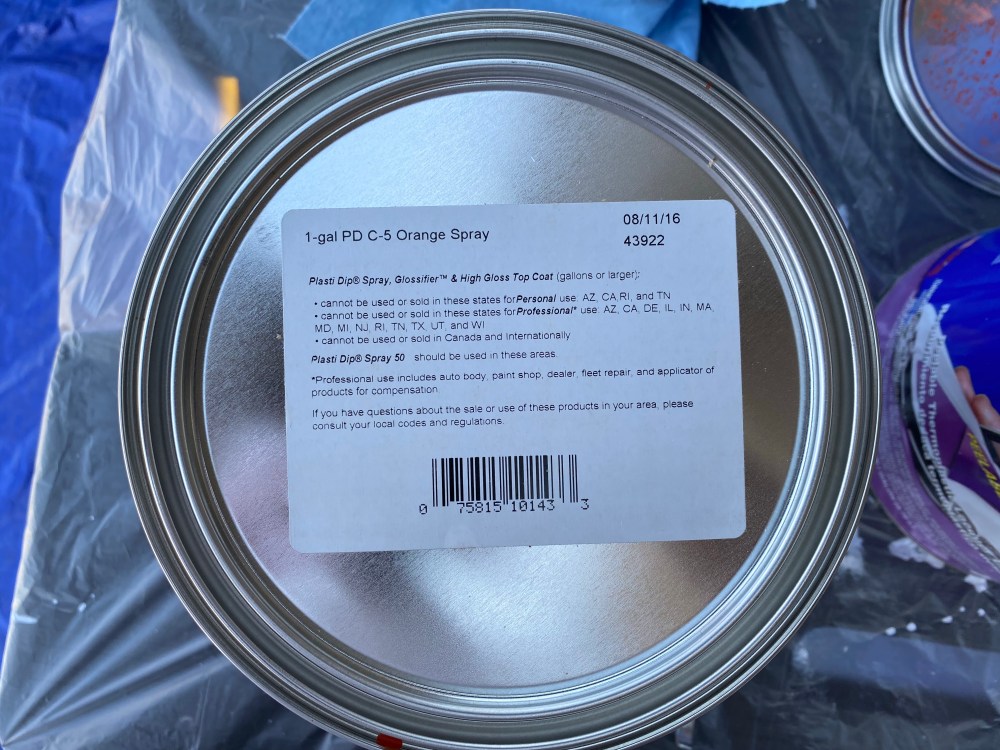
I took another swing at bat a year later with Sulfur Yellow. I wanted to get some metallic and the (then) new Performance Series offered a cheaper and simpler way to get a metallic color without the complexities of mixing it up yourself using DipPearl Top Coat. My mistake with the Nio Green was I’d tried to put a coat of the gloss top coat to finish and I put way too much on – and I totally killed whatever metallic flake was in the green. I decided this time around I’d stay away from the gloss finish and just take it as it was. The overall finish was MUCH better – turns out DYC (Dipyourcar.com) recommends you NOT put a top coat on the Performance Series because it can kill the metallic effect, just as it did on my first dip job (d’oh!). The yellow is a much better fit for the SLC. The SLC BEGS to be painted some crazy color, why fight it?
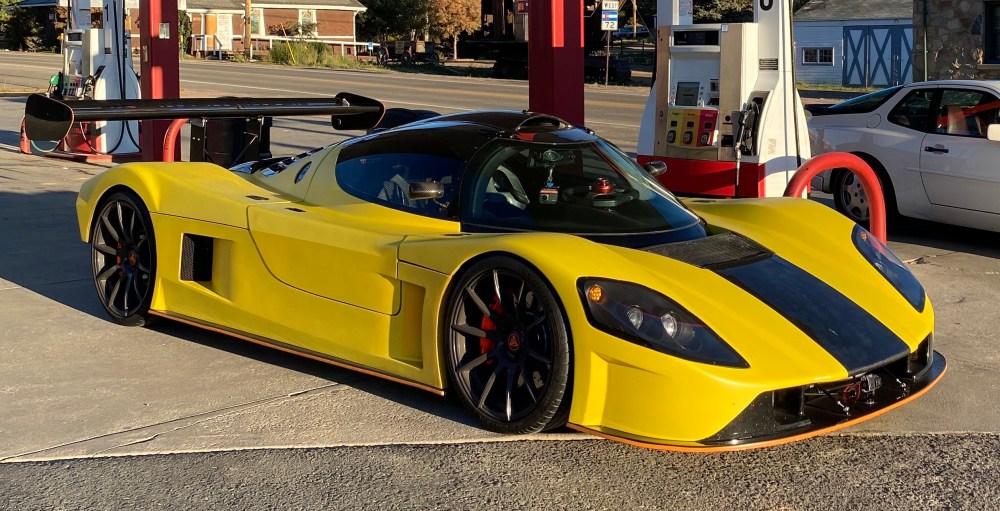
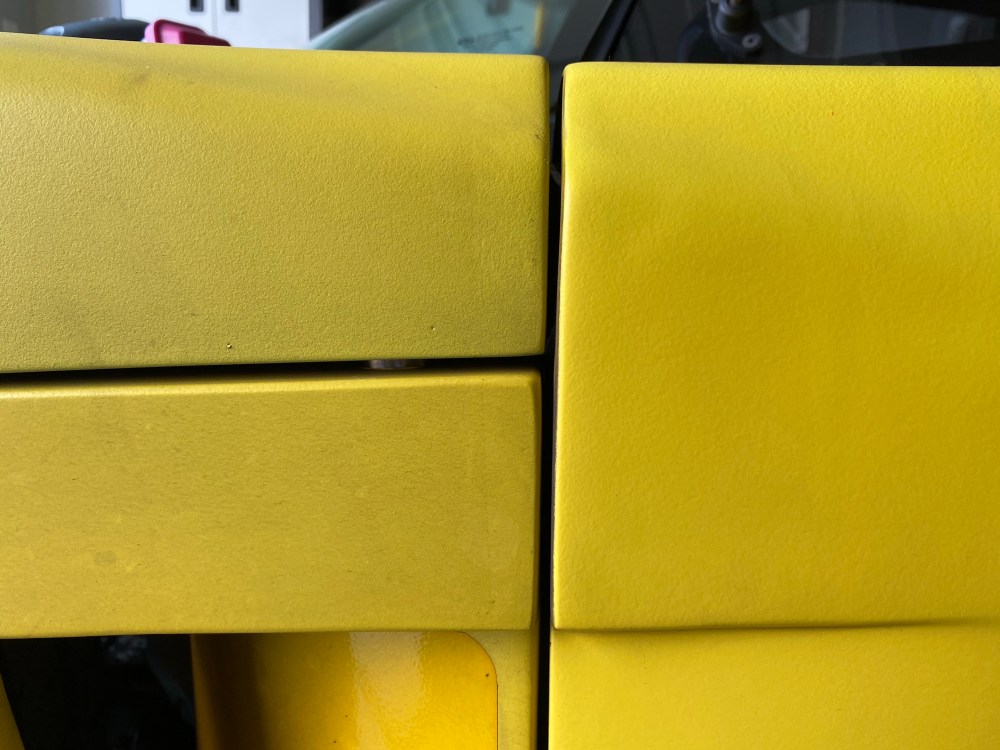
My second time dipping went much better – fewer runs, I kept the metallic effect, and the color was a much better match for the car’s lines. But … there was one problem which drove my OCD nuts … I’d committed a pretty big no-no both dip jobs but it was much more evident with the Sulfur Yellow. DYC recommends you dip your car moving front-to-back and avoid painting panel by panel. When you paint panel by panel you can see differences in coverage/shade at the borders of each panel. When you paint the car front-to-back any inconsistencies in coverage are blended and much less obvious.
When I dipped the SLC I pulled and moved all my body panels so I could get the right access to all the various nooks and crannies of each body panel. Well – when I went to re-assemble the freshly painted Sulfur Yellow body panels I noticed immediately that there were shade differences between each panel. It was painfully obvious at the front of the car, where the front clam, spider, and door meet. Uuungh … I’d just unmasked and re-assembled the car and I was already feeling like I wanted to start all over. Oh well, chalk it up to a learning experience and live with it, my OCD would have to just suck it.

Fast forward a year. I’ll be honest, I’ve done my dip dirty – literally. In the year since I’d dipped the car yellow I’d only washed it twice, and only after almost a year of driving. I generally didn’t have much time to detail the car so my weekend schedule went like this –
- Wake up before any humans should be up
- Drive car to canyons
- Enjoy canyons
- Get home before family wakes up
- Park car
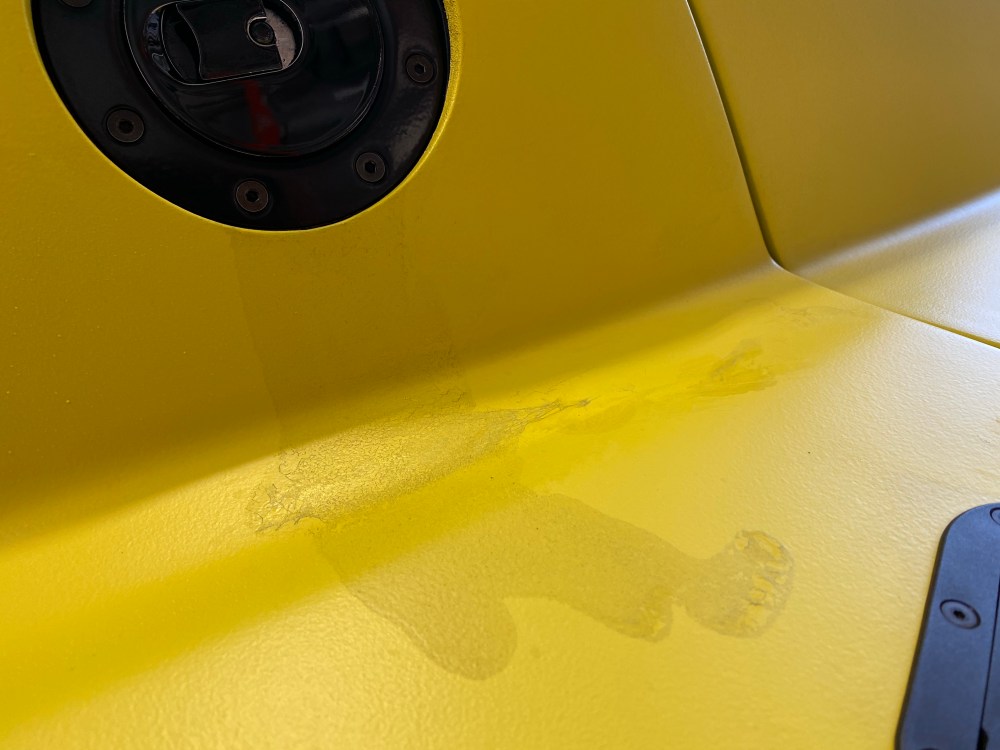
Rinse and repeat each weekend. I just didn’t bother to wash the car and after a year of neglect it was really starting to show. I decided I’d try to be nice to the car and I gave it a wash – only to find that the miles of dirt and grime had really penetrated the plastidip and conventional car soap and a microfiber sponge weren’t doing much to bring that bright yellow back to life. I was pretty bummed but remembered reading that DYC’s pre-dip cleaner could be used in a pinch for cleaning if soap and water weren’t doing it – boy, this stuff is the magic bullet for knocking dirt and grease out of dip! There must be some very mild solvent in the formula because it literally melted grease and I could wipe away thousands of miles of grime easily with just a few spritzes of the pre-dip cleaner. WOW.
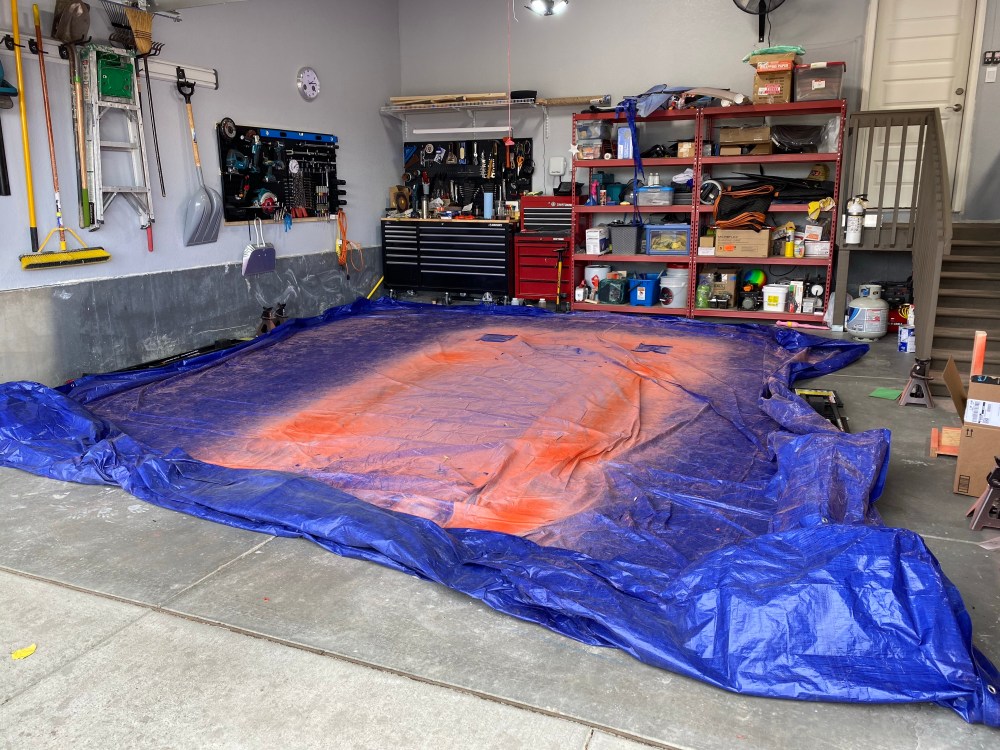
Only one thing – I was kind of happy to have an excuse to pull the yellow dip. Now that the dip was looking pretty fresh again I had a tough time talking myself into removing it. That is … until my next fuel stop. I usually try to have a paper towel handy when filling up because plasidip does not play well with gasoline. This particular station I was at didn’t have any paper towels available at the filling island but I figured I’d done this enough times I would chance it. Wouldn’t you know it, the second I pulled the trigger I got a pretty big splash back with a good burp of fuel running down the side of my car. Without a paper towel or water handy there was nothing I could do but stare down as the gasoline started to slowly eat away at my dip. Darn. Guess I gotta peel it now!
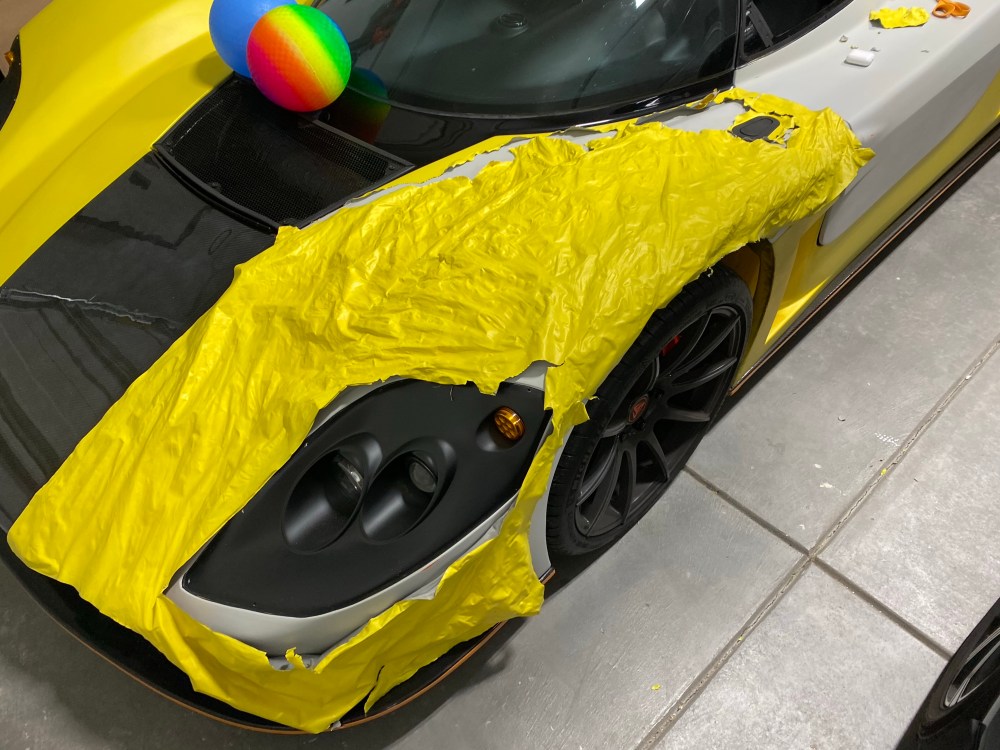
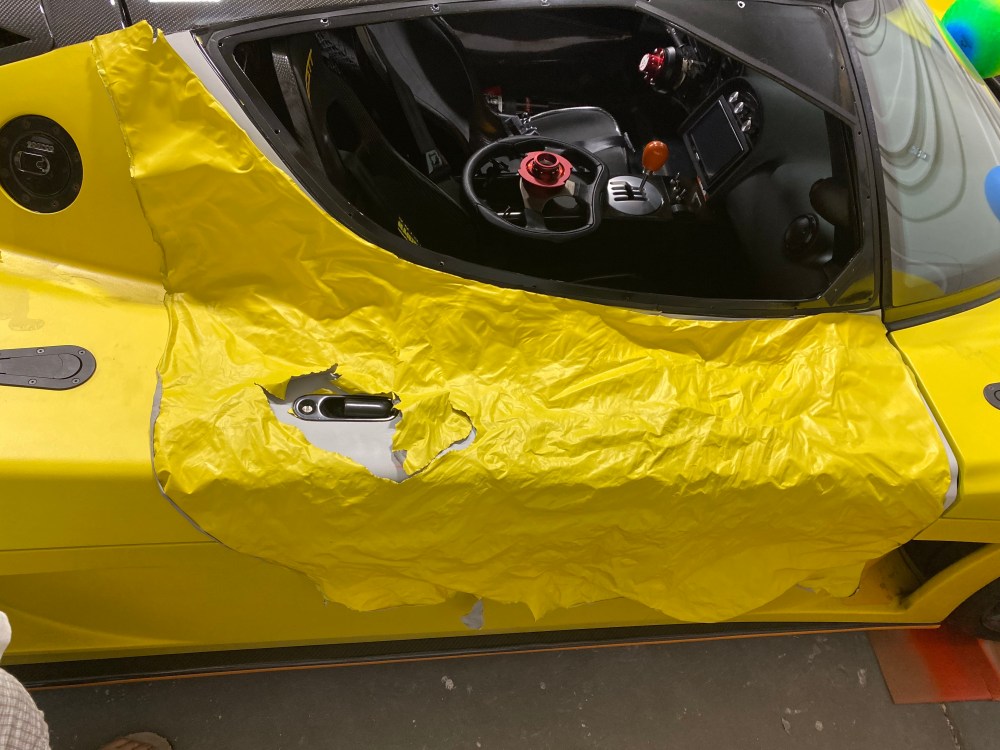
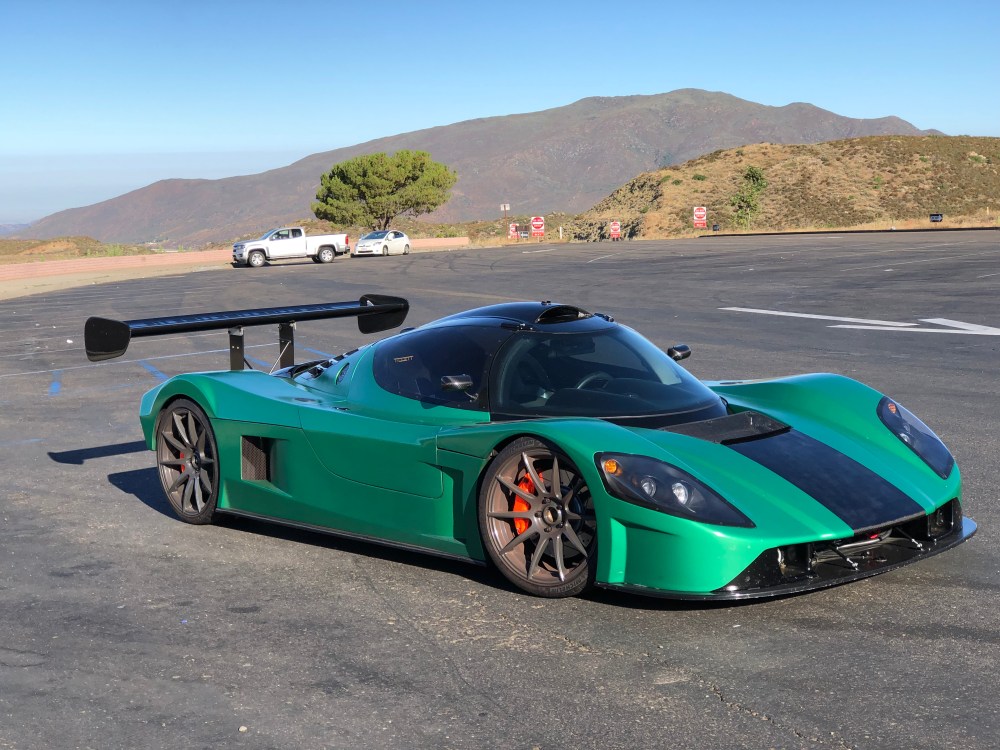
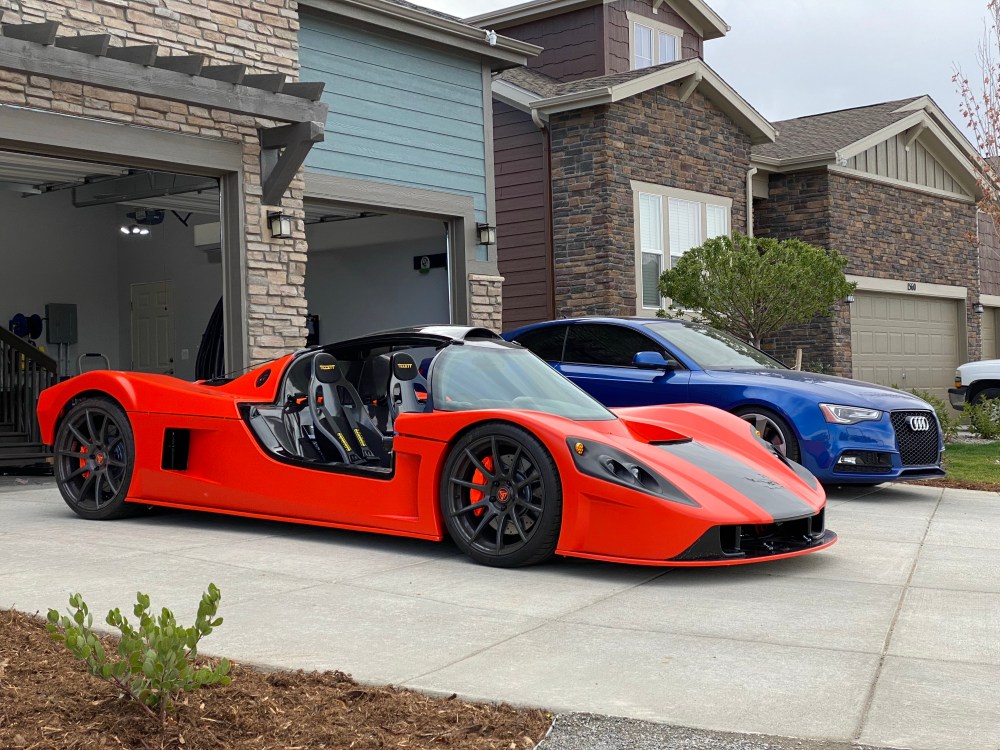
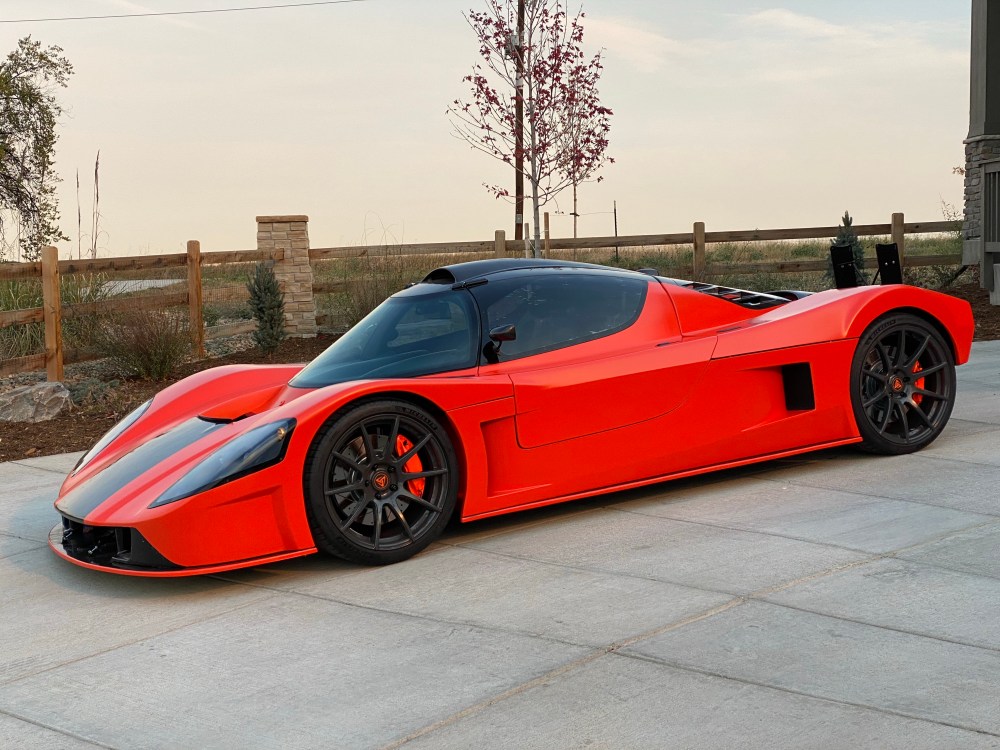
I’ve been plotting and planning for this dip job for literally years – no joke, I had already purchased a few gallons for my next job about 2 years ago, during a DYC sale. As I said, when I painted the car green I knew I’d made a mistake. The yellow was an improvement, but even then, I knew it wasn’t quite right. This next time, I’m going to do what I had wanted to do all along, but didn’t allow myself to do – I’m going to paint it orange!
The (really stupid) reason I didn’t paint the car orange to begin with is I’d ordered the kit with the orange gel coat – and I loved the way the car looked. Hands down, it’s the coolest and most fitting color for an SLC if you’re talking about the available gel coat colors, IMHO of course. When I saw the car for the first time sitting in the car carrier I was totally blown away by the orange.


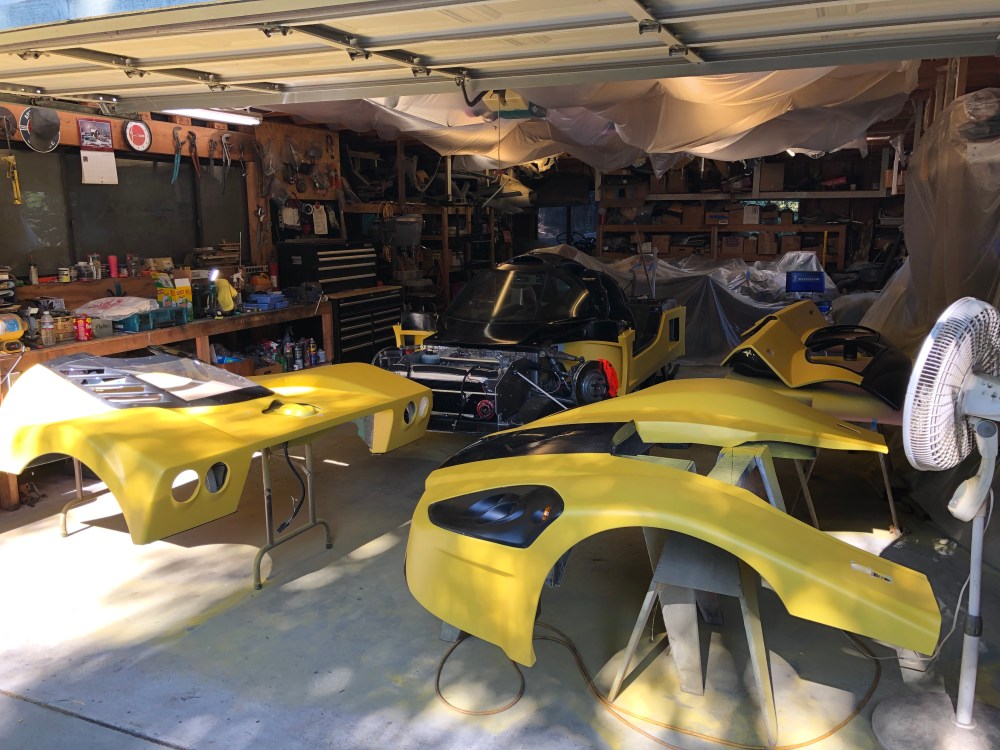
I told myself I wanted to do as much of this project myself, including painting the car. Since I’d never touched a paint gun prior to the first time dipping, I wanted to take a few runs at painting the car before giving it a “real paint job”. So I figured plastidip would be a good way for me to practice – low stakes, low cost. And I wanted to try several different colors before settling on a paint color so I could see if there were any colors that spoke to me the way the orange did. Well … green was a pretty big bust. Yellow was alright.
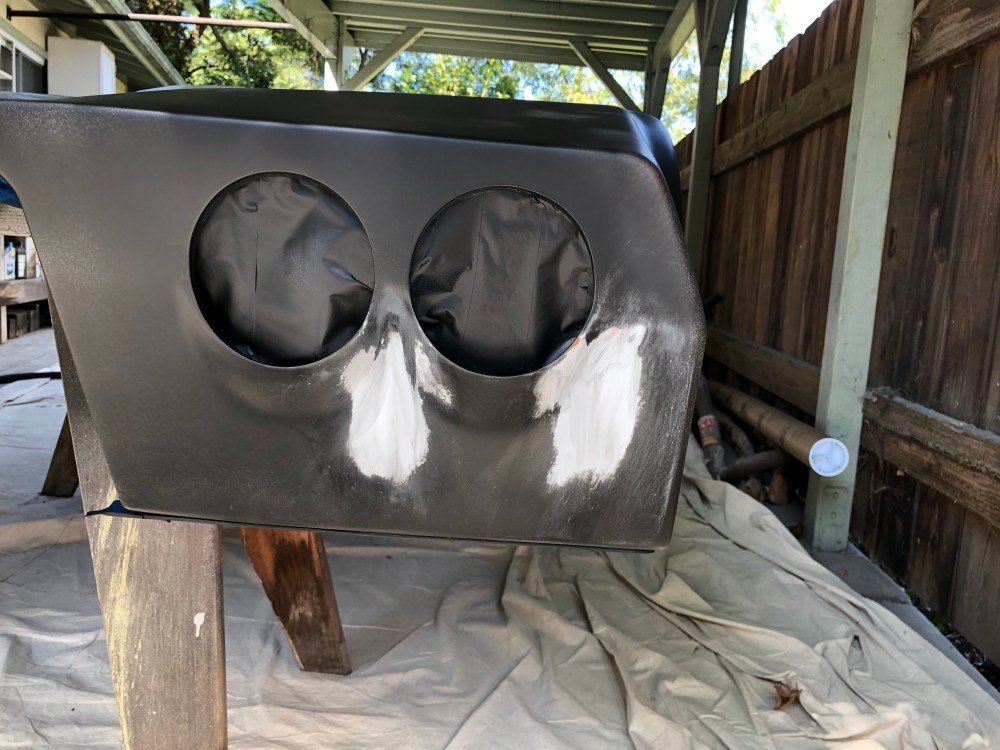

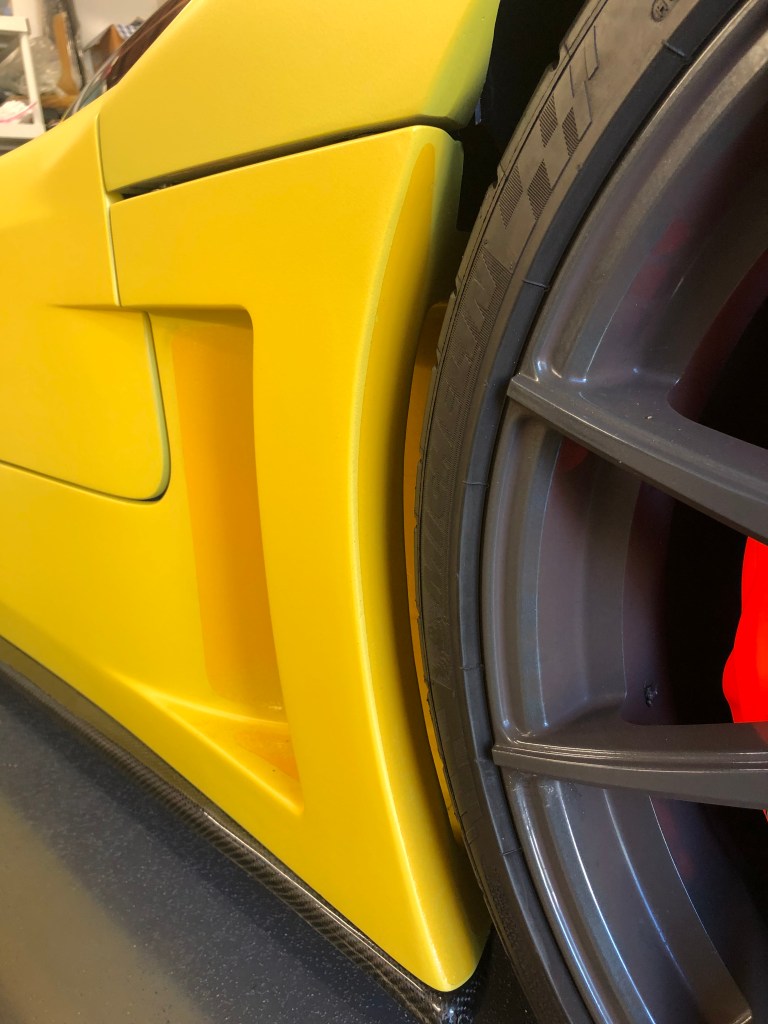
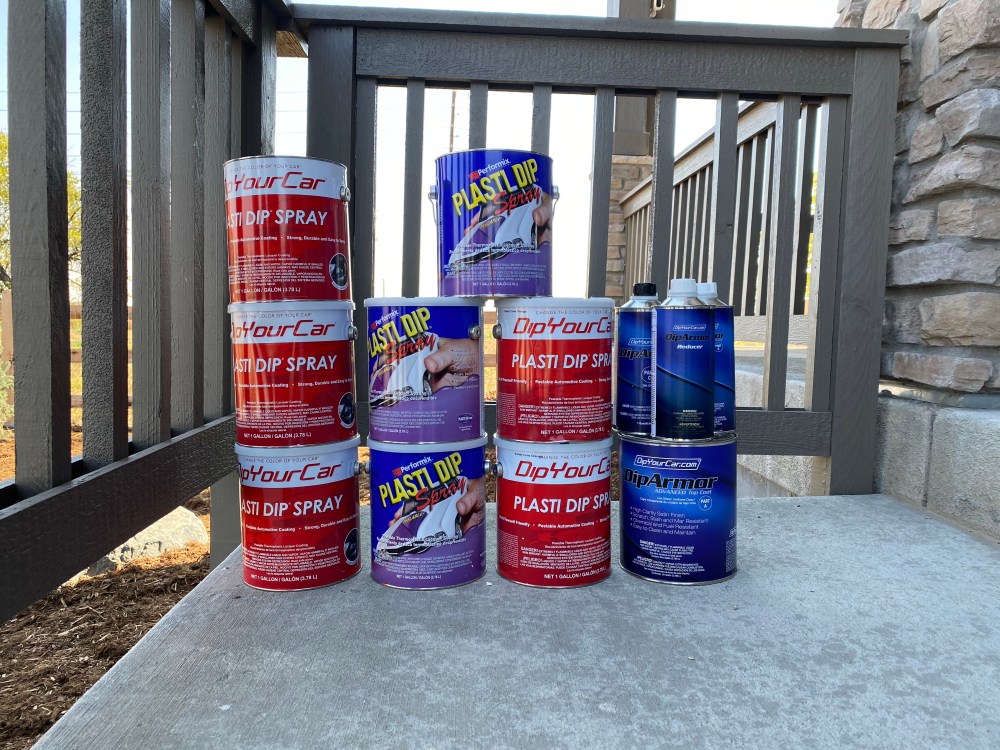
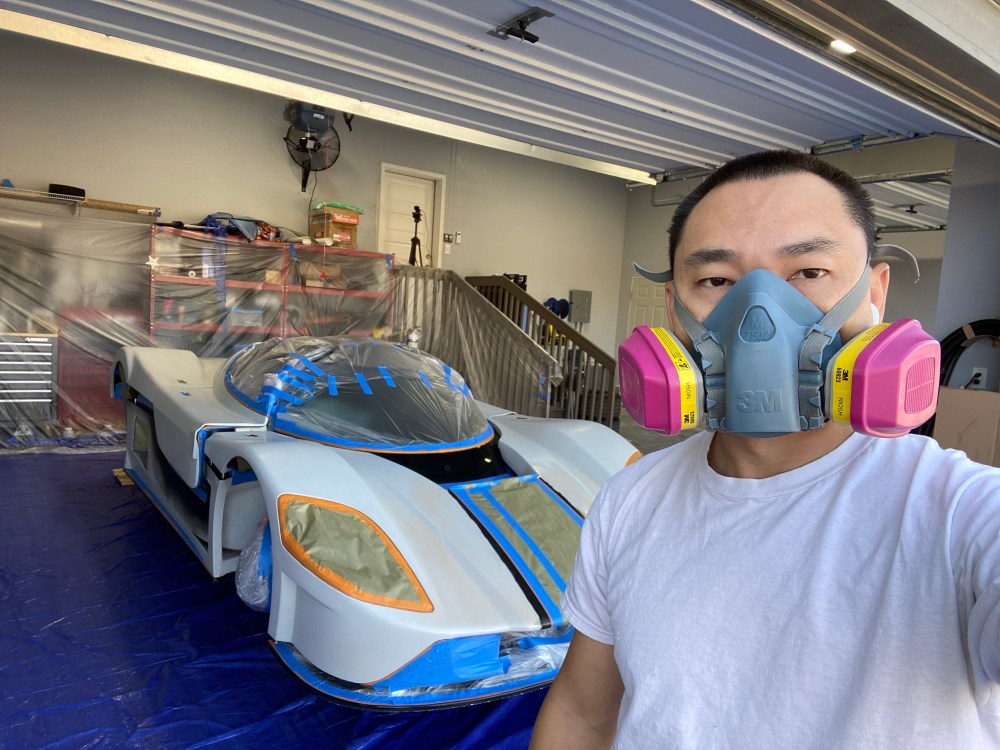
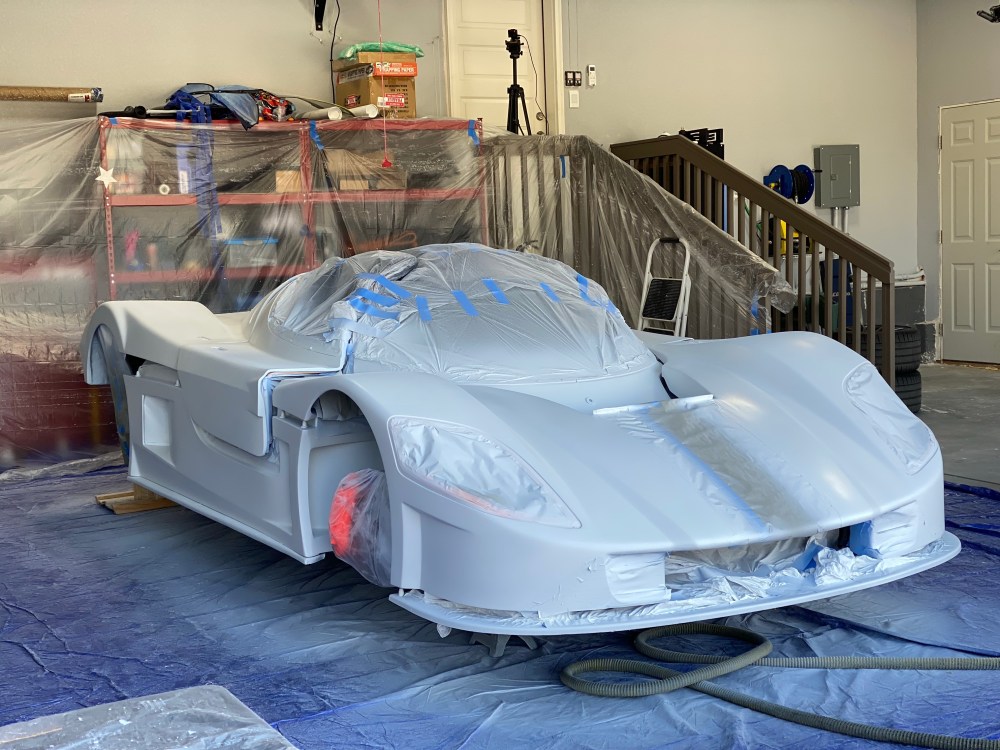
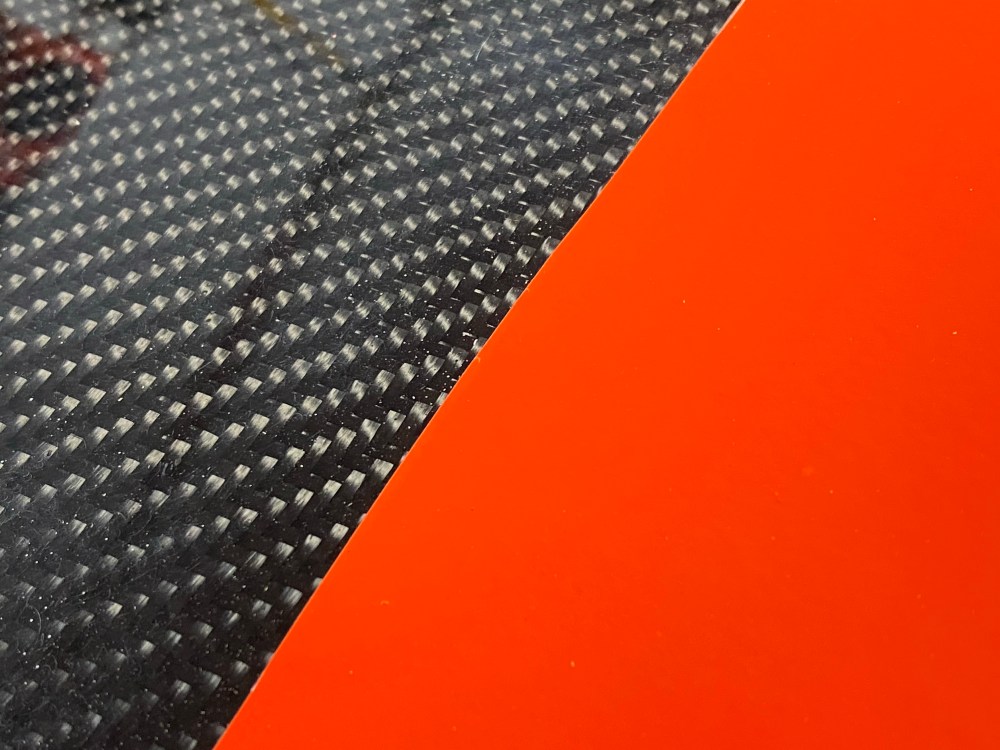
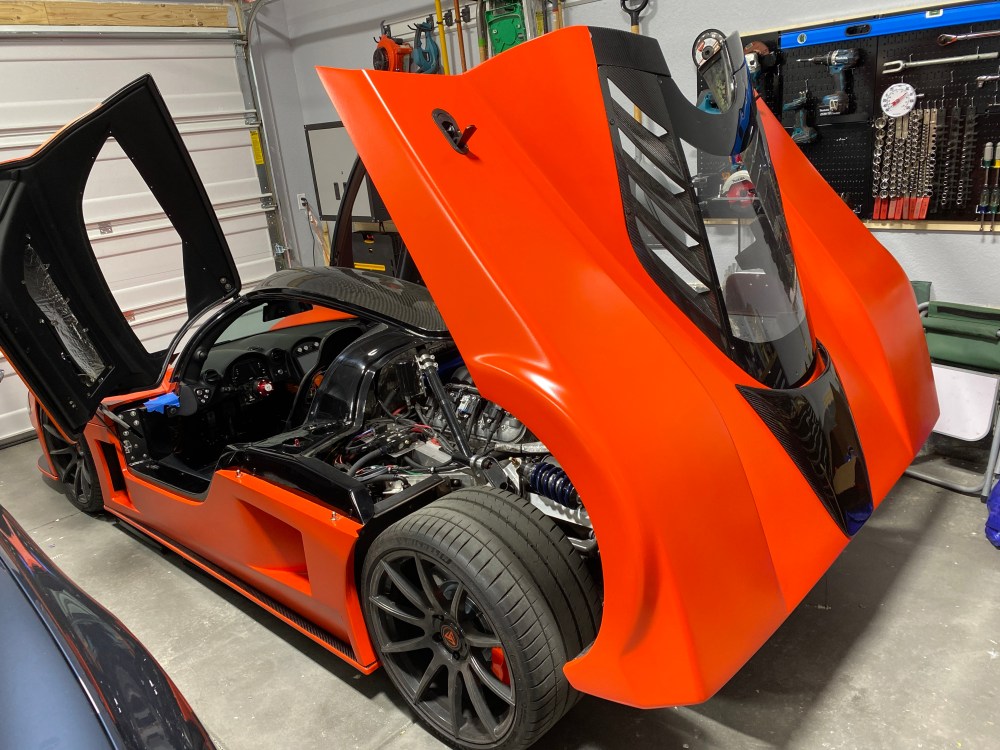
I decided this time around not only was I going to paint the car orange, but I was also going to mix in some cool pearls so I could get a nice color shift effect. In addition to adding pearls, I wanted to try the new DYC Dip Armor product as well. The Dip Armor product gives plastidip a MUCH higher resistance to solvents, such as gasoline, and it leaves it with a much slicker feel. This was to be my most ambitious dip job yet, I was pumped!
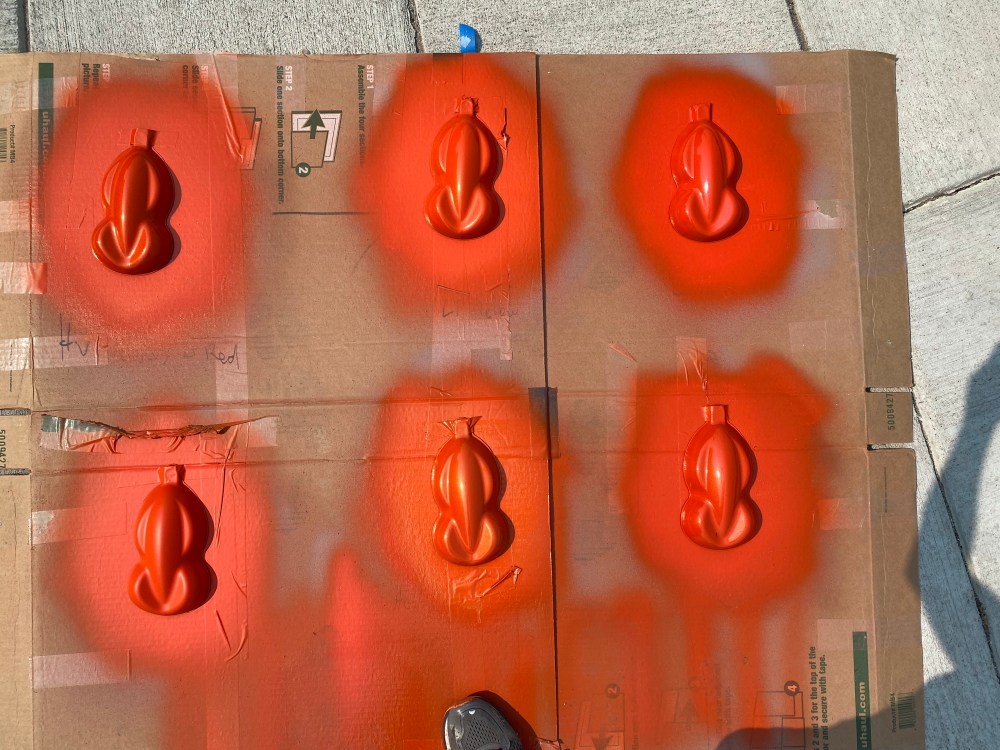
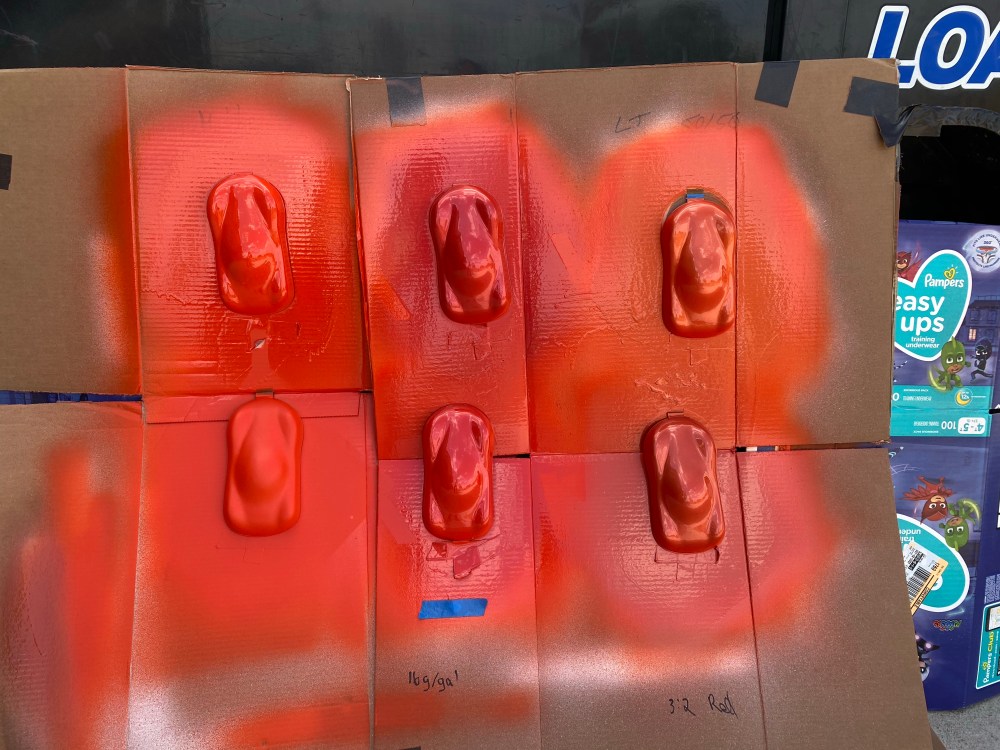
So I started by shooting a few speed shapes with various loads and pearl colors. After about 15 combos I just couldn’t find the right combination of pearl and load that really jumped out to me saying “THIS IS IT!”. I just kept coming back to the basic orange color … damn.
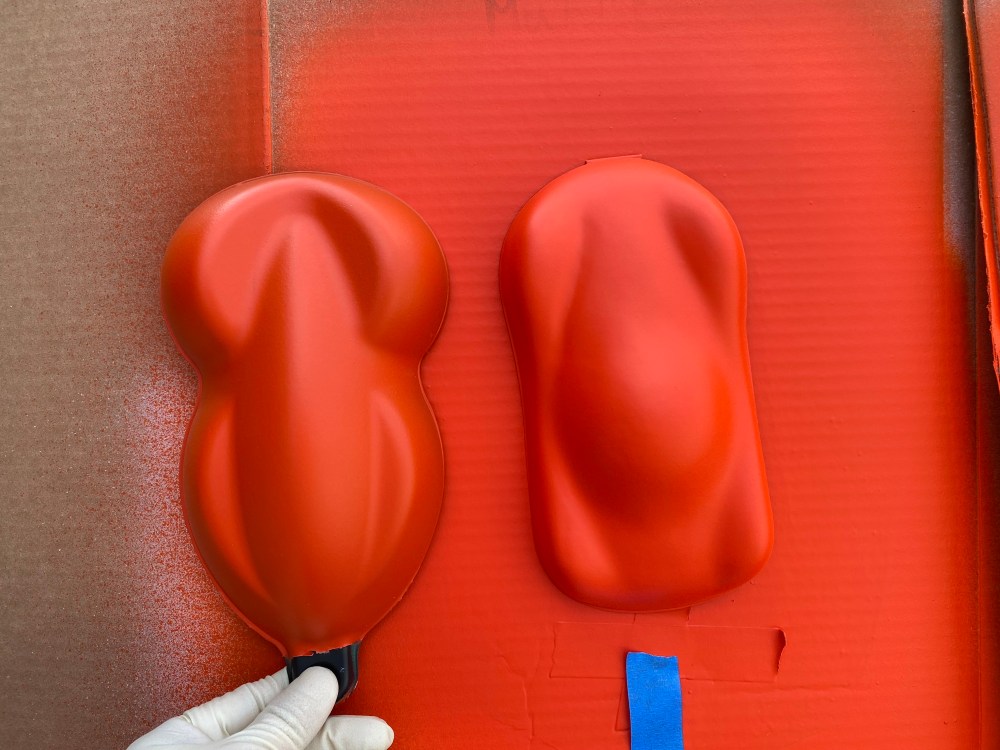
So what was to be my most complex and ambitious job became the easiest dip job I’ve done so far, apart from adding Dip Armor as the final coat.
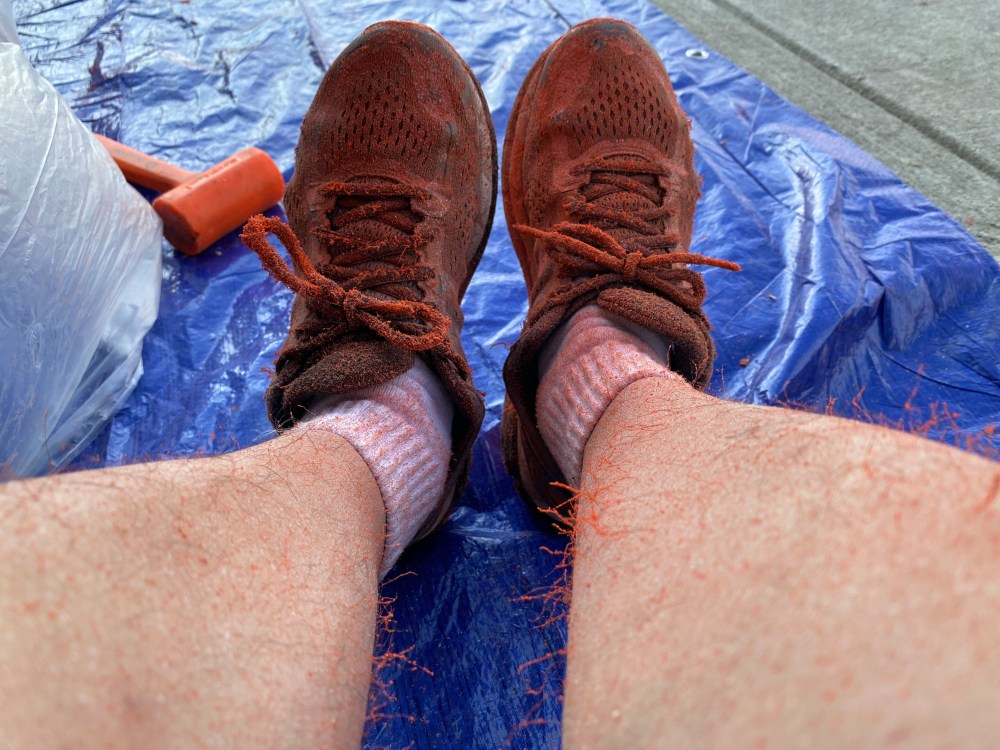
OK, that was a lot of verbal diarrhea to say I’ve dipped the SLC orange – Safety Cone Orange to be precise.

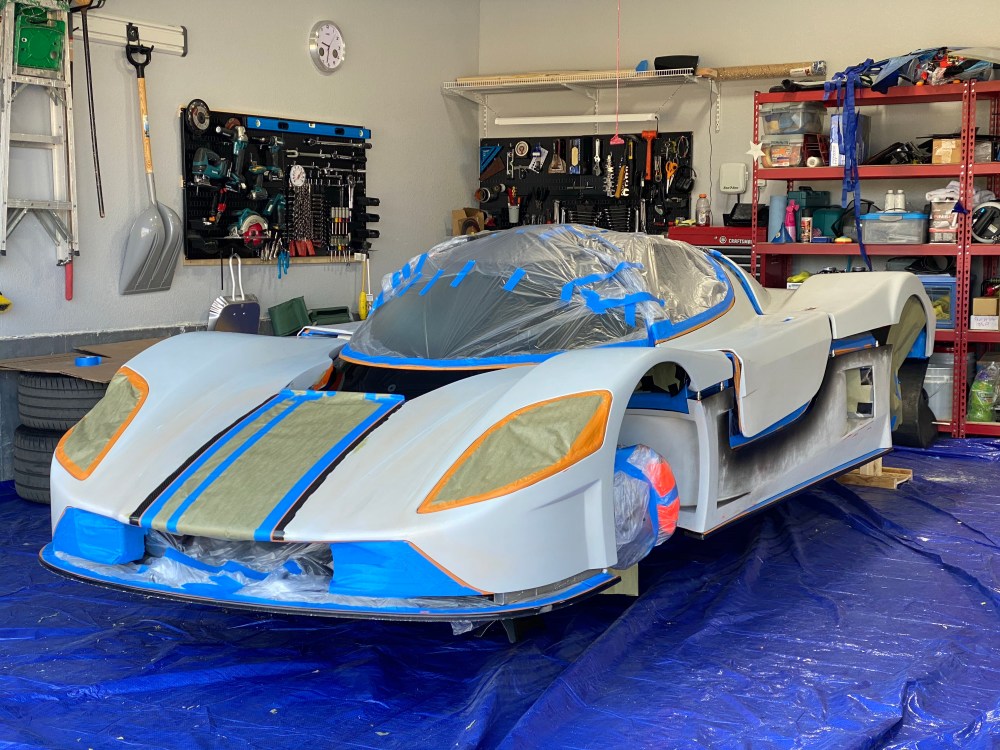
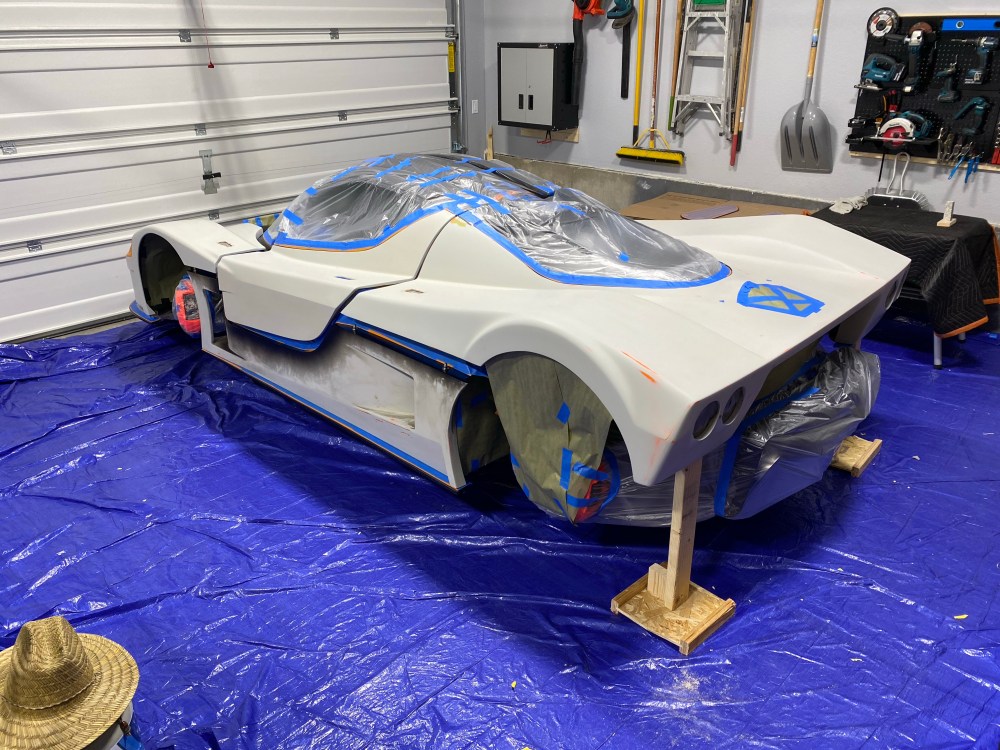
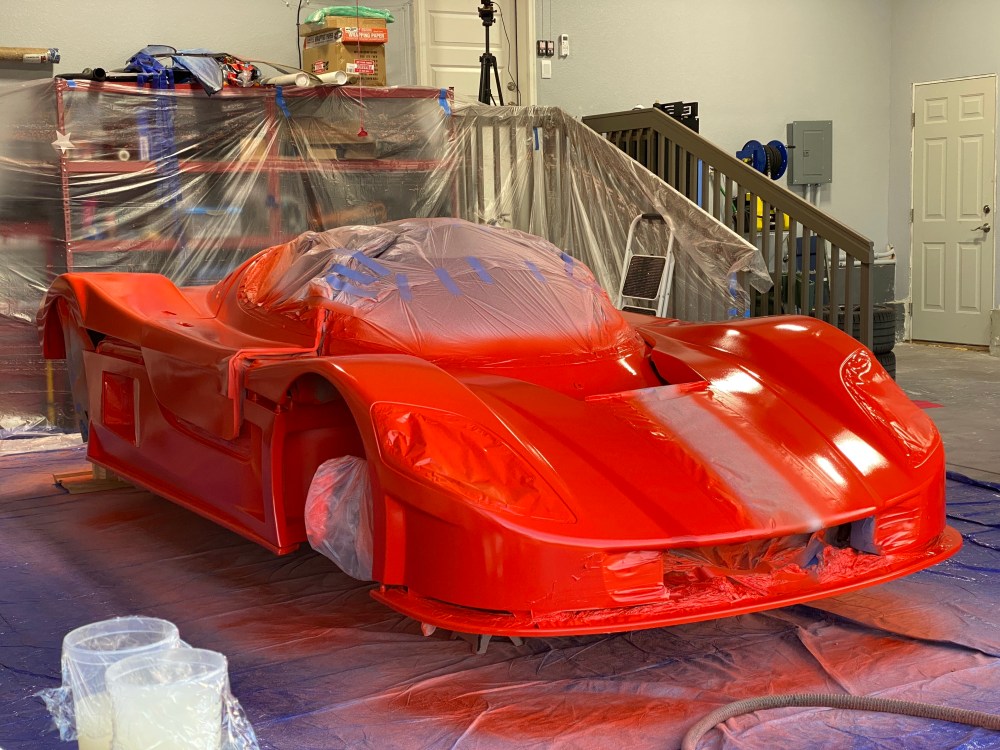

Verdict? LOVE IT. I should have done this 2 years ago! Oh well, live and learn. I don’t know how long my SLC will remain safety cone orange but my mind’s at ease and I haven’t started thinking about the next color … yet.

OK, if you’ve made it this far – the talk amongst current builders seems to be a greater acceptance for plastidip as a good way to get your car painted while waiting for your body to season, something I’ve been saying for years! I’m glad there’s some traction here, hoping to see what colors others go with. I’ve created 2 videos to go over a few tips and things I’ve learned having dipped the car three times now. I don’t expect these videos to be all that popular – unless you’ve got an SLC and plan to dip it, there’s really not much reason to watch. Anyway, for those who do, I hope you find these useful.

Cam, I feel as tho I owe you a lot.
For the better part of 3 years, my wife and I have kicked around the idea of building a car together.
Up until a few days ago we were debating between the ultima gtr or the sl-c (her being for the slc).
Three days ago I happened across a random page of this log and started reading… it was captivating.
I quickly navigated to entry 1 and began my or rather your journey.
Fast forward to this moment, upon reading your final entry thus far, I have made up my mind and am going to change sides to the sl-c.
The car is (for lack of a better word) stunning, and has so many different levels of potential. After peeking at the configuration portion of the ordering section on superlites web page, i see now that its still going to be some time before the actual order is placed but never the less… it WILL be ordered.
Thank you for allowing others to join you on your building experience and for giving insight on some issues that may arise.
I’ll be buying your two books upon purchase of the kit.
You and your SL-C are awesome and I can’t wait to see any further customizations you make in the future.
LikeLike
Hi Casey – great news, happy to hear you’ve been enjoying the info and I hope you find it useful as you get underway on your build! Feel free to reach out at any time if you have any questions. Beat of luck!
LikeLike