I’ve taken about a week off from the car; we spent a few days up in Washington visiting my wife’s best friend and her family. Before we left I typed up a list of to-do items and taped them up on the wall by the car. By the time I was finished I had 6 pages of type-written items to cross off before the car can be “finished” enough to drive home! I was feeling a bit sluggish and not quite sure where to start, so I picked what I thought would be an “easy” item to cross off the list.
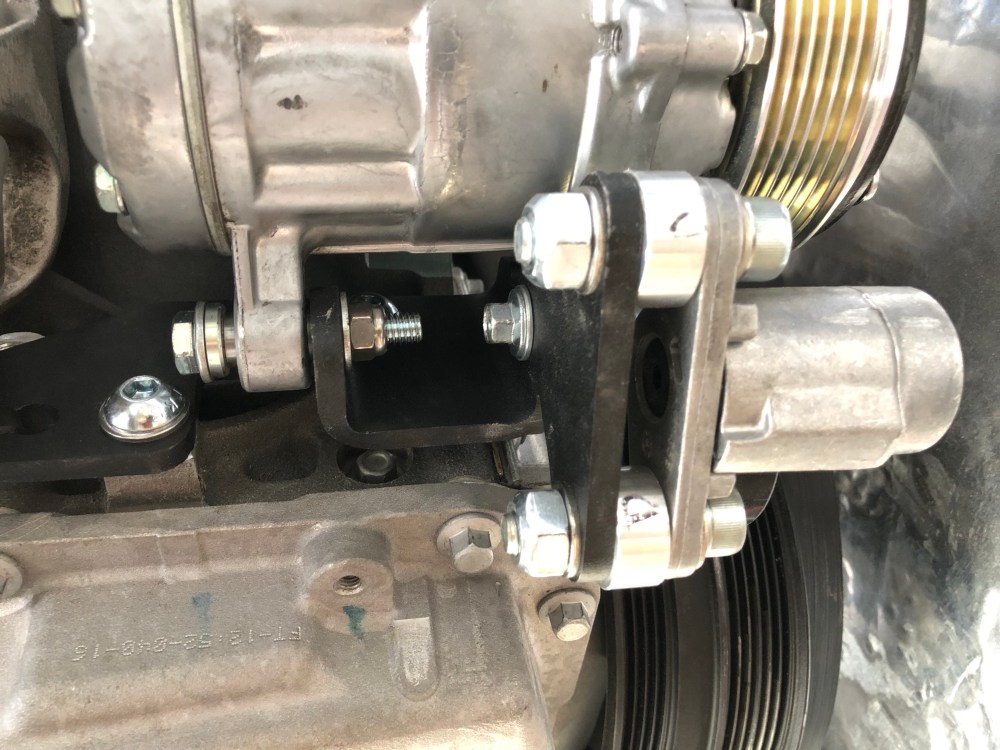
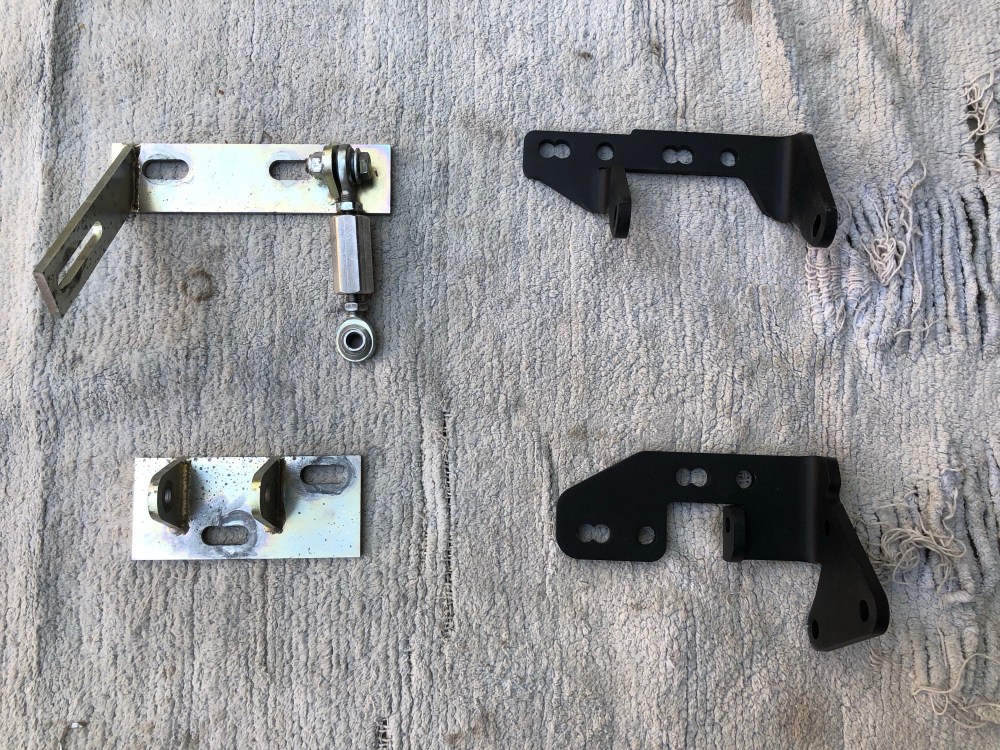
Waaaay back in post #15 I covered the installation of the AC compressor using the factory mounting brackets. It’s not the fanciest of brackets and it appeared to be way more adjustable than necessary. At the time, I figured it was because RCR wanted the bracket to be compatible with multiple engine configurations. Recently, I got my answer – as I suspected, the brackets are slotted so they can be used on the different LS motor configurations.
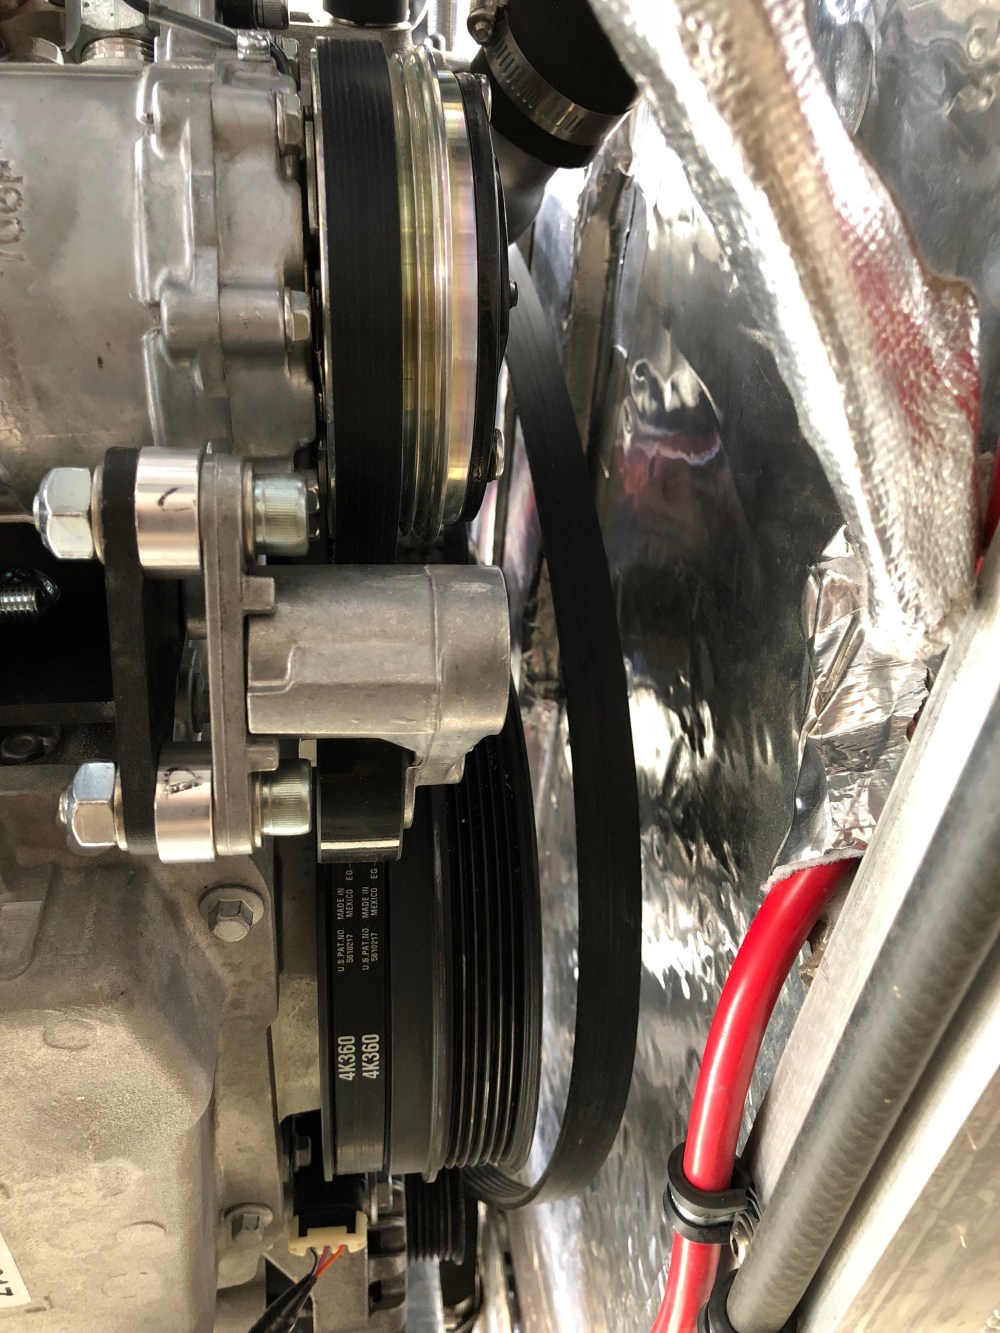
A few weeks ago I participated in a discussion where SLC builders were discussing their AC belts getting thrown and throwing out ideas on how to address this issue – see what I did there? During my very short go-kart session I also threw my belt but figured it was just a freak thing. When I re-installed my belt I double checked that my alignment was good (it was) and that the compressor was pushed out as far as it could go (it was). There is no spring loaded tensioner with the RCR AC mounting system; the forward upper mounting point is fixed using an adjustable turnbuckle. Dial the turnbuckle out and you extend the rod, pushing the compressor away from the crank and increasing your belt tension. I wasn’t a real fan of this but I had the bracket so figured I would give it a shot anyway.
Between my thrown belt and the chatter that others were throwing belts, I got real paranoid and decided I needed to do something about this before I got too much further into my build. Tossing a belt at low engine speeds didn’t bode well for running the engine at full tilt. I didn’t want to have to chase thrown belts and I really didn’t want to have to work on the AC compressor again once it’s charged.
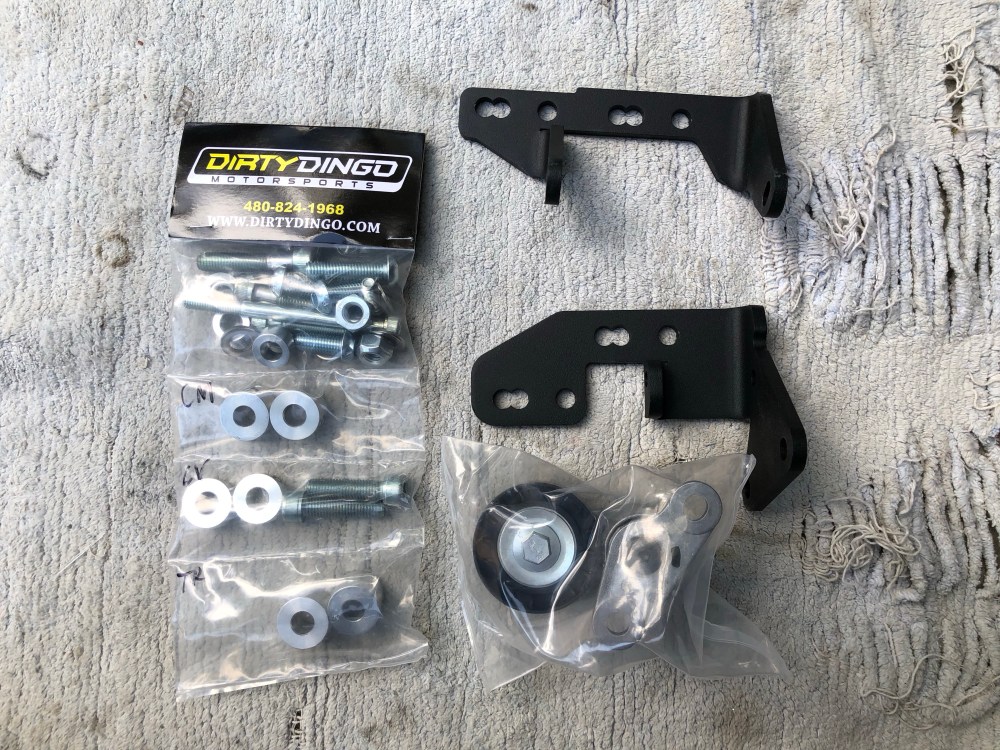
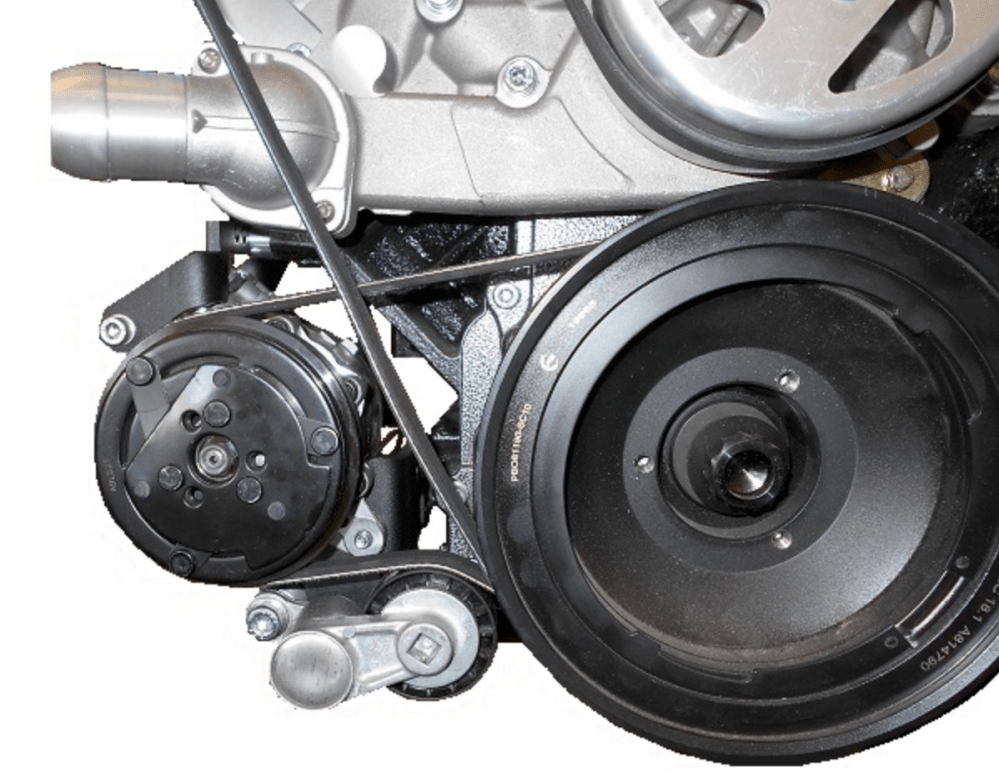
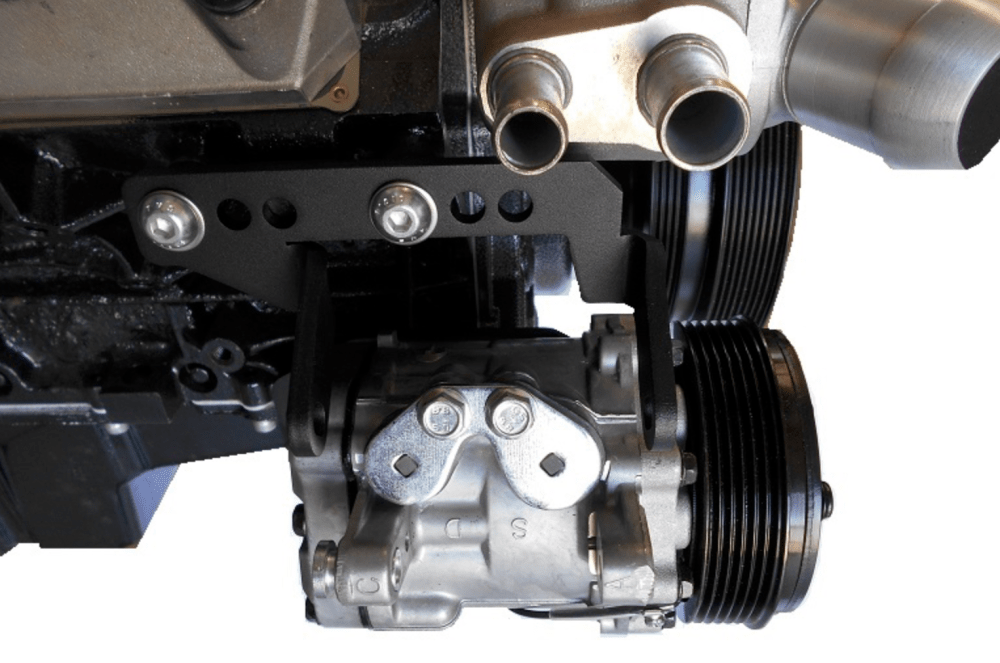
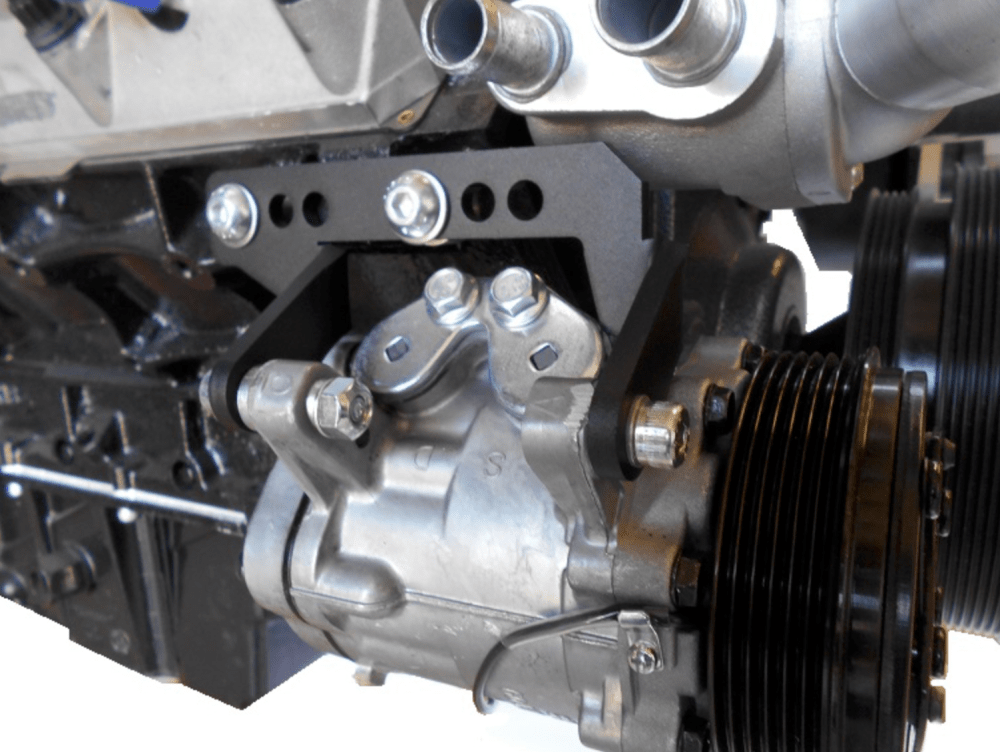
Dirty Dingo makes a mounting bracket for the AC compressor which puts it in nearly the same location RCR locates the compressor – but the Dirty Dingo unit also includes a spring loaded belt tensioner. The belt tensioner increases the wrap at the AC pulley and is supposed to help prevent the belt from jumping off. The install instructions for the Dirty Dingo setup are located here.
Since my compressor and engine are already installed I couldn’t get any decent photos to show – so I pulled these from the DD website:
I had my compressor rotated as far away as possible and I still didn’t think I had enough tension. Perhaps I could have tried going down one belt size but I just wasn’t a fan of the tensioning method nor the amount of wrap.
If you’re also using the factory AC compressor mount and you have *any* inkling or concern that you might throw a belt, do yourself a favor – buy the Dirty Dingo unit now and get peace of mind you’re running as good a setup as you can. It’s $145 which isn’t cheap, but it’s not all that expensive either. Believe me – it’s a LOT easier to install this with the engine outside the car than with everything buttoned up! I spent an entire afternoon cutting up my hands and cursing, wishing I’d pulled the trigger on this sooner. Knowing how OCD and paranoid I am, I shouldn’t have waited until now to do this. 20/20.
A few gotchas for anyone installing one of these:
- The photos in the install aren’t so good – pay attention to how the lower bolt is installed. Follow the instructions explicitly in the order they’re laid out in the instructions.
- The 8x100mm lower mounting bolt is too long to install or remove with the engine mount in place. The bolt fouls on the mount and can’t be installed per the instructions if the passenger side engine mount is present. If you install the compressor before the mount goes on it’s not an issue – but let’s say you need to replace the AC compressor in the future for whatever reason; that’ll mean you would need to pull the engine and remove the engine mount before you could pull the AC compressor. Nuh-uh. Instead of using the included 100mm bolt I used 2 shorter bolts, one for the front mounting ear and another for the rear (similar to how the top mounts are secured).
- The 4-rib belt should be installed on the rearmost ribs of the AC compressor if you’re using the Corvette style balancer.
- Use Dayco PN 360K4 or Gates PN K040360 if using the Corvette style balancer.
Install Dirty Dingo AC compressor mounting bracket – CHECK!
I didn’t have “cut up my hands” or “bloody my knuckles” on the list but I added those to my list and put a fat check next each!
**So I went down to the local O’Reilly’s and picked up the K040360 belt and installed it this morning. WOW. Talk about easy peezy to install the AC belt! With the original factory system it was always a tough game of trying to spin the turnbuckle and loosen all the bolts so the compressor could rotate. Getting the belt on wasn’t all that difficult, but then trying to increase the tension was another game of messing around with the turnbuckle and tightening all the bolts once again. I have a lot of hoses and wiring above the AC compressor so fishing tools down there was tough, not to mention poor visibility (hence the cut up hands and bloody knuckles). With the compressor fixed in place it’s a simple operation to get under the car, turn the tensioner, slip the belt on, and boom. Done. I’m a really big fan of this setup after installing the belt! Between the factory tensioner and the Dirty Dingo, replacing belts is a 5 minute operation, tops.