Another post so soon? Must be a record for me! I enjoy writing and these posts are a fun way for me to document this build while sharing the progress with friends and family.
I can feel the impending stretch of Home Reno Phase 2 approaching and I’ve been trying to make the most of this downtime to work on the SLC. Apart from the toe link bolt issue I’ve been making tracks.
One of the very first things I did when the SLC arrived was to remove the brake calipers with the intention of getting them powdercoated. I purchased the Eastwood dual voltage powdercoat gun kit during their Black Friday sale (recall I said it was an expensive day for me!). I’ve always been interested in powdercoating and the Youtube videos make it look so easy. Just spray the powder at the part, stick it in the oven, and you’re done! What could go wrong? Mmmyeah, not so straightforward, especially when your ambition far exceeds your abilities.
As you all know by now, I dwell on and overthink the minor points of this project. I literally spent several hours scouring the internet for photos and images of brake calipers; red, blue, black, and yellow seem to be the most common colors. It seemed to me if I was going to have a stand-out-like-a-sore-thumb car I needed the calipers to be just as loud. Since I haven’t zeroed in on final body color yet it needed to be something that would go well with whatever I ended up with. Red or black would have been the safest bet but I happened to come across a video from Eastwood in which they powdercoated a valve cover in their “Atomic Orange”. BAM! The video made it look so easy! What could be louder than a color with the word ATOMIC to describe it? I was sold!
Here’s where I should have done more research. Instead, it was about 3AM on Black Friday and I’d already been up a few hours looking at brake caliper photos, watching Youtube videos on powdercoating, and my eyeballs were getting pretty dried out. Definitely time to place an order! So with the screaming deals happening at Eastwood I pulled the trigger on some Atomic Orange powder, a powdercoating kit, and other incidentals for the job. Boy was I pumped!

Fast forward, the SLC has arrived and I’m tearing it all down. Brakes are off, on to powdercoating!

There’s been some discussions on the forums regarding whether or not calipers should be torn down prior to powdercoat. It seems to be fairly split between coaters who won’t touch a caliper with seals and those who don’t care one way or the other. Viton has a max recommended temperature approaching typical powdercoat curing temperatures. Given the short duty cycle of the coating process it’s probably fine to leave the seals in place. I know many people have had great success with powdercoated brakes that were not disassembled. Knowing my propensity for getting things not-quite-right, I opted to disassemble my calipers before coating.
These suckers were pretty difficult to disassemble! Getting the pistons out wasn’t too difficult – a little pressurized air in the fluid passages and they pop pretty easily. It’s extracting the seals without scratching the piston bores that was difficult. Unfortunately I was 15 for 16 on getting seals out without damage. One of the seals tore as I was trying to pull it out; luckily seals are readily available and can be purchased in singles instead of as a full caliper rebuild.
Anyway, on to powdercoating!
I just happened to have an oven that was in need of some abuse (it came out of our house, removed during demo and destined for the junk yard) so I was all set. HERE’S when I started to do a little more research on powdercoating and realized that I’d probably selected the worst possible color to do as a powdercoat DIY noobie.
Issues I had not anticipated:
- The Eastwood video oversimplified the entire coating process. To get the proper adhesion when doing multiple coats/colors a partial cure should be performed for each layer before going onto the next. Each subsequent layer becomes increasingly difficult to apply, 2 is doable, 3 is exceedingly difficult.
- I had planned to do THREE layers (a white base coat, the atomic orange, a gloss clear). Getting a good result for a single coat project should be tackled for beginners – 2 coats are tough, 3? Not unless you really know what you’re doing and you have high end equipment. The Eastwood kit I bought would not be considered high end equipment.
- The Eastwood kit I purchased is good for simple DIY stuff. However, achieving really great results requires a much better grounding path than the tiny wire that’s part of the kit. I was not going to drive a new grounding rod or fab up a dedicated powdercoating booth.
- In one Eastwood video I watched one of their guys perform what’s known as “hot flocking” a clear coat onto a brake caliper after having applied a vinyl decal. I was planning to add a “Brembo” decal and topping my orange calipers with a clear, just as I had seen in the video. Upon further reading it seems hot flocking is actually a fairly difficult and risky process of powder application. It involves heating the part up to a temperature where powder melts instantly upon contact. This can lead to inconsistent coating thickness or pooling. I decided to axe adding the Brembo logo and hot flocking a clear coating bringing my job down to 2 coats instead of 3. The vinyl “Brembo” logo I purchased could also curl/distort during the heating phase. If this happened, the finish would be ruined. Too risky.
- The powdercoating process is very sensitive to contamination. I was planning on doing everything outside, on the driveway – not exactly a “clean room environment”. You work with what you have …
OK, sounds like I bought a dud system but I’ve been using it for a few days now and I have to say I’m VERY happy with this purchase! I think the Eastwood videos oversimplified the process but I was able to make the system work for me – although I did not reproduce the Atomic Orange I originally wanted (more on this later). I think this kit works OK and with additional practice I’m sure I can get it to do what I want but I was short on time and wanted to make some progress, any progress!
OK, reality has set in, this isn’t going to be a stroll in the park – on to powdercoating! (Seriously).
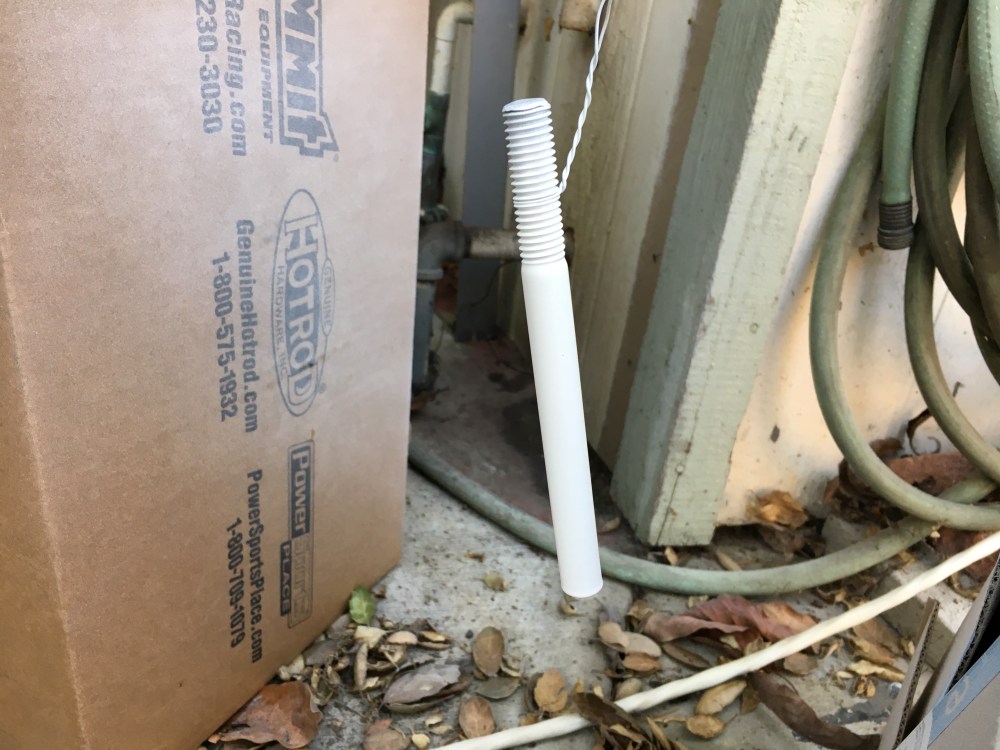
My first test piece was to lay the white base coat down onto the newly shortened toe link bolt scavenged from my suspension. The first coat went on OK but while the part was in the oven it was clear that I did not get good coverage (the color of the bolt was still apparent) so I figured now would be a good time to try hot flocking. FAIL. I ended up putting too much powder onto the part and powder pooled at the base of the bolt. I then tried to apply the orange powder. FAIL. I wasn’t getting a good enough ground and the powder was literally bouncing off the bolt and not sticking to it at all! Not a good start …
My next test piece I was careful to be a little more liberal with the white base coat. I also made sure to mask a portion of the piece so I could uncover it after the white coat had set and use the masked area as a grounding ear. SUCCESS – kind of. I didn’t quite get enough of a base coat. Moving on … applied the orange powder. SUCCESS – kind of. I didn’t apply enough orange powder and the result was a totally inconsistent orange. It was about the right shade of orange and matched the orange gelcoat bodywork fairly well – I was on the right track! All I needed was to be a little heavier with the powder.
Practice time’s up, my next part was going to be the real deal.
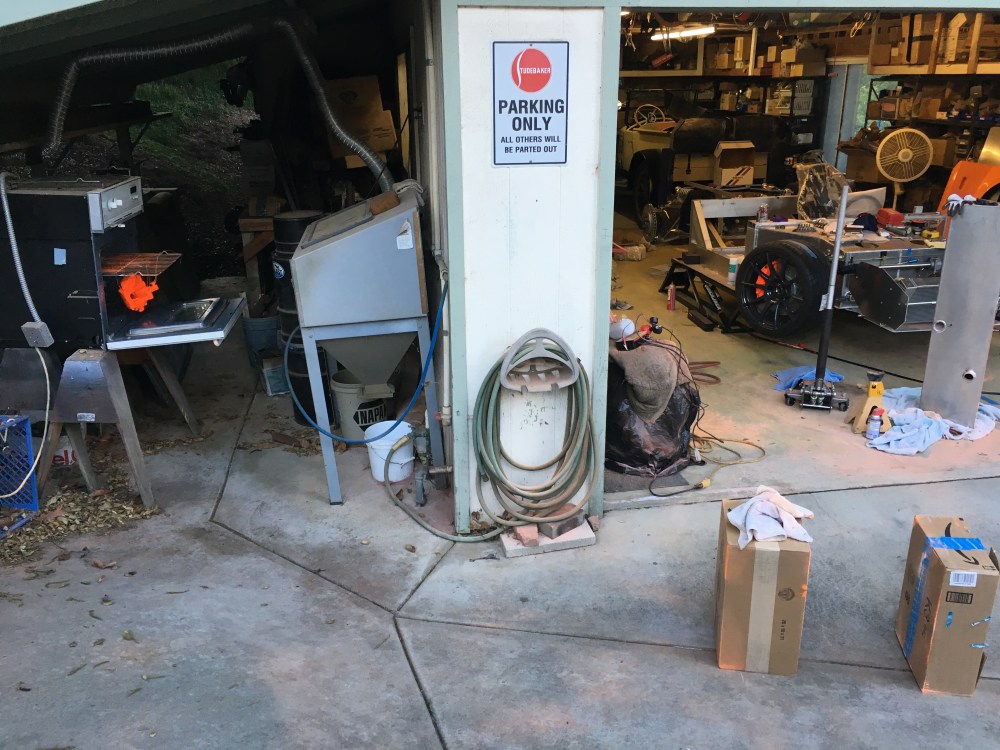
Contamination and greasy fingerprints are common causes for defects. As part of the caliper prep process I doused the caliper down in Acetone and Brakleen no less than 3 times and treated the caliper as if I were working with a liquid oxygen pump – this made me super paranoid. BTW, the powder used for powdercoating is essentially flammable dust, do NOT use with a gas oven or you may have an “unintended thermal event”! Only electric ovens should be used for this process.
Anyway, on to powdercoating!
I had gotten a little smarter about masking, grounding, and using the gun by now. However, I knew this next piece wasn’t going to be perfect. Really, only the visible portion of the caliper is important, other areas may be less consistent and still be OK (Shhh, OCD voices, it’ll be ok …) So with that in mind I oriented the caliper with the outboard side facing “up” in the oven. My thought was any pooling or runs would occur on the vertical surfaces, hopefully the main visible portion wouldn’t run too badly.

White base coat down, stick it in the oven. The powder cures after being at 400F for 20 minutes. To get a partial cure I let the part sit for 12 minutes at 350-400F. I then removed the part and let it cool back down to ~220F before proceeding with the orange coat.

OH CRAP. Here’s where things started going sideways. The original “Brembo” logo could clearly be seen through the white coat – I didn’t put on a thick enough coat. It looked OK when I originally pulled it out of the oven but as it cooled it started to change colors and become grayer (powder contraction?) – the original black anodized coating was starting to show through! By the time I realized all this the caliper was cool and I had to decide – coat with more white, or go on with the orange.
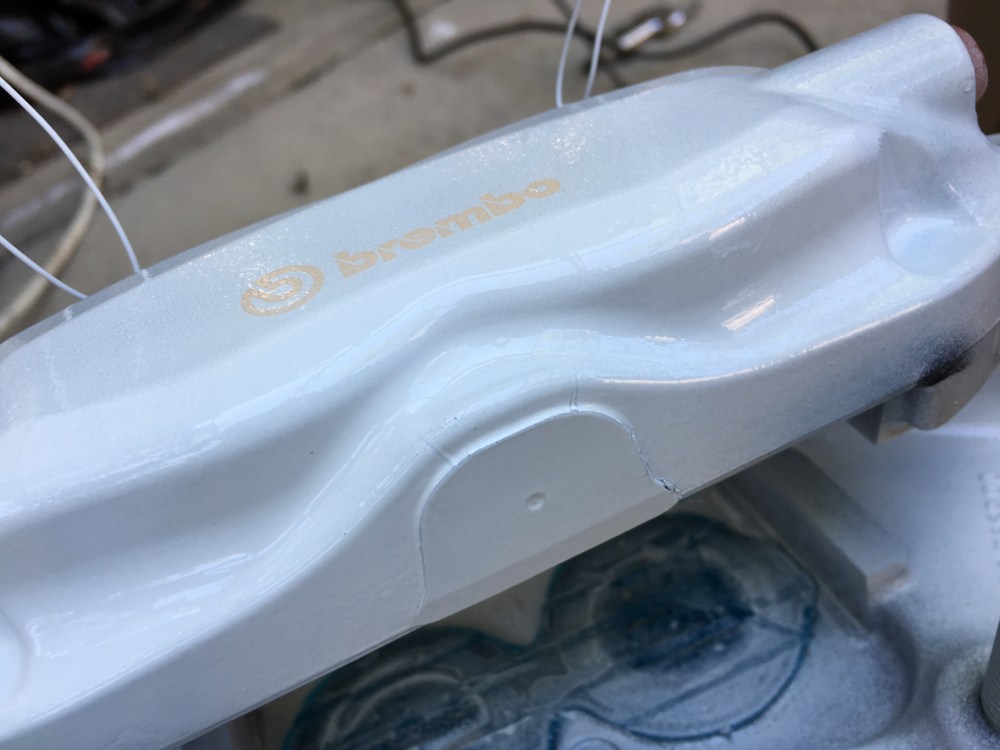
Harking back to my first test piece and recalling the orange wouldn’t stick AT ALL if the base coat was too thick, I decided to roll the dice and move forward with the orange coat. But this time it was for all the marbles, I had to really get the orange on super thick or this caliper would look like a melted creamsicle behind my wheels! Fingers crossed, I used more orange than I thought was necessary – then added more for good measure. Get the part back up to temp and let it do a full cure cycle, that process took about 35 minutes. Not opening the oven during the final cure was a killer.
SUCCESS – kind of. I was a bit surprised when I opened the oven to find a RED caliper! Is this what happens when you use too much orange? What the heck? OK, too late to now, it’s a done deal. I didn’t want to “shock” the part by pulling it out of the oven right away so in it sat, with the door open until it came down to about 250F. When I pulled it out of the oven I was surprised to see the color had shifted and become more orange. WTH? I know, you guys think I’ve got vision problems but I took photos! It seems the color shifts somewhat between fresh in the oven to when it cools back down to room temperature.

So here’s where more of that research would have come in handy. The Atomic orange color is a translucent color; its final appearance is dependent upon what’s underneath. Since I didn’t apply enough of a white base to make it opaque, the white/black/gray combo turned the final orange a much darker orange than I had expected. It’s almost a red/orange effect, kind of cool actually. The downer is EVERY caliper I paint, I’m going to need to try and recreate that poorly coated white base coat or the final result will be the real atomic orange – which is MUCH lighter than the first completed caliper. Oh boy, 4 calipers total, so 3 more times to get this wrong in exactly the same way!

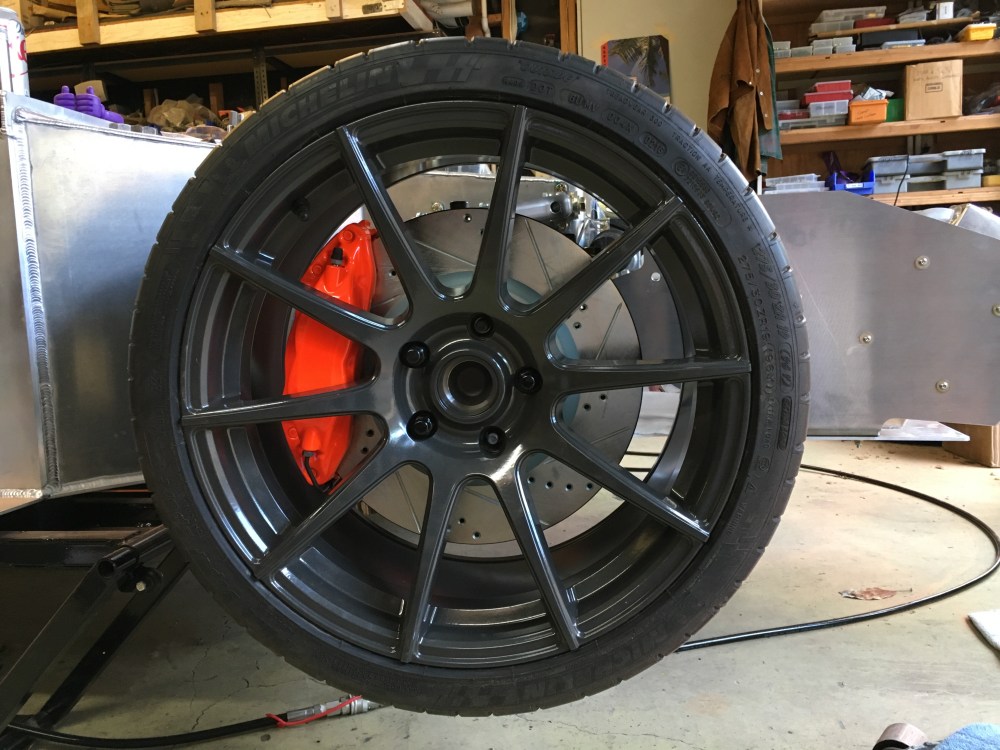
Final result – SUCCESS! I was able to screw up 3 more times in about the same way I did with the first caliper. All 4 calipers are (more or less) the same shade of orange, close enough you wouldn’t be able to tell without having them next to each other. I don’t think I could be any happier with the final product (OK, not true, I could be happier but the flaws and defects aren’t that noticeable and this is a hell of a result for a first time project!). The calipers have a great POP under the gunmetal wheels. In low light the color almost appears fluorescent/glows and really stands out. Depending on lighting the color very subtly shifts between red/orange/yellow and it’s got great depth!
Talk about fumbling toward success!


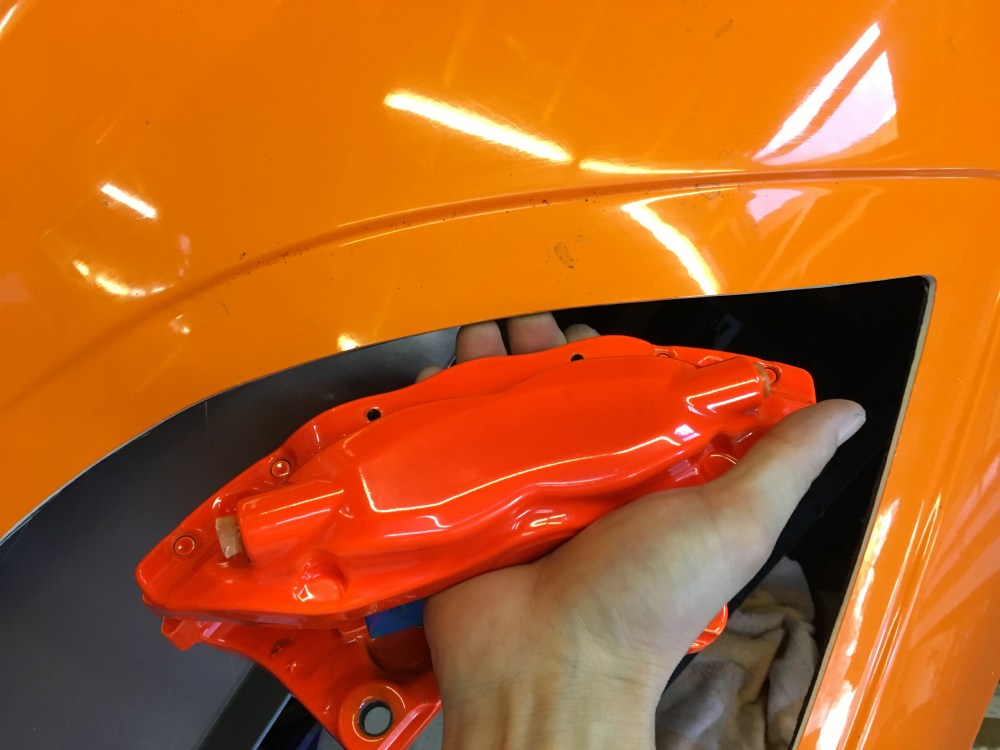

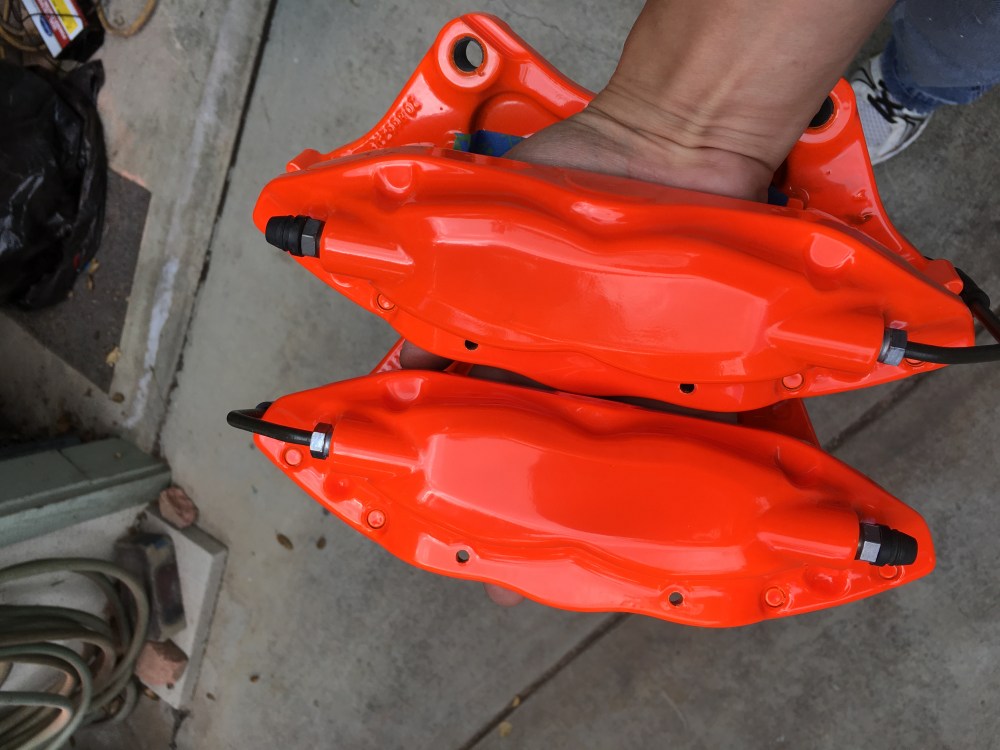


Unfortunately my iPhone camera doesn’t really do the color justice, I’ll see if the DSLR does any better. In person the calipers are darker and have a more reddish tint.
For any builders interested in tackling this project I would highly recommend it! It’s been a very satisfying experience; however, I would recommend going with a solid single stage color to avoid the pitfalls I ran into. On sale, the Eastwood system is a real bargain! Not to mention you’ve now got a tool you can use for many other parts on the car. I’m already putting together a list of other things to coat!
