I had too much time on my hands and I let my mind dwell and fester on an earlier decision I had made.
It’s been quite a while since my last post. Phase 1 of our house renovation has come to a close and we’re taking a short break before stepping into Phase 2. This gives me some time to devote toward the SLC before taking another hiatus.
In the meantime we’ve been quite busy between the house work and travel. Stephanie had a few business trips recently and I tagged along as nanny while she was bringing home the bacon. On our last trip to Indianapolis I found myself sequestered inside the ginormous hotel pacing back and forth as Ellie began walking!
Here she is pushing her car seat while getting the whole walking thing figured out.
Clearly she’s enjoying herself. The near-freezing temperatures in Indy left me endlessly pacing back and forth inside the hotel with Ellie – apparently kids can hit the repeat button on an activity and not get bored. EVER.
So this gave me the opportunity to think about all the things I’d do with the SLC once Phase 1 closed – I only have a handful of days of reno downtime and I wanted to have a plan… but my mind kept going back to the polished suspension and to how disappointed I was after I applied the Ballistol. So I kept going over it in my mind – powdercoat? I’ve got a kit at home and I’m itching to learn something new …. Anodize? The parts are basically ready to go …. Shut down the crazy voices in my head and move on? …. Can’t.
I had (yet) another discussion with Stephanie and went over pros/cons of each process. I told her I was leaning toward anodizing. This being the umpteenth time we’ve had this conversation, the eye roll quickly followed by “you should just do it” was enough of a push for me to do it! So I spent several hours walking back and forth the hotel lobby researching anodizing and trying to come up with a color. Way too many hours spent on color; I went kept going from the extremes of plain black to blingy gold (John knows how much I like bling).
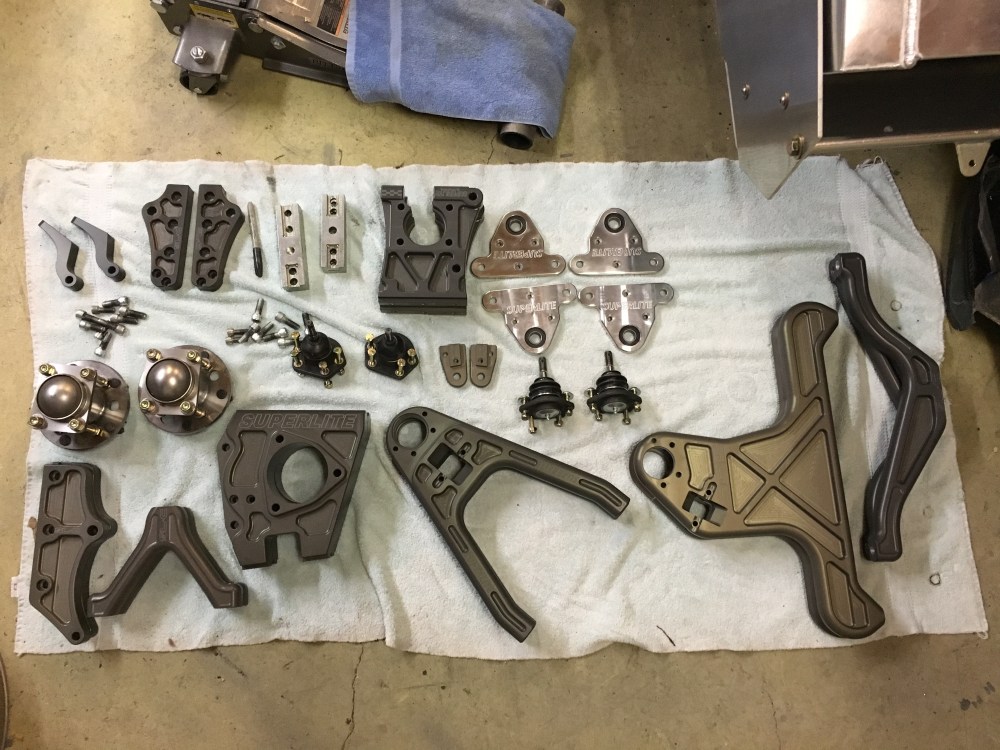
I found a pretty nice website for A to Z Metal Finishing and wouldn’t you know it, they’re local to me. Once we returned from Indy I boxed the suspension pieces up and headed down to A to Z for a consult. I had a nice discussion with the folks at A to Z and they explained the pros and cons of Type 2 vs 3 and clear vs colored anodizing. I’ve had parts for work anodized to a Type 3 classification in the past so was already familiar with that, but I wasn’t aware that dyed/colored anodizes were UV sensitive and would fade over time. Good to know, I was already leaning toward Type 3 for the increased strength but unsure about color. I didn’t want to have a black-turned-purple suspension so opted to go with a clear Type 3 anodize. Those who’ve followed Mark Setter’s GT-R posts will recall he had his suspension anodized clear as well. Note that Mark went with a Type 2 clear anodize; the resultant finish maintained the silver aluminum appearance but luster was knocked back down to near pre-polished state. With a Type 3 clear anodize there is no dye used, however, the part takes on a darkened color. This is due to the different chemicals used for Type 3 vs 2. The type 2 anodize leaves the oxidation layer clear. The Type 3 anodize causes a chemical reaction to occur which leaves the oxidized layer much darker in appearance. The final color is dependent upon the type and chemistry of the aluminum or anodize run (the SLC suspension required 3 anodize runs to get everything coated). So … it was a bit of a gamble on what my end product was going to look like! I took a deep breath and left the parts with A to Z.
The call came in a week later and my parts were ready for pick up! Upon arriving, I found A to z had individually wrapped and sealed all my parts – a nice touch. It took me a few minutes to tear open the first piece to see what it looked like – and to be honest, I was a little disappointed when I opened the first wrapped part. The finish had a very dull luster, no bling at all – and the color was a light olive/gray color, almost military/camo-like. My wife thinks I can’t see shades beyond the most basic color wheel – and she’s right. So here’s a few shots showing the final product, better than me trying to describe it:
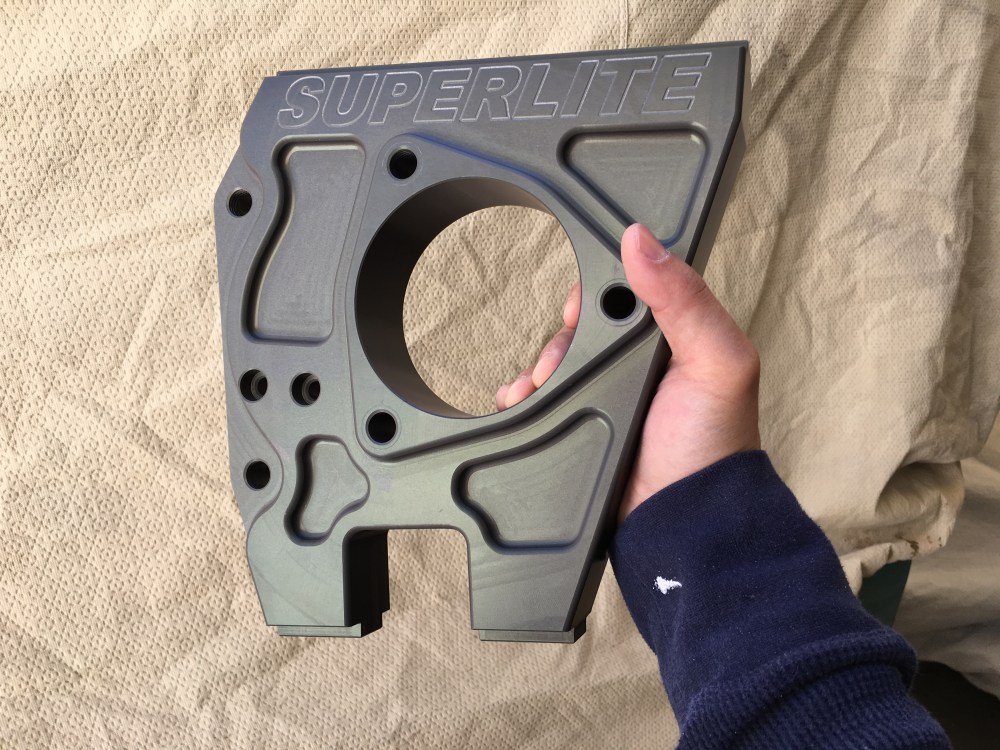
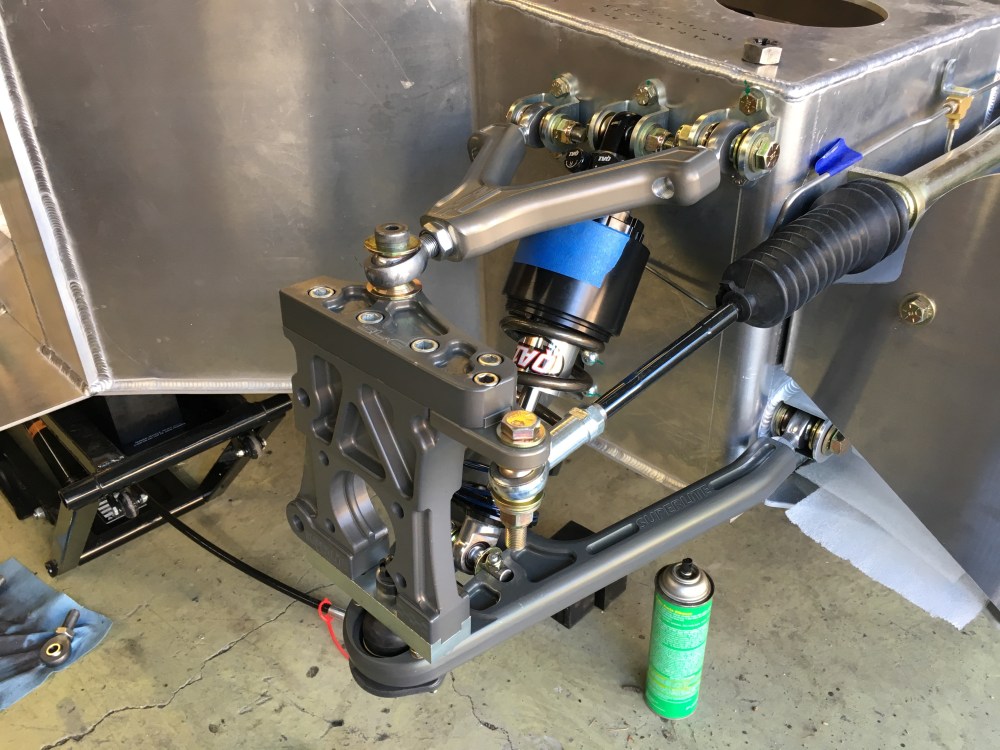


Now that I’ve had time to get over the initial impression my latest assessment is I like it (thank God!). The color has grown on me and I’ve addressed the thing that killed me the most about the polish/Ballistol treatment – fingerprints! The anodized surface is exceptionally resistant to finger prints and makes it easy to maintain/clean. I think ultimately I achieved what I was looking for; a nice, clean looking part with increased durability.
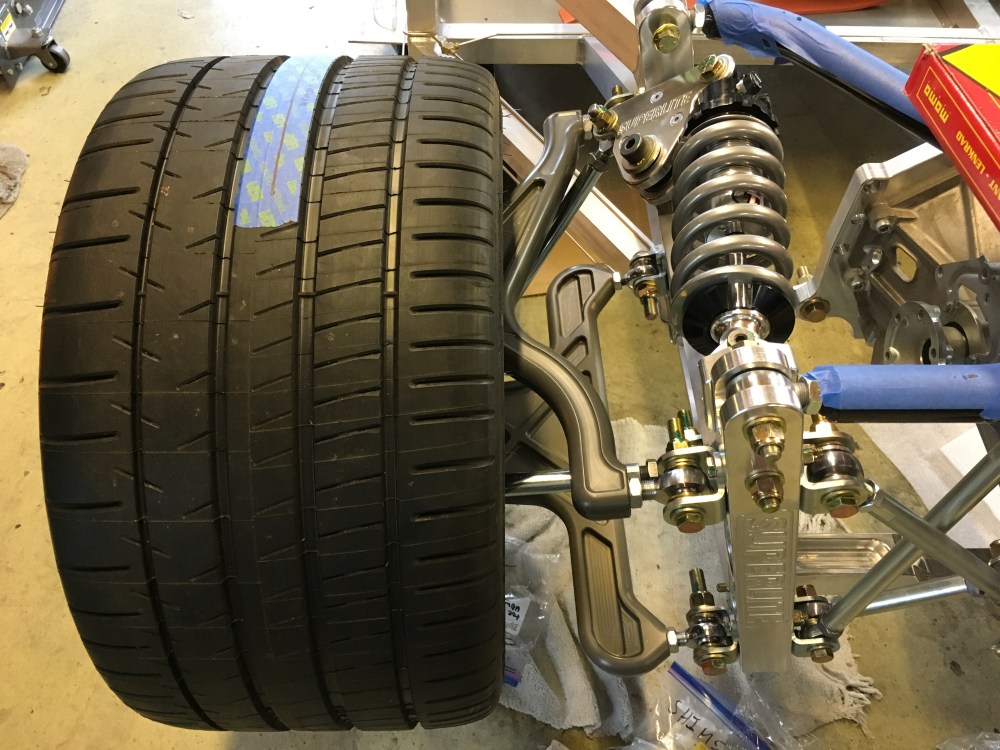
I recall now why I was a bit taken aback by the initial unwrapping – I had it in my head that the Superlite Aero suspension pieces were also Type 3 clear anodized (and they may very well be). The few drool worthy sneak peek photos of these parts show a very rich and deep appearance and I was expecting/hoping to see the same with my parts (scroll through the photos at the linked site to see what I mean). The disconnect between what I’d unwrapped and what those photos show is what put a damper on my pick-up. With time, and after assembling the suspension and seeing it all back together, the end result is FANTASTIC and I’m super glad I went with the Type 3 anodize. A to Z were great to work with and I may hit them up again for additional parts later on this project. I worked with Yuri and he was a great resource and very patient – he could tell I was nervous about leaving my parts with him!
For any builders out there considering going down this path I would encourage you to have a lengthy discussion with whoever you plan to use for coating. There’s really nothing wrong with a dyed Type 2 coating; the suspension is hidden from the sun so color fastness should be fine unless you’re planning to drive around in go-kart status forever ;). Abrasion/wear resistance is better with Type 3, but Type 2 is better than nothing and I haven’t heard any complaints from builders that haven’t had their suspension treated. Also bear in mind the Type 3 anodize will affect dimensions to a greater degree than Type 2 (it’s thicker) – there’s a lot of tight tolerancing in the suspension and you’ll need to keep this in mind. Forget powdercoating – the coating is so thick it’ll destroy all the tolerances and you’ll never get the parts back to where they need to be.
Would I do this again? Hell yeah – I think anodizing the suspension is definitely the way to go!
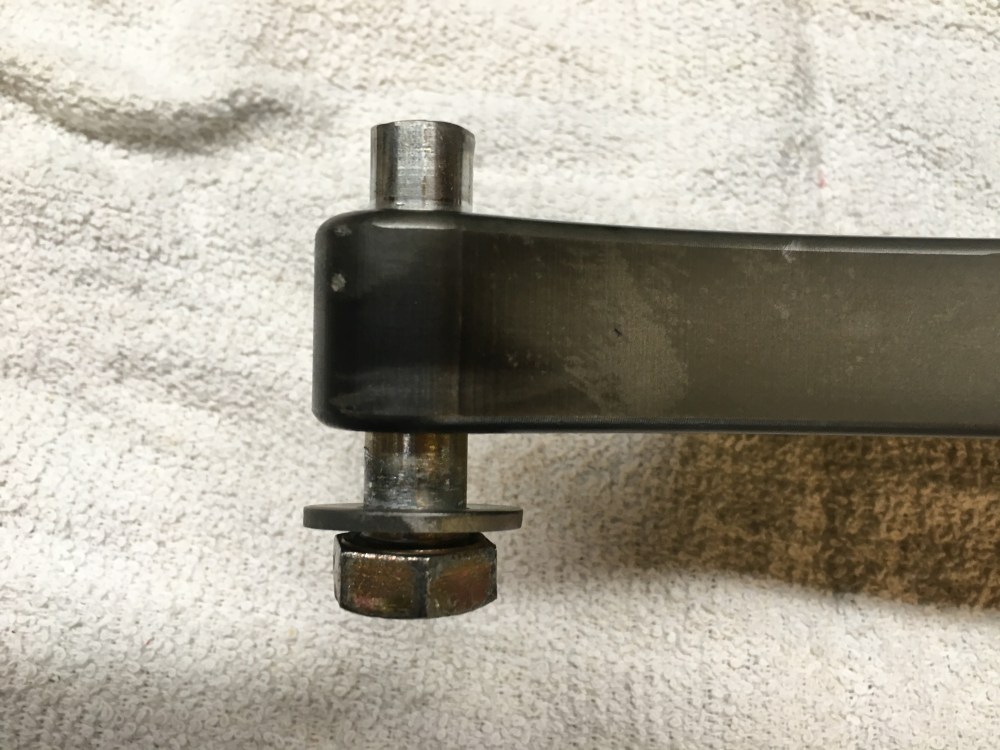
Would I choose to sand/polish the parts before anodize? Mmm… probably not. The anodize process softens the machining edges/lines somewhat and the time investment doesn’t seem worth it (unless you’re freakishly OCD and have the same voices in your head). I had already sanded everything but near the end had gotten lazy and only did the visible surfaces. Bob’s advice has been to stick to the big picture and get the car completed, forget dwelling on the minutiae – and he’s right, I need to stop overthinking these details!
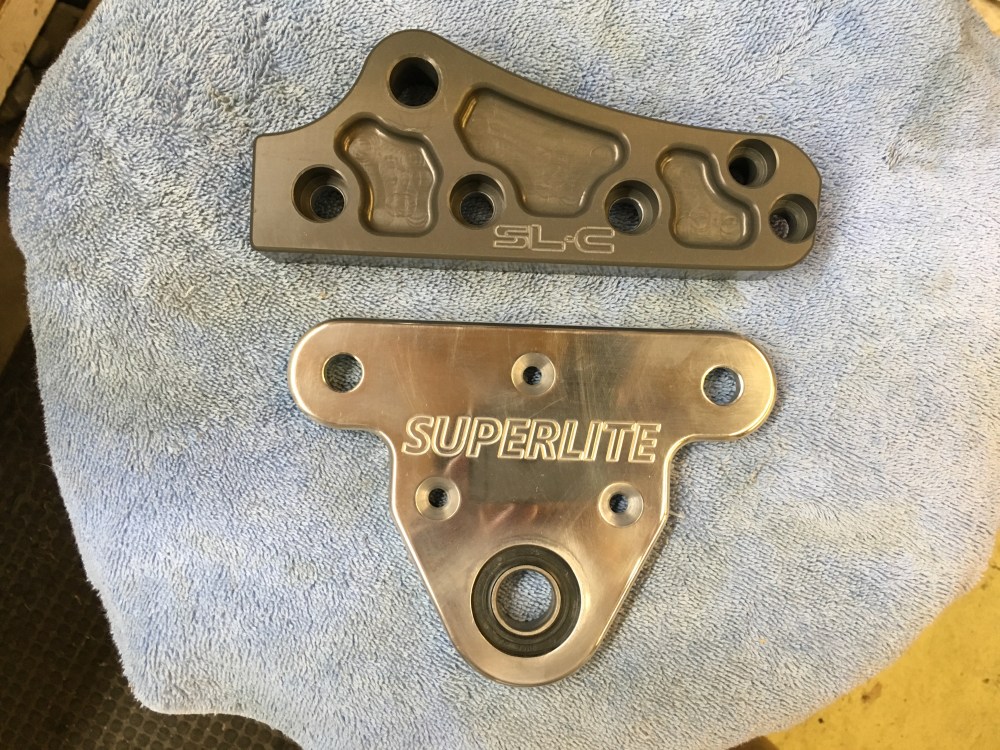
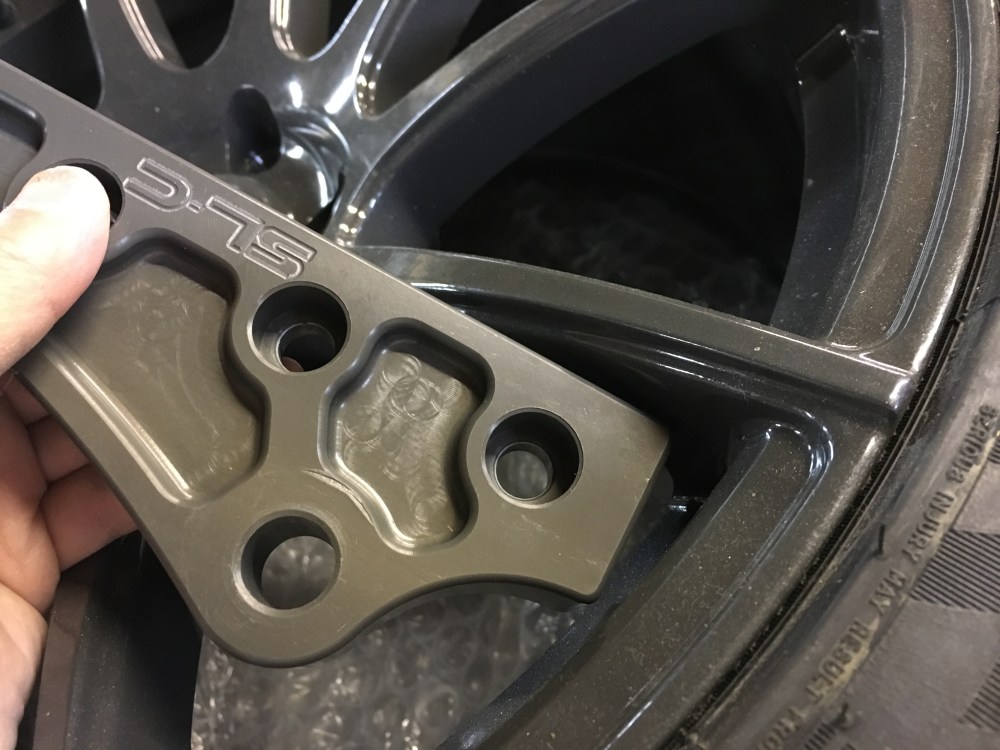
Here’s a comparison of a sanded/polished anodized surface versus an as-machined anodized surface for the curious:

As I was closing in on securing the toe link for the right rear corner the bolt started getting tight on me. It was pretty close to making it home so I did the dumbest thing you could do – I kept going. BIG MISTAKE. By the time I got sensible and started backing the bolt out it was already too late. The bolt had galled and any movement was just binding the bolt worse. Eventually it froze and the deal was done. I hit it with a torch to try and get the aluminum to expand and release but I think there had already been too much material movement (or I couldn’t get it hot enough with the torch). I resorted to cutting through the toe link spacer and bolt then removed the upper upright link with the cut bolt still seized. I had planned to find a local machine shop to drill out a Grade 8 bolt (fat chance of not damaging the aluminum piece!) but Bob had recommended throwing the entire assembly into an oven and hitting it with his press. A great idea which worked!


I contacted RCR and told them of my woes so I could order a replacement set of hardware. After hearing of my travails they offered to send me replacement parts free of charge. Granted, there’s probably not a lot of cost involved but the gesture is very much appreciated! It was a nice pick me up after I had already spent several hours kicking myself for being so dumb. Note to self, any signs of binding and STOP. I’m sure there will be other similar encounters before this project is finished so I’m mentally preparing myself for future mistakes.
Anyway, the round-about point of the story is I likely created my own headaches by anodizing the suspension. The toe link assembly is not one where you want ANY slop and the tight tolerances at this joint probably got screwed due to the thicker oxidation layer. I had made it a point to lightly touch up this location with sand paper but I probably didn’t hit it hard enough and the original clearance went to a transition then interference fit. Keep this in mind if anodizing your suspension. Do test fits and STOP before anything binds on you.
Thanks to Fran/RCR for helping me out!
