I am admittedly way too OCD about the details and I’ve gone around in circles several times trying to figure out what to do with the suspension.
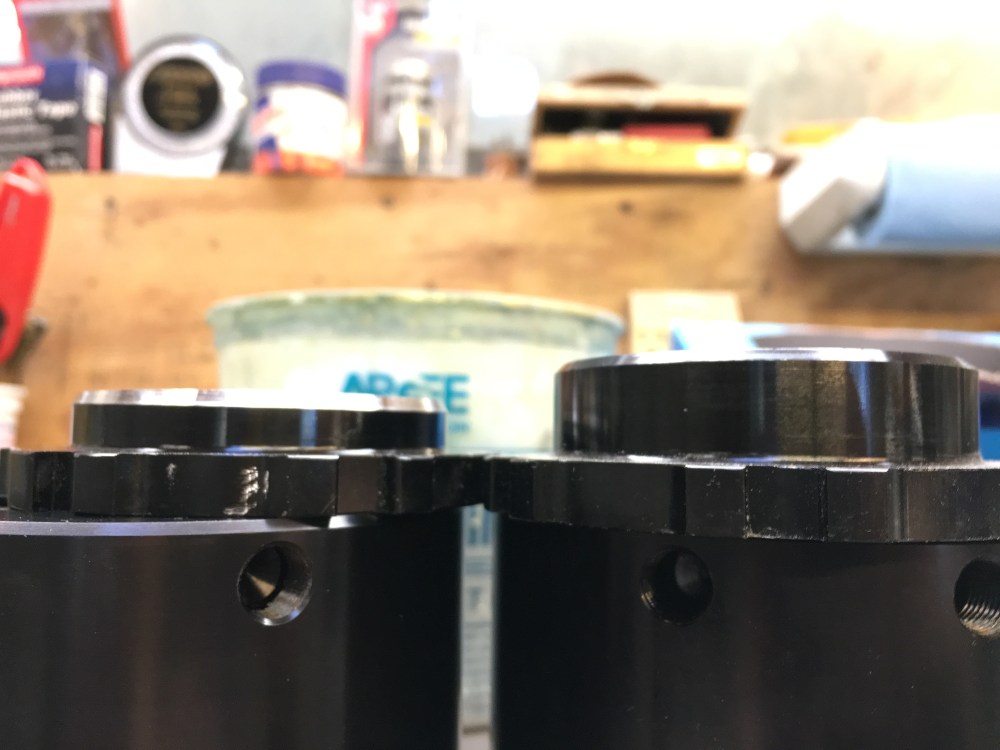
A majority of the suspension is billet aluminum. On its own, it’s as I said, automotive jewelry. Up close, there are a few warts which have bothered me and I’ve spent way too much time thinking about what to do about it. As finished, there are many minor remains from the machining process. Cut lines and slight disruptions in the surface can be seen when staring at the various pieces with the light just so. Ask just about anyone in my family and the response would be “What lines?” – but I know they’re there.
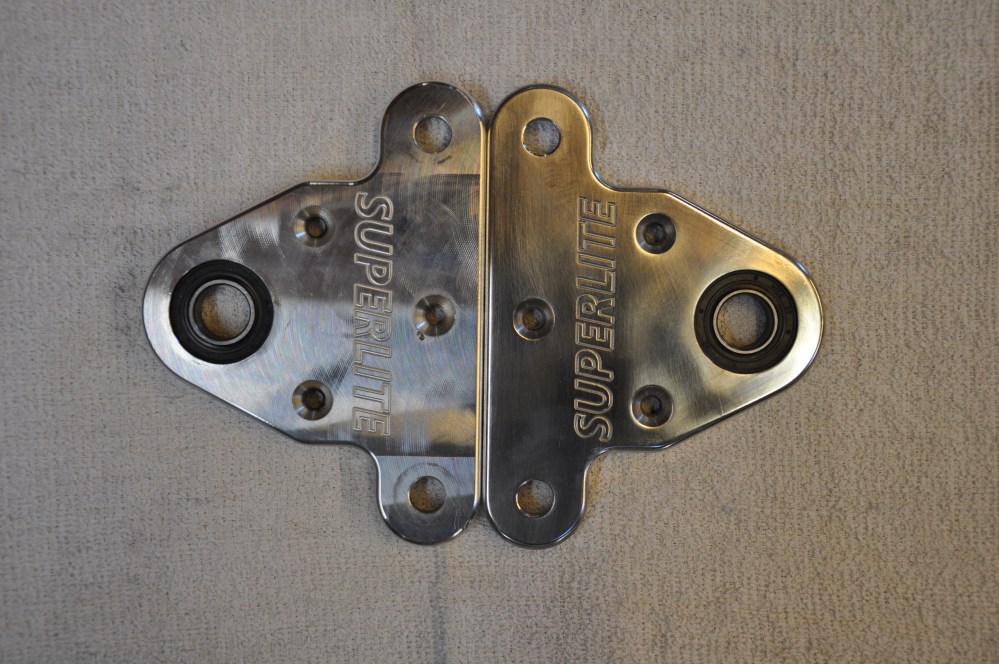
As others have done, I embarked on a journey to figure out the best way to remove these lines. After several sessions and sore arms I settled on the following recipe:
- Hand sand using 220 grit sandpaper (dry)
- Hand sand using 400 grit sandpaper (wet)
- Polish with white buffing wheel and white rouge
- Hand polish using Busch’s aluminum polish (this stuff is absolutely amazing)
At this point the results are pretty stunning. A-arms are smooth and have an almost mirror-like reflection. What next? How do I plan to protect this wonderful finish that I’ve spent so much time producing?

Sadly (pathetically?), I’ve spent several sleepless nights going back and forth. For some time I was set on anodizing. Anodizing to a Type 3 hardcoat or type 2 would produce a scratch resistant finish and I could have it done in just about any color. What color? Again, too many hours spent trying to figure this out. Ultimately, I abandoned this line of thought – after several thousand miles on this car the wheels are sure to kick up rocks which would lead to nicks and dings, some of which would break through the anodize coating. So now I’d have these beautifully anodized arms with tiny pinpoints of raw aluminum visible. My OCD would win and I’d strip the arms and re-anodize. Stupid.
So what’s better than anodize? Maybe powdercoat. I’ve got a powdercoat system (which I’ve never used) and an oven big enough to do all the suspension pieces. Powdercoat produces a paint-like finish that’s thicker and stronger (purportedly) than anodize. But as with the anodized finished, it too would eventually chip. Uuungh …
So I threw in the towel and ultimately decided I would stick with raw polished aluminum. Several folks have had great luck with Ballistol, a simple wipe on/wipe off liquid that’s meant to help stave off oxidation. I ordered up a bottle of the wonder liquid and gave it a shot – it’s too early to know how effective it’ll be but feedback from others is there’s no oxidation even after several years. I was just about heartbroken when I saw the Ballistol leaves a slight residue and immediately dulls the mirrored finish look, bringing it back to a state almost as dull as if I hadn’t done any polishing! If I wiped the surface repeatedly and with enough vigor, the shine was back – but now I’m faced with wondering whether I just completely removed the Ballistol, negating any oxidation protection I was seeking. The Ballistol also seems to leave fingerprints like ankle biters surrounding a freshly washed car.
Blah, I give up. I settled on going through with the whole rigamarole of polishing then following up with the Ballistol. If the suspension gets corroded, nicked, or dinged I always have the option of pulling the entire suspension and doing this all over again!
… Or maybe I should just anodize it, get the corrosion protection and fingerprint-free finish, and live with it if it gets damaged.
time to get off the crazy train and just move on. It’s a problem for me to have so much time between doing things to dwell on the inconsequential.
So the suspension arms are now cleaned up and ready to go back onto the car!
Next step – assemble the front shock and bolt the front A-arms to the chassis. Erm… Houston, we have a problem.
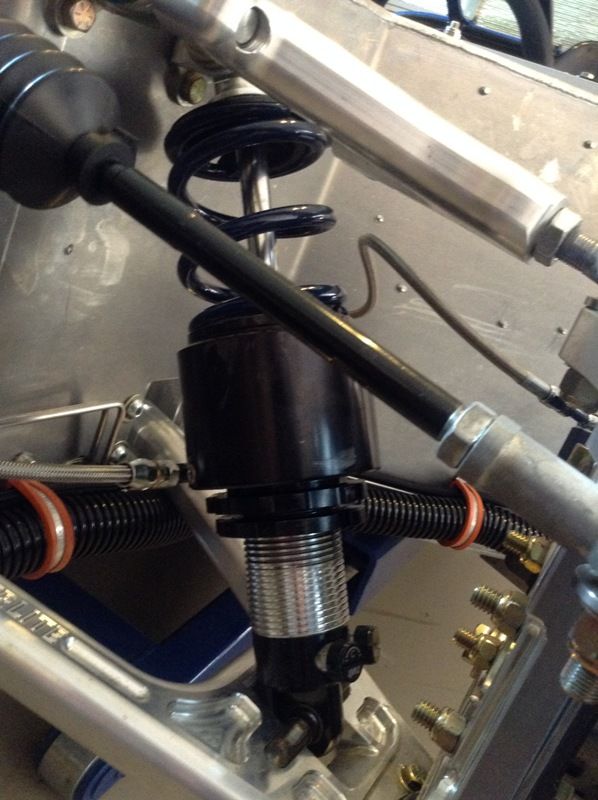
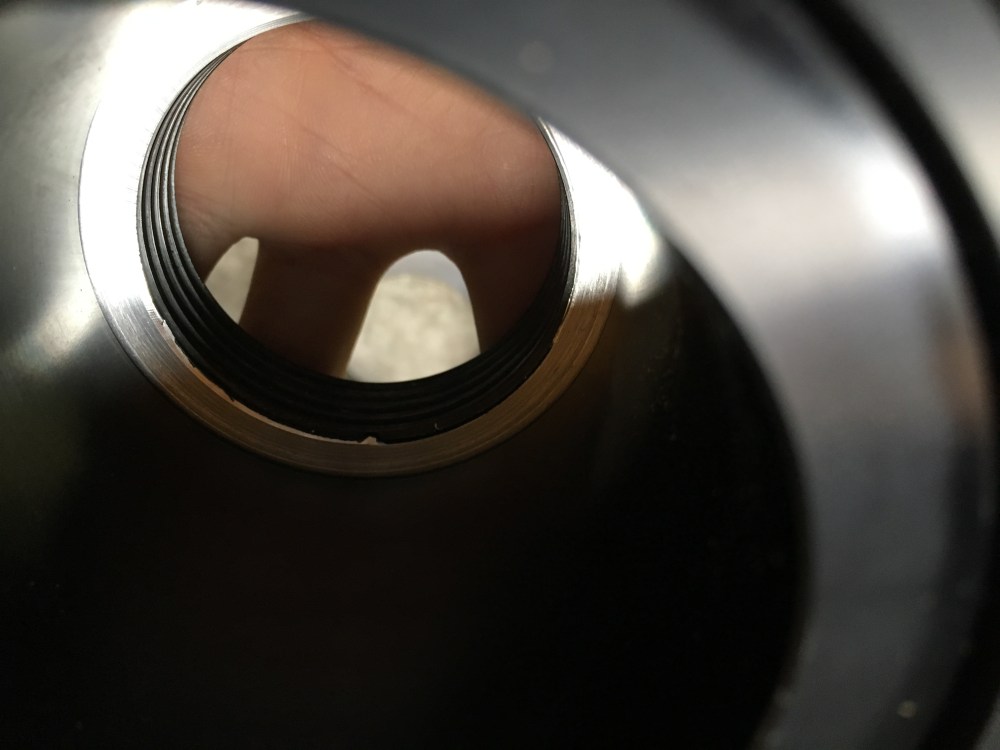
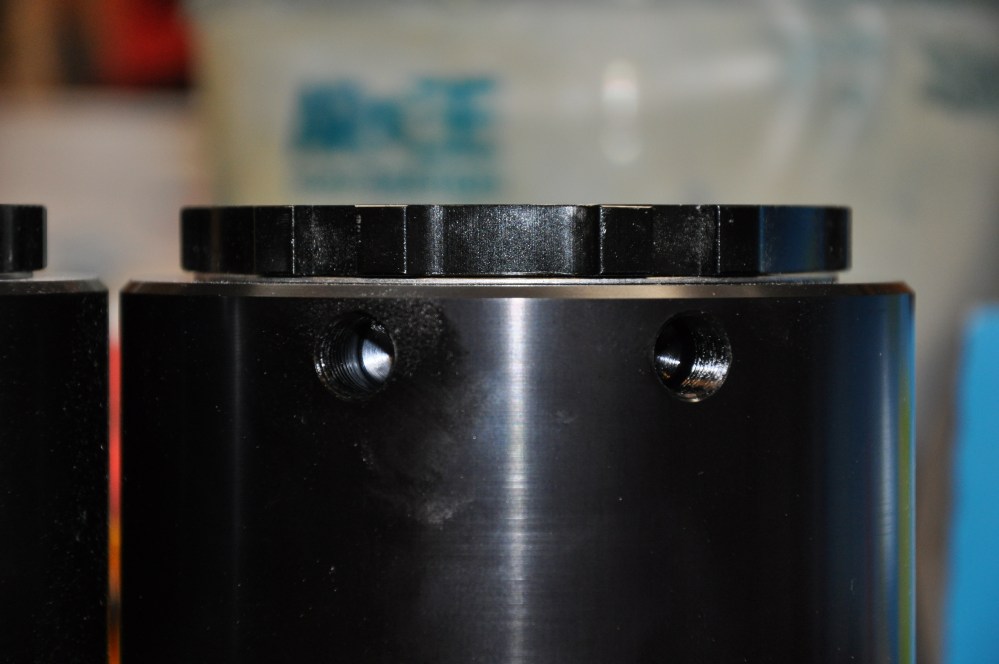
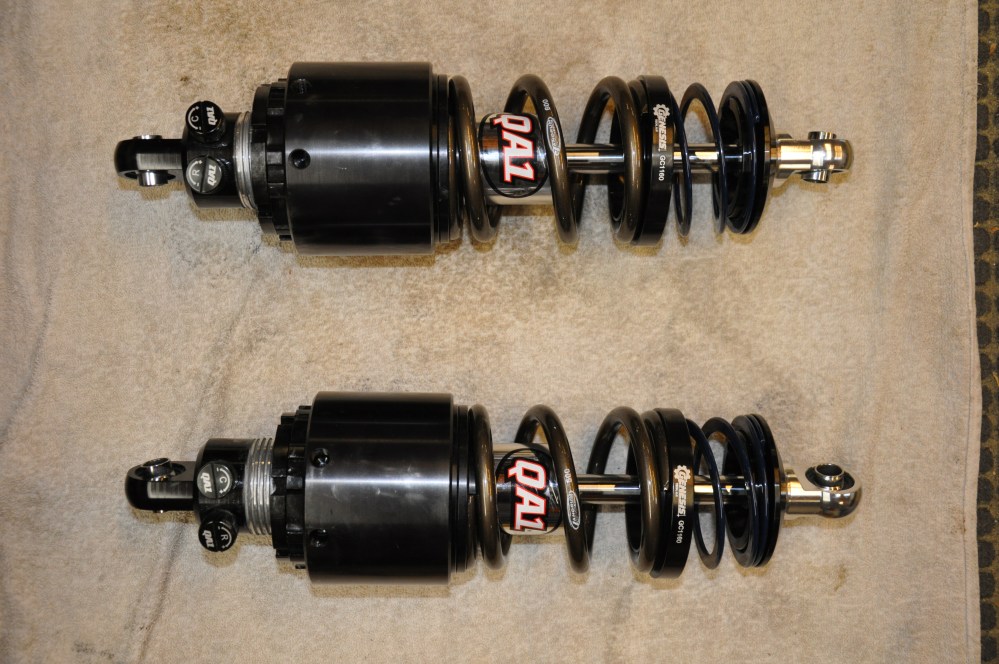
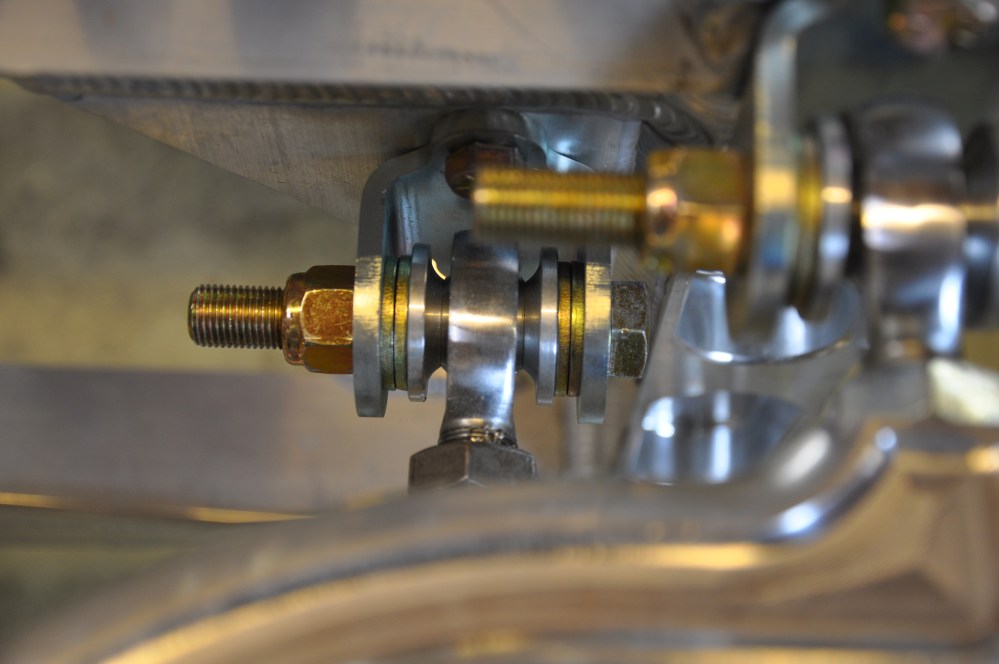
I ordered the optional front lift system. This incorporates a hydraulic lift cylinder which sits on top of the front springs. When pressurized, the cylinder expands and effectively “pushes” on the front springs which in turns pushes down on the suspension. This provides an additional ~2″ of lift at the front end – just enough for speed bumps and the occasional street ripple (this car is low!). Anyway, when configuring the front shock to be used with the lift cylinder, the cylinder is installed between the preload adjustment collar and spring. Unfortunately the preload adjuster protrudes about ~0.500″ into the lift cylinder while the lift cylinder only has ~0.375″ of clearance. Installing these two without modification would mean the suspension would ride on a small lip (about 0.080″ or so). Over time, and with repeated shock loading, I expect one or the other component to deform. While this shouldn’t create a dangerous situation, the result would likely end up with a decrease in static ride height (requiring a simple adjustment) or possible seizing between the lift cylinder and adjustment collar (a much bigger issue for adjustment and serviceability).
Here’s what it looks like unmodified:
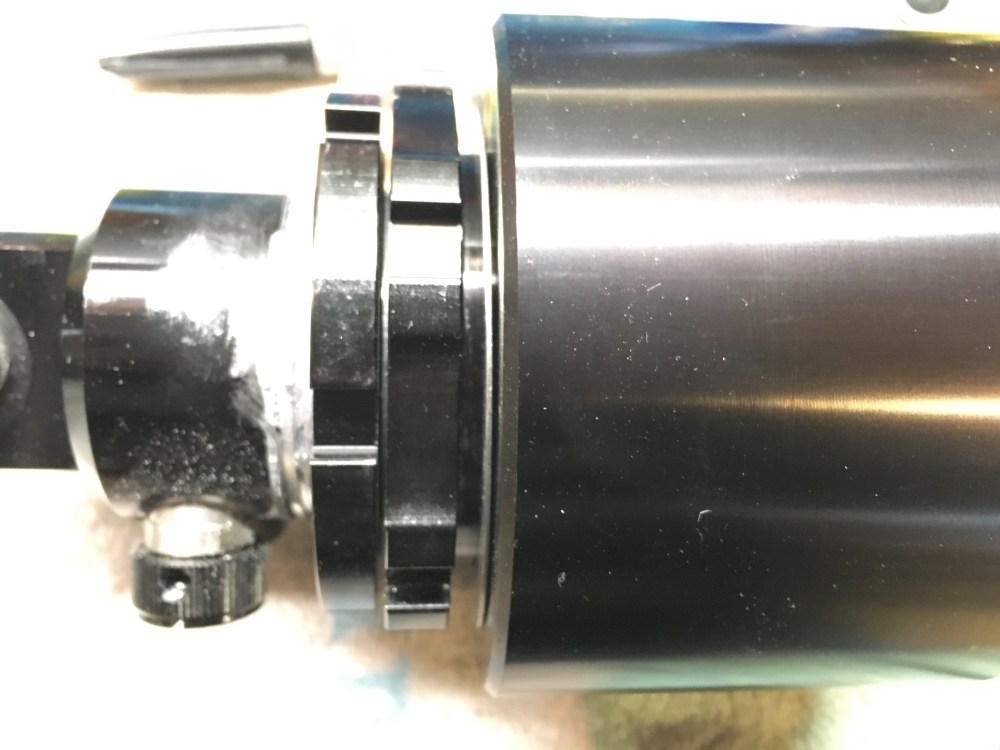

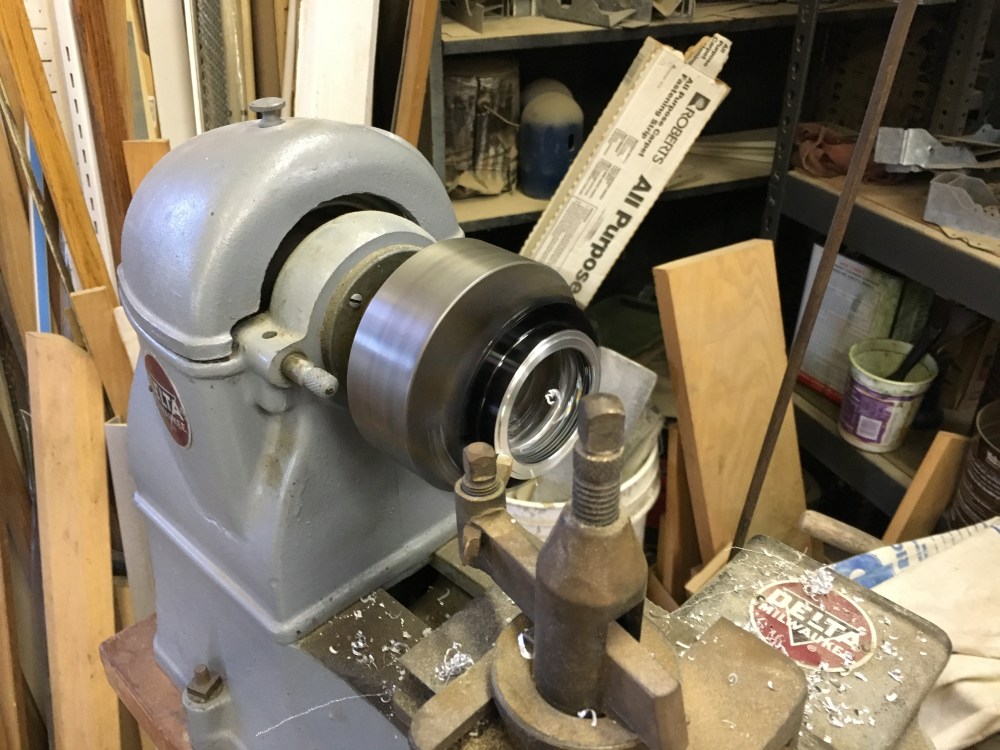
As luck would have it, Bob had recently been bartering his automotive repair services and received a really sweet lathe in exchange. A lathe is just the tool I’d need to rectify the interference concern at the front shock. The simple solution was to machine the preload adjuster lip down enough so it would sit flush within the lift cylinder body. This would allow all the loads going through the shock to be taken up by the flat face of the adjuster – as it normally would in the standard configuration. Kudos to RCR for offering to perform this mod FOC but lucky for me Bob had just pimped himself for this awesome lathe!
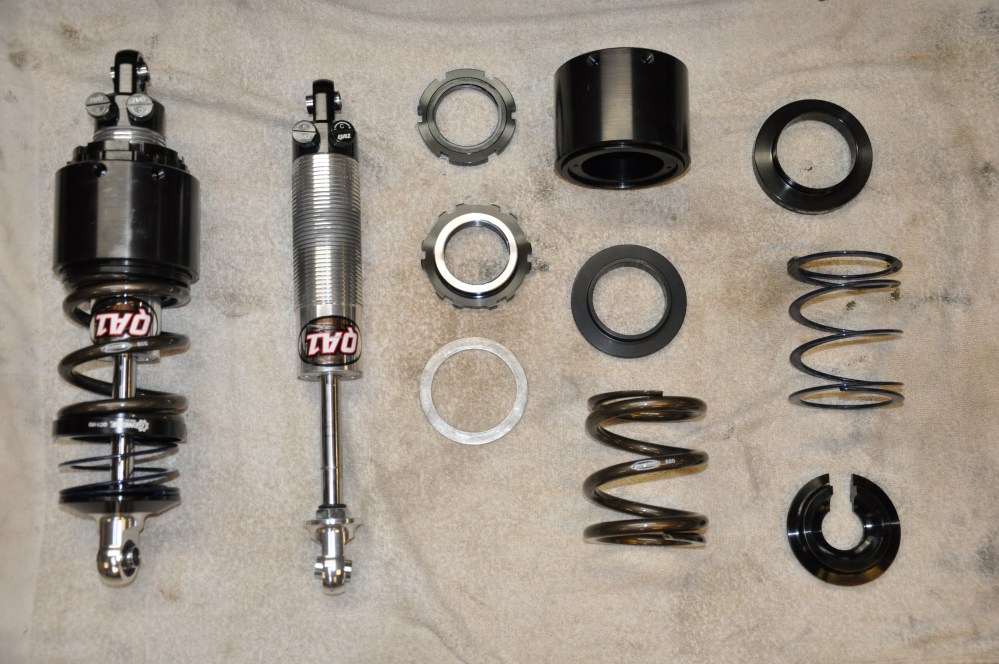
Keen observers will note I’m running two springs in the front shock. The thinner spring is a “zero rate” spring; its spring rate is about 25 lb/in which is tiny. It’s meant to expand only when the suspension becomes fully unloaded. Due to the presence of the lift cylinder, this requires me to run an exceptionally short front spring. A drawback of this short spring is it reaches full extension fairly quickly. The only time this *should* occur is when the car is on the lift with the suspension in full droop. The paranoia in me says this is a street car and I’ve been known to do stupid things. Something stupid I might one day do is not pay attention and hit a really big bump – so big as to bounce a corner of the car into the air. OK, not likely, but what if this did happen – would it be possible the suspension could momentarily become unloaded such that the spring could come out of alignment? Maybe.
I agree, sounds like a calamity of epic proportions and if I really did this maybe I’d deserve to have the spring fall out. However, with these zero rate helper springs I would luck out and only suffer a bruised ego should I happen to get the car airborne. And maybe a cool story.
Parts used (ordered from HRP):
- Helper spring: Hyperco 2.50″ ID, 4″ free height, CS100
- Helper spring guide: Genesis 2.5″ guide, G1160
In addition to running zero rate helper springs in the front shock I’ve upgraded the bearings to steel. The as delivered shock uses a teflon bearing between the bushing and shock body. Over several thousand hard miles these bearings have been known to wear out, resulting in front end slop. Not an issue if you’re keen on preventive maintenance and keep on top of checks. Given that I want this car to be a near DD (and I’ve been known to be lazy) I’ve opted to go with the upgraded bearing configuration now before getting the car on the road.

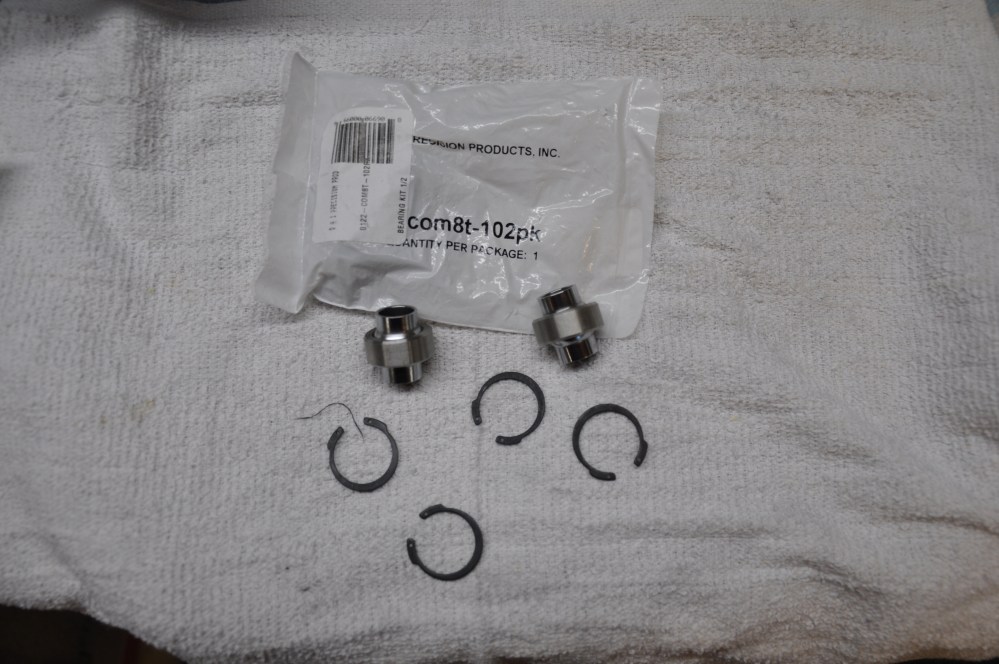

Installation is fairly quick and easy. A pair of snap ring pliers and about 2 minutes per end. The rear shocks as delivered had already been upgraded to steel bearings. At the time of this writing the upgraded bushings were cheapest from Speedway and are PN COM8T-102PK, 1 package required per shock. I believe earlier kits were delivered with teflon bearings in the rear shocks so I’m not sure at what point the improvement was rolled in so be sure to take a look at your setup before ordering. I happen to have an extra 2 sets of bearings on my shelf due to not checking.

- Polished suspension pieces – CHECK
- Assembled front shocks – CHECK
- Suspension bolts – CHE… damn …
As received, the bolts in several locations are excessively long. Not an issue or concern, but a bit of an eyesore for me. The general recommendation is ~3 threads past the captured nut is sufficient for bolt length.
Alright, next up – shorten bolts.
Bob keeps telling me – “This is a driving car, not a show car!” I need to pay him more heed if I’m to actually build this thing.
After I shorten a few bolts.

One Comment Add yours