This is a new word for me – frit. What’s a frit? That black band surrounding your windshield with the little dots – that’s the frit. It has several uses for being on a windshield; if you’re really curious follow this link.
On the SLC, the front windshield has a factory applied frit – at least on newer cars. I believe the very earliest cars didn’t have a frit at all and builders had to apply their own. The factory supplied headlight covers, windows, and rear “glass”, however, do not come pre-fritted. They’re thermoformed polycarbonate sheets with a protective anti-scratch coating on both sides.
I chose to add a frit to these pieces for cosmetic reasons. Having the frit will hide the transition between bodywork and polycarbonate pieces. It’ll also help hide any bits of dirt that migrate into the space between the poly “glass” and the underlying fiberglass. In truth I had planned to go sans frit but there were issues with my black base coat in several areas and applying a frit to the poly pieces will hide the paint issues.
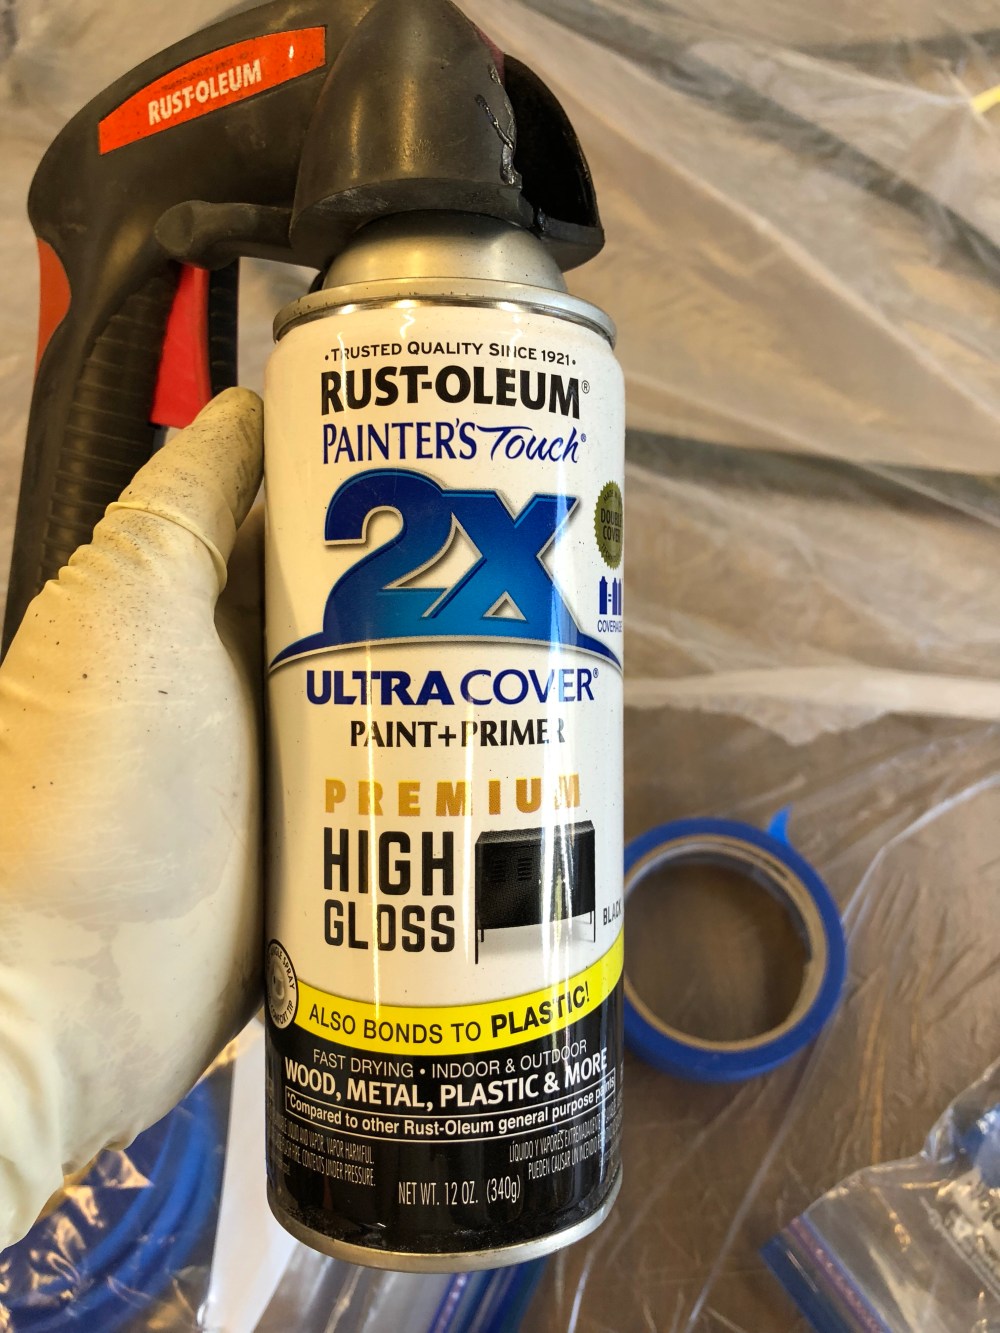
DCarter put together a really nicely detailed study on his frit experiments. Over the years builders have used several different methods for fritting and it was about time we figured out the latest and greatest on this subject. See post #282 of Dan’s build thread for details. Dan’s experiments showed that Krylon Fusion spray paint came in as the winner, just beating out Rustoleum’s 2x paint + primer.
So what did I do?
I went with #2.
I went down to the local HD and couldn’t find a can of the Fusion so I picked up a can of the 2X. What can I say, I was in the mood to frit. They had a NEW Premium High Gloss version and the sweet packaging just spoke to me – I had to get a can of that premium high gloss stuff.
Frit up was the headlight covers. I figured if I ran into fritting issues it would be less obvious since my headlight bucket area is already painted black.

Job 1 and I already screwed up. The cover on the left was my first masking job and the cover on the right was my second. I have 2 (actually 3) types of tape on the covers. The yellow tape has a stronger adhesive than the standard painter’s blue tape – so it’ll give a better seal against paint migrating underneath. The dark blue tape is a vinyl type that’s much more flexible than the other blue or yellow stuff. This is the one you want to use when creating your actual edge – and it’ll be the first thing you pull up when unmasking.
So what did I do wrong? On the cover on the left, I applied the dark blue stuff first, then the light blue. So when I went to unmask my cover it meant I had a tougher time pulling the dark blue tape up because it wanted to lift the other tape with it. This doesn’t make for a clean “rip” as you’re lifting the tape and it meant my frit wasn’t super sharp.
My other mistake was I waited too long before pulling up on the tape. I gave it 2 minutes before pulling and by this point the paint had started to gel/set up and it didn’t tear cleanly, giving me a rougher edge. Frit. Thankfully this only happened in a few areas.

The engine cover was the next piece of poly to be fritted after getting fitted. I had worked on this piece so long ago I’d forgotten that I only roughed it and it needed a little more cleaning up before it was ready for the frit.
A builder recently asked so I’ll add this here for others as well –
Cutting the polycarbonate:
When cutting my poly engine cover I first used a medium blade on a standard jigsaw to make my rough cut. I left myself about ~1/8″ of safety (be sure to protect the poly from scratching due to contact with the jigsaw). After the rough cut was made, I followed up using a 1/2″ band file belt sander. I had initially tried using sandpaper + block to inch up to my final edge but it was taking FOREVER. That belt sander get the job done much quicker and still leaves a decent edge (even with an 80 grit belt). After putting down the belt sander I followed up by hitting the edge with a hand held piece of sandpaper, just to knock down and clean up any pieces still hanging on. I didn’t bother to use anything finer than the 80 grit since I was planning to paint the edge as well.
Anyway, back to the fritting. Having learned my lesson I masked the cover as I should have – with the dark blue vinyl tape last. A few minutes channeling my inner Banksy and it was time to remove the vinyl tape. As Dan discovered, pulling the tape at a very sharp angle (almost back onto itself) gave the best edge. Lesson learned from before, instead of waiting 2 minutes to pull the tape, I did it almost immediately. Once the cover got the last coating I ran back around hitting the vinyl tape with another wet coat, counted to 20, then peeled it back. This time the frit came out much better/sharper.
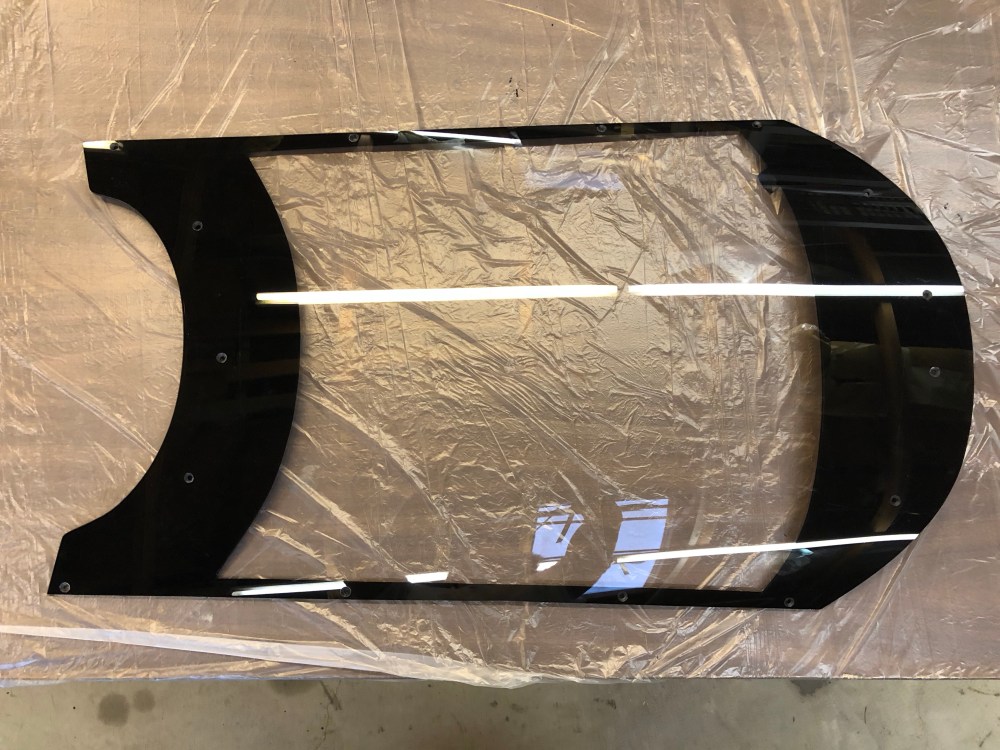
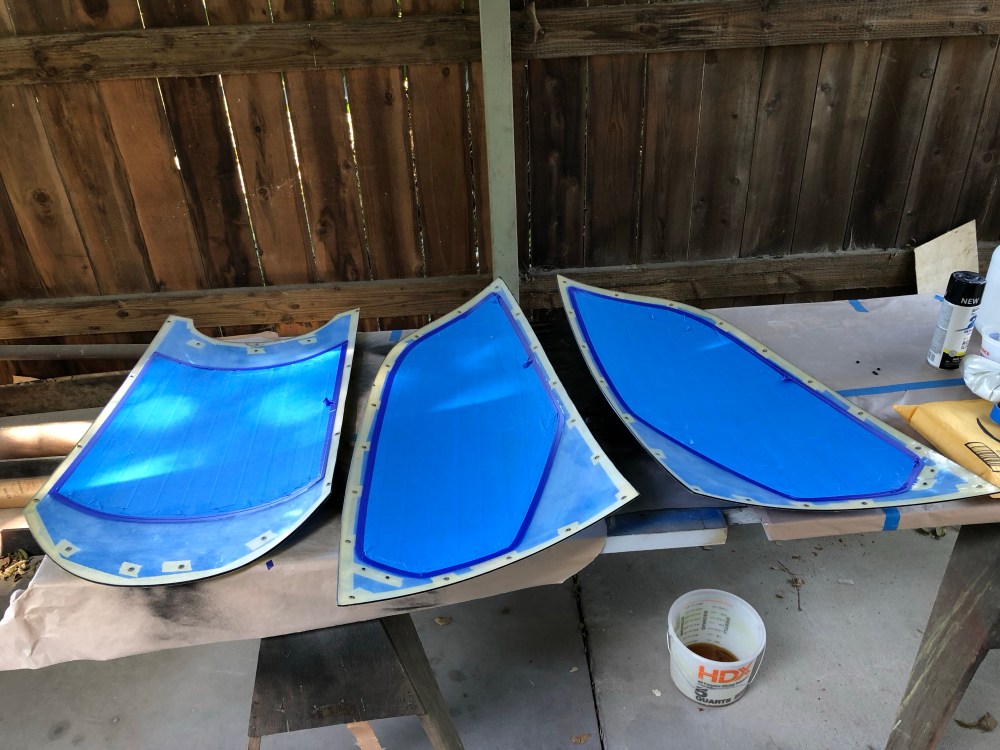
The last pieces to get the frit are the side windows.
It occurred to me I haven’t really gone into detail about the process and this is a step I was a little unsure of when I first began – so maybe this will help others:
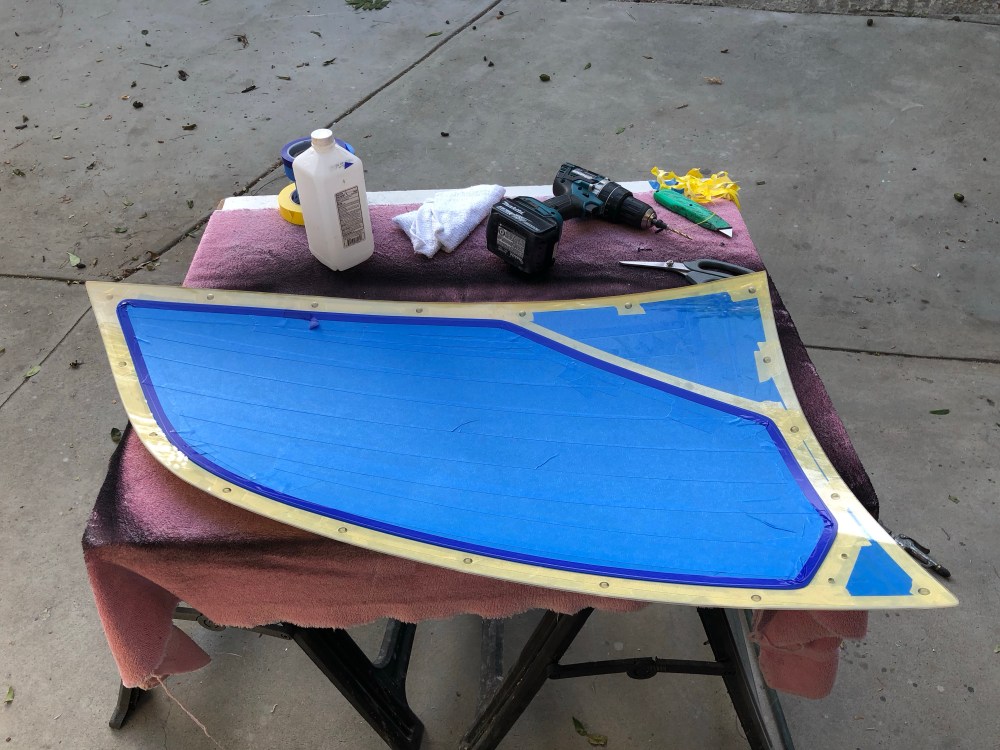
It’s important to keep the poly pieces as clean as possible. I don’t know how sensitive the anti-scratch coating is so I tried to be careful with any rags or chemicals I used. To clean the poly pieces I used a cotton rag and Isopropyl alcohol. It doesn’t seem like the IPA negatively affects the coating though you’ll want to be sure to give the workpiece a good wipe down so there isn’t any residue before painting.
I wanted my fritting to end just past the fiberglass – so from the inside looking out, the edge of the frit would just be visible. I found the best way to do this was to temporarily secure the poly piece to the body then trace out the edge using blue tape.

I then followed my frit line using yellow masking tape. The contrast between the blue and yellow colors makes it easily visible to see the frit line from the other side. For any holes, I covered them with a single piece of yellow tape and pressed firmly – this ensures any paint from the inside won’t bleed out onto the exterior surface via the screw holes.

Next, I applied masking to any area that would not be painted. As I approached the frit line, I left a few mm between the edge of the blue tape and the frit line.


Be sure to run a tack rag around everything before pulling out the rattle cans or you may trap some fibers between your first coat and the glass – which will be painfully obvious on a gloss black surface.
It took me a few runs at bat to get the painting down. The Rustoleum 2X stuff sprays pretty well but I was dancing with getting a wet coat down versus spraying so much I generated a run – luckily no runs were produced during the fritting process. Generally you want to start with 1-2 light coats before going heavy on most painting projects but here, I wanted to go heavy right off the bat. I didn’t want any tiny aerosolized paint particles to potentially get under the tape edge. I also wanted to create as smooth a look as possible on the exterior side so by going heavy you ensure all the paint actually touching the poly is laid in one go and doesn’t dry in splotches.
After the first heavy coat I gave it 10 minutes before following up with a second heavy coat. On the second heavy coat I finished it by doing a quick spray around the frit edge one last time, then gave it a short 20 count before pulling on the vinyl tape. The paint is thick enough it won’t migrate past the frit edge once the tape is lifted. You want to pull with a very steady force, as any jerking of the tape can cause little paint hairs to form – which then fall back onto the poly and gives it a rough edge.

The directions on the can says maximum adhesion and hardness occurs after 5-7 days when painting on plastic.

Frit.
Frit count = 43
**Post frit update:
Soo … I totally f’d my frit. In the procedure above you’ll note I don’t mention anything about preparing the polycarbonate surface to receive paint. I’d run a trial earlier on some scrap pieces and my adhesion test (scraping of a fingernail) showed no performance difference between sanding the polycarbonate or leaving it as-is. Boy … I found out pretty quick when I attempted to install my weatherstripping that the paint does NOT stick to an unsanded surface!
So here’s how I fixed the glitch:


The second round of fritting went much more successfully. The exterior side does not show a hazy black border from the sanding.
Frit disaster averted!
Frit count = 50

Cam,
Your build is coming along nicely. I’ve been thinking about building an SL-C myself, and enjoy watching your progress.
LikeLike
Hey Daniel – thanks for the feedback, appreciate that you took the time! Best of luck if you decide to take one on, feel free to hit me up with any questions.
LikeLike