After a pretty awesome time go-karting around the neighborhood (and not jumping a curb), we had put the SLC under covers until it was time to bring it down to Hanson’s for exhaust work. Wouldn’t you know it? We’ve been having a crazy terrible drought this year and it seemed today was the day for rain.
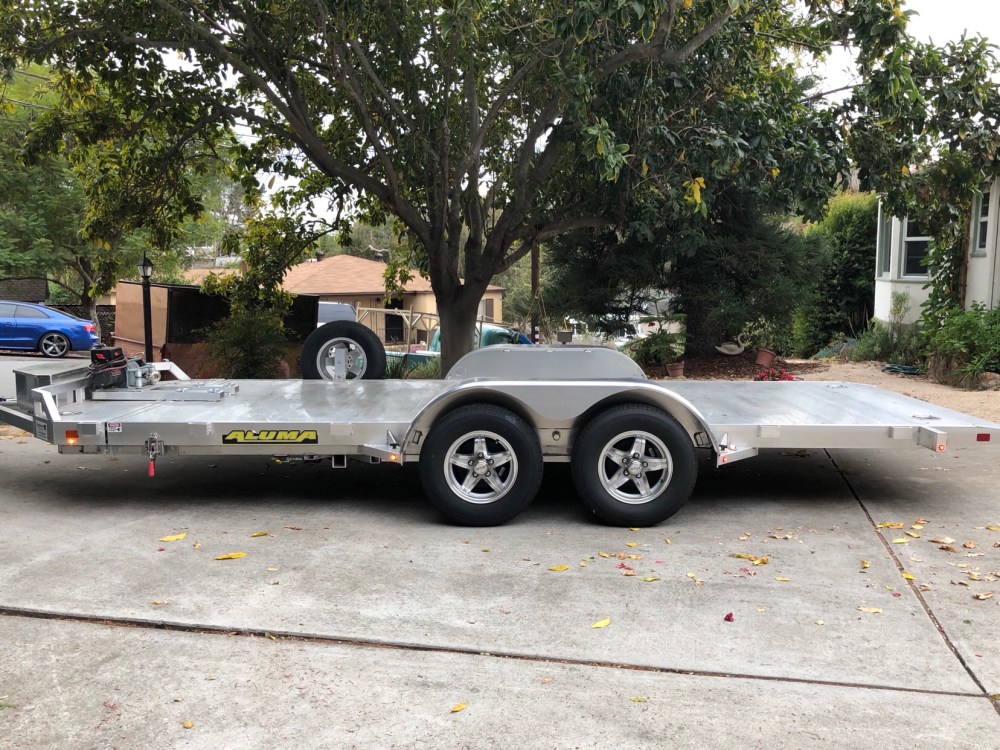
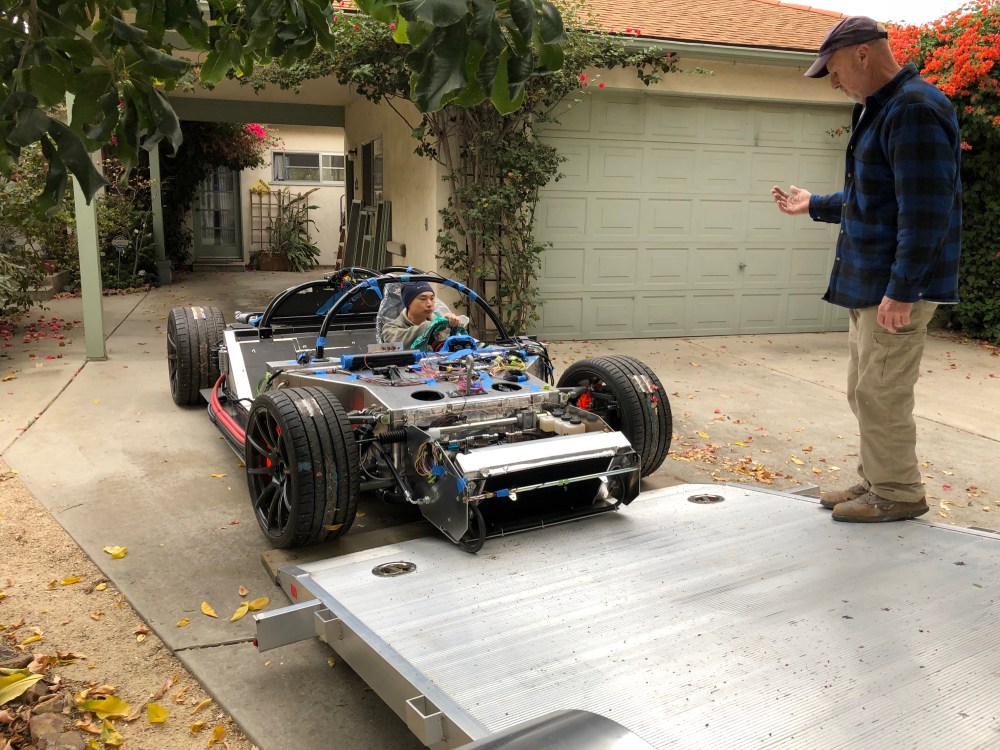
The clouds were looking pretty ominous as we loaded up the trailer. Loading the SLC went fairly smoothly though I was a bit nervous. Bob’s trailer has a tilt feature – the entire bed tilts upward so you can drive right onto it. With no front end and a 2×6, the SLC was *just* able to get onto the trailer without making contact along the radiator box. Once a car drives up onto the trailer, the balance point shifts forward as the car drives forward, eventually causing the trailer bed to lower until it’s horizontal.
Not so easy with the SLC. The SLC is a mid-engine car, with much of its weight located near the back, especially while in go-kart mode. With the nose pulled as far forward as possible, we were able to shift the weight forward just enough to get the trailer lowered.


A few hours later and the skies opened up … a deluge ensued.
I make light of the rain for the sake of this blog post but many homes were damaged due to flooding over the next few days – I hope those who were affected can quickly recover.

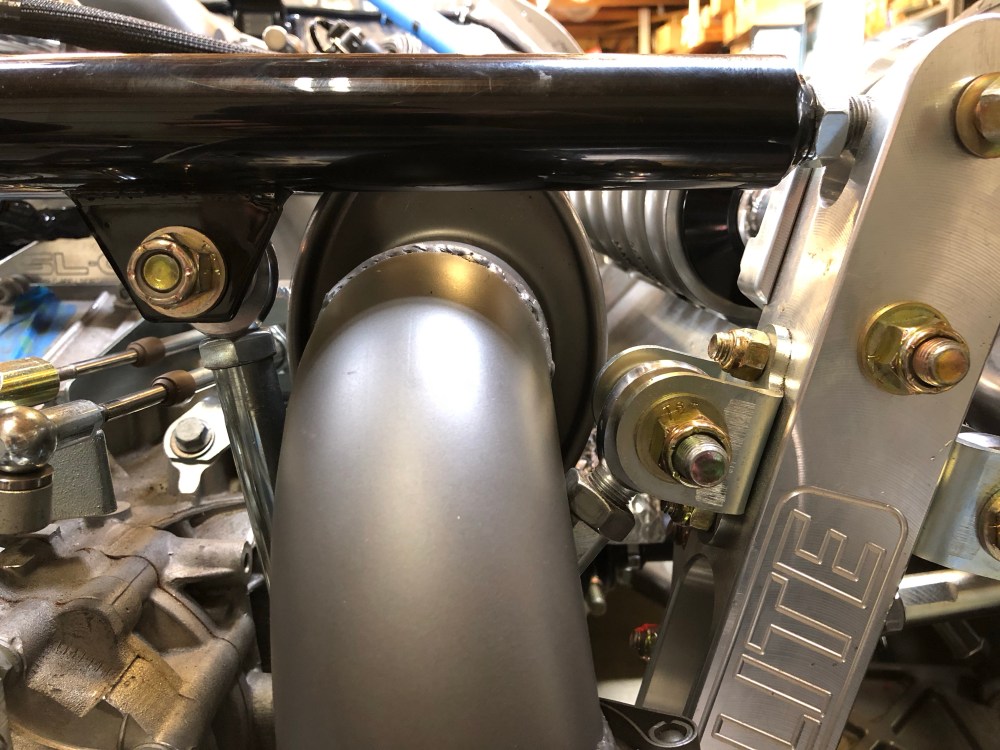
Hanson’s was pretty booked on day 1 so I came back the next morning to see how things were going. Joe’s the master exhaust fabricator who picked the shortest straw so it was his job to figure out how to cram an exhaust system into a space barely big enough to run my arm through. He started off by telling me I was nuts – but that he was going to work some magic and see what was possible. Boy oh boy, did he make some magic happen!


Joe was still working on the exhaust at the end of Day 2 so I took off to pick Ellie up from daycare. Joe was going to continue tacking things up so we could pick the car back up first thing in the morning. Bob was about to hit the road with his truck for an out of town trip so I needed to get the car back to continue working – we’d get the exhaust as far as we could and I’ll come back to complete the work once Bob’s back in town.
I woke up the next morning and was stunned – 3 days of rain, straight. Pretty much unheard of for San Diego, and we were having one of the driest years in quite a while. I drove over to Bob’s so we could collect the trailer and head over to Hanson’s for the pic-up. We were both a bit anxious about trying to load the SLC in the rain but figured we could fall back on the winch if needed. Turns out we didn’t!
When we arrived at Hanson’s the rain had eased up. Clouds were breaking and things were looking brighter!
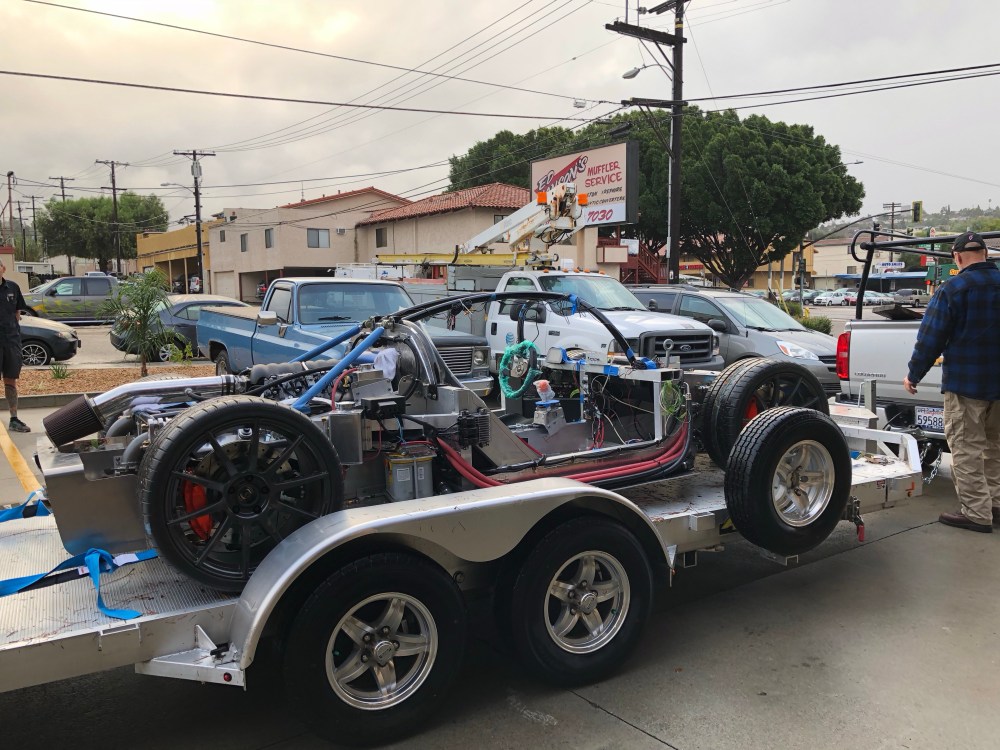
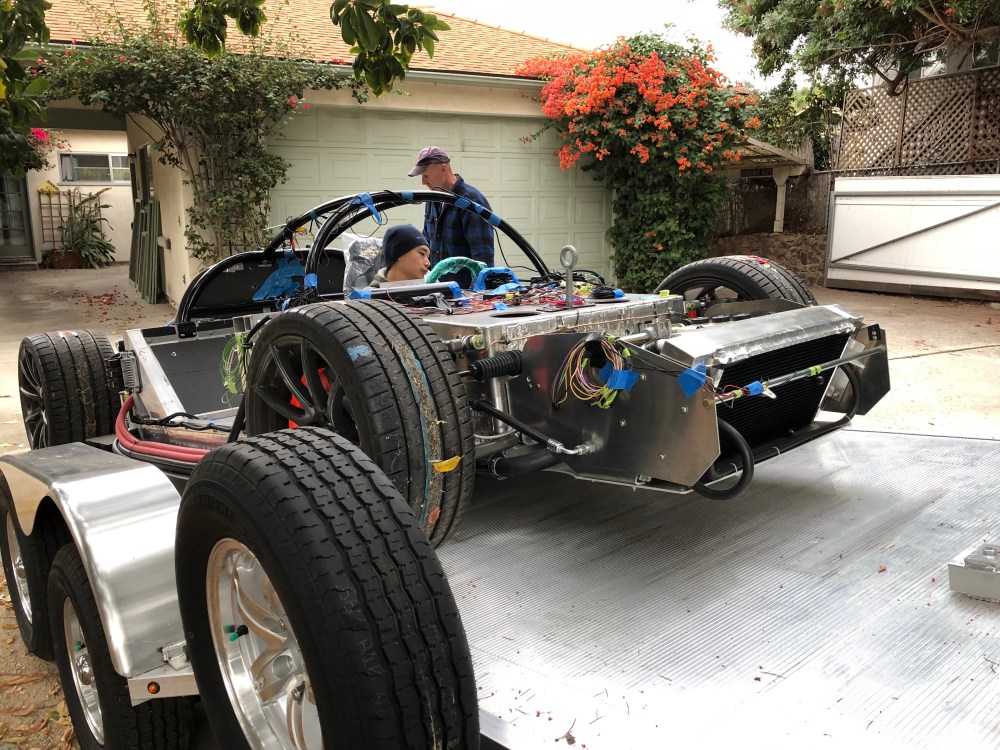
Getting the SLC off the trailer and back down into the garage also went without a hitch. I’m really surprised by how much ground clearance the car has with the front lift engaged – starting to make me feel easier about using this car for around-town driving and as a semi-daily driver.
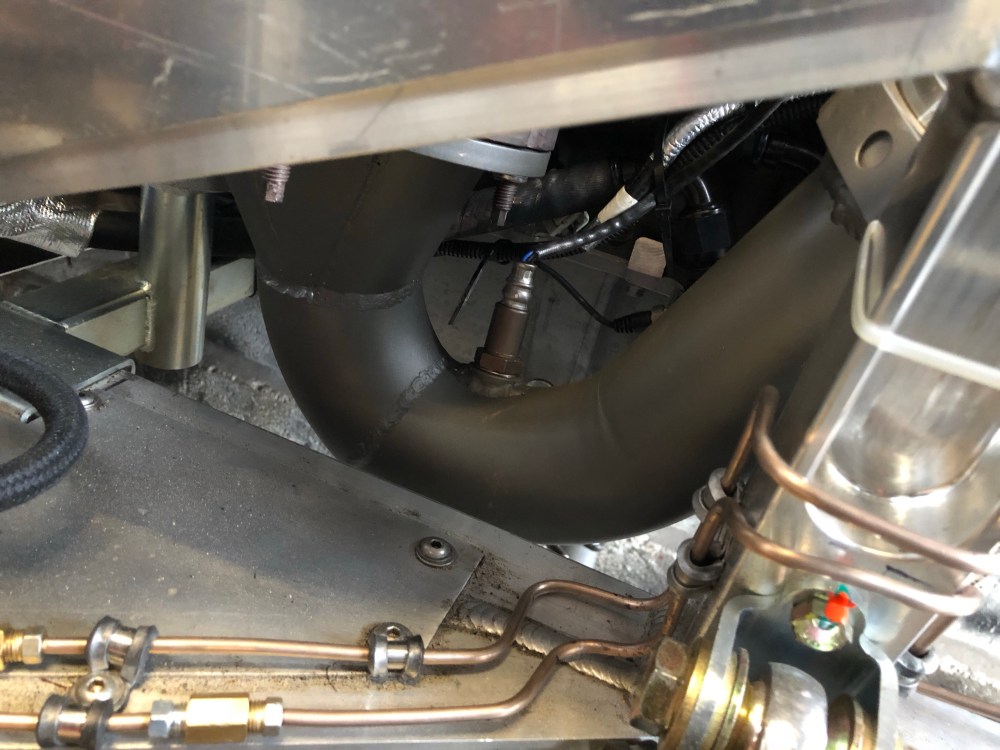
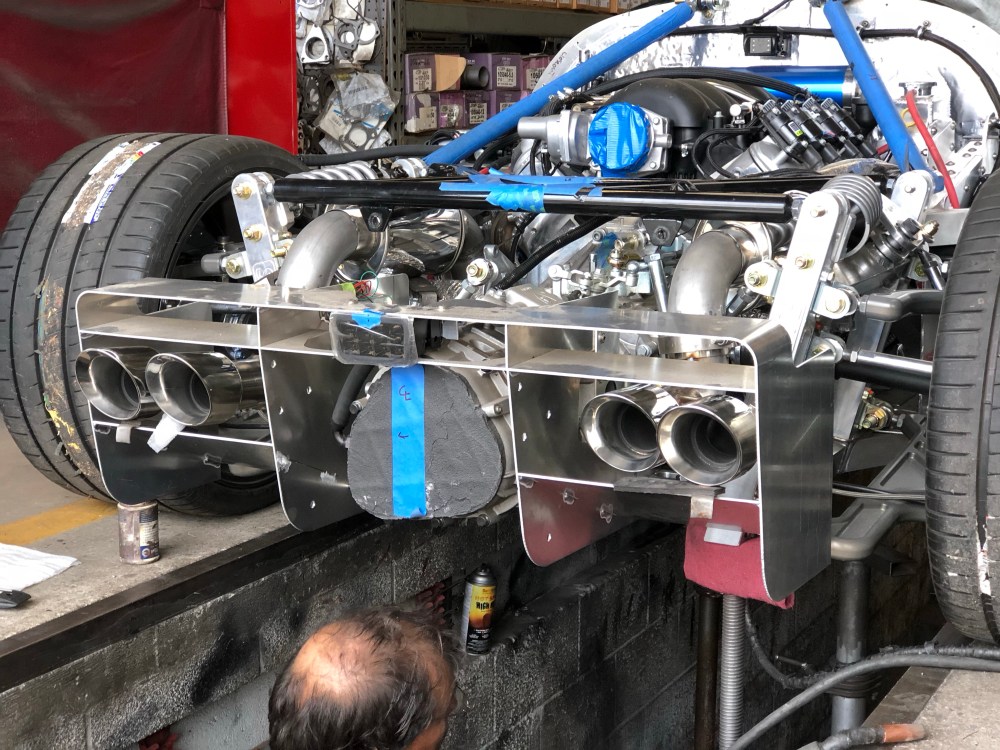
How’s it sound? AWESOME. I was a bit worried the exhaust would still be too loud given how small these mufflers are – actually, they’re billed as resonators which technically aren’t designed to muffle sound, they’re meant to change the frequency. SHackett reassured me they would quiet the engine to a reasonable level and he’s right – at idle and part throttle it’s surprisingly tame. Get on the loud pedal and the decibels shoot up pretty quickly.
Exhaust details:
- Exhaust tips: Corsa PN CSE-14333
- Mufflers (resonators): Vibrant Performance PN VPE-1142
- 3″ diameter tubing throughout
- Collector flange: ordered from Tabzone.com, PN 12212-1 (3/8″ thick)
A shout out to the awesome crew at Ed Hanson’s Muffler Service in Spring Valley – these guys are first rate! If you have any exhaust work and they’re within driving distance, don’t hesitate. Rebekah runs the front office and was really into the project. She’s a car gal at heart – she could see I was running an LS and wanted to know how I’d mated the Audi gearbox to a GM motor, what version of LS I was running, car specs, etc. Ed’s has a 5-star Yelp rating and it’s well earned; they bend over backward to give you high quality service at a reasonable price.
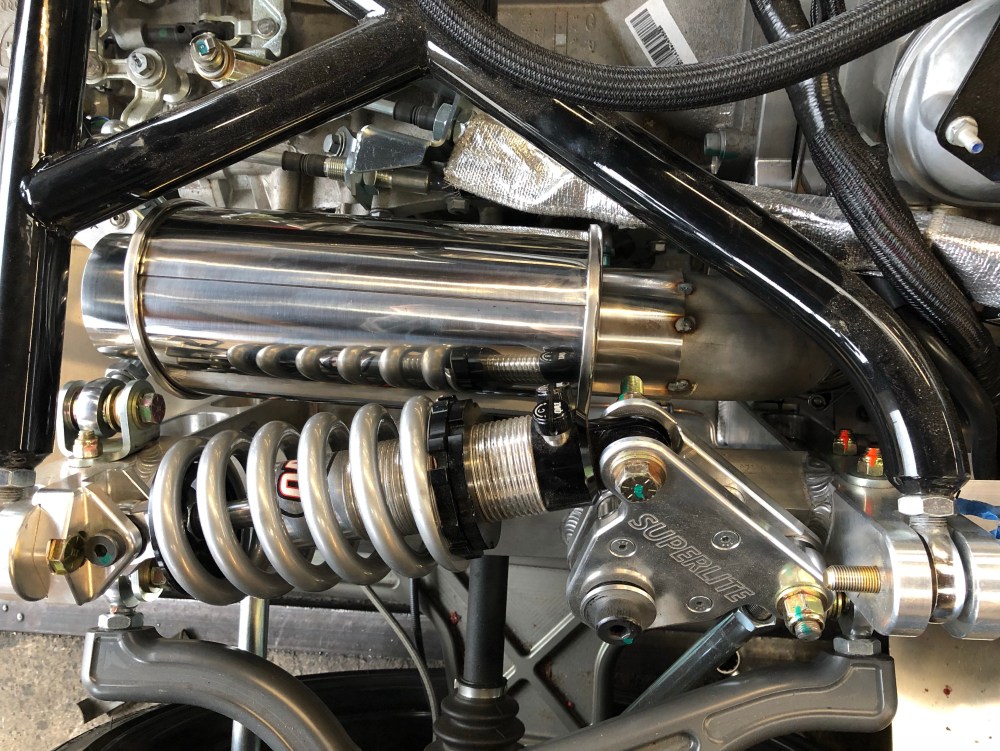
Bob’s been bringing his cars here for years, I’m glad I opted to have a custom system made. I was able to get everything exactly how I wanted and Joe is really easy to work with. I popped by from time to time on each day and Joe was always happy to have me poke my head in so I could see how things were progressing. I had all the chassis bracing in place so getting things lined up meant Joe would have to take apart the air filter, intake pipe, and rear bracing – a bit outside his normal duties but he didn’t mind at all.
The overall cost of the system was very reasonable given how much work was required – but I got a steal when you factor in Joe’s experience and craftsmanship. I’ll keep plugging away on the car while Bob’s out of town and we’ll get it back down to Hanson’s for the final welding and bracket work after Bob’s return.
I believe Ed sold the business a year or two ago; it’s great to see the new team have continued his commitment to high quality work and customer service. Thanks again to Joe, Rebekah, and the awesome team at Ed Hanson’s Muffler Service!
