Over the Thanksgiving holiday my brother in law Bob (the third, aka Bubba) flew in from Austin. I had previously had a bet with JBurer that I’d have the car in go-kart status by Thanksgiving – of course this bet was made last year before I even got into the home renovation stuff and I had clearly VASTLY underestimated the amount of time that project would take! So despite losing the bet I was pretty determined to try and get the first engine start by our previously agreed upon deadline.
Welp, I didn’t quite make it. Bob, Bubba, and I took a break for Thanksgiving but I burned one of my Get out of Jail cards with Stephanie by continuing to work on the car the following days – I thought it would be great if we could get the engine started while Bubba was still in town. It was fun to have the Bobs in the garage helping me out, couldn’t think of a more fun Thanksgiving holiday.
By now I’d figured that I was most likely going to pull the Infinity system out of the loop with respect to the critical engine operation items – namely ignition, fuel pump, and fan control. With that decision made I abandoned trying to integrate the two harnesses and focused just on getting the GMPP controller kit and AIM dash sorted enough to get the car started. I didn’t have an exhaust for the car yet so anything near the exhaust manifold exit got zip-tied out of the way. I also hung the O2 sensors near the manifold exits so I could get some kind of reading. I knew the engine was going to run way rich despite the jury rigged sensors but figured anything was better than nothing.
Electrical – check.
Since we’re in San Diego I opted to shoot for a 70/30 mix of water to coolant. It’s not critical I get the anti-freeze protection and I plan to run water wetter for the high temp protection (once the coolant system is properly bled in). On my motorcycle I used to run straight distilled water and water wetter and didn’t have any issues – I’m hoping for a similar experience with the SLC, adding a touch of coolant for the added lubrication properties.
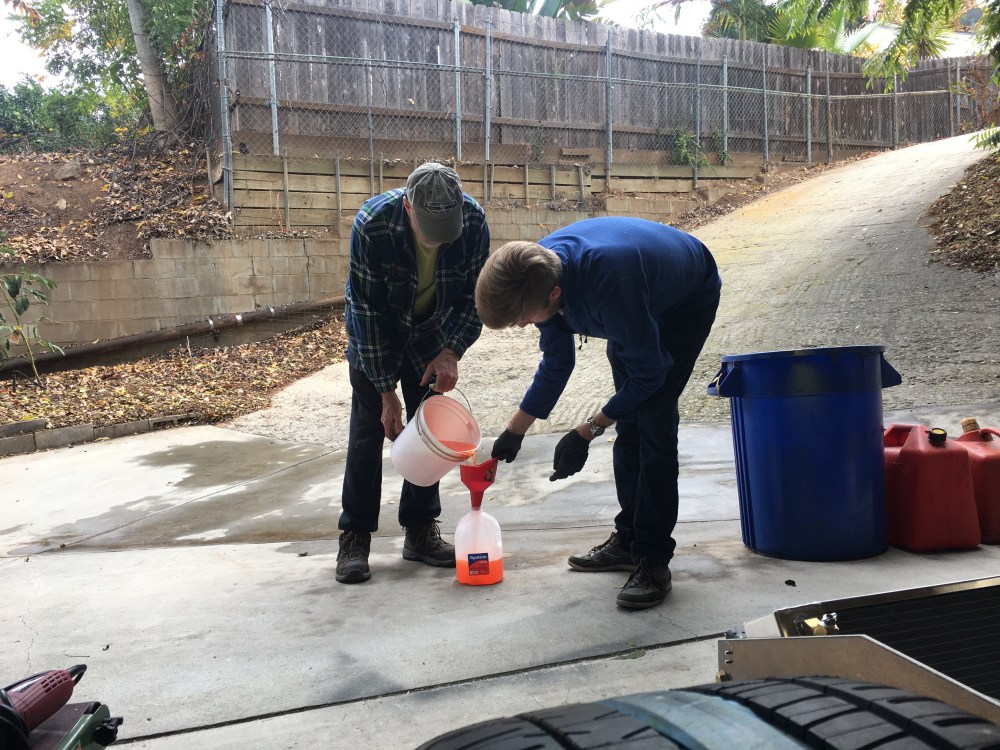
Coolant – check.
Thanks to SHackett’s blog and some email correspondence I had already known ahead of time I would need a fuel level sender conversion harness to get the kit-supplied sender to work with my AIM dash unit. Calibration of the tank went fairly smoothly – the tank holds approximately 17.75 gallons of fuel. The fuel level sender will not sense the first ~1.8 gallons as it is below the sender’s sensor leads.
Fuel – check.
I was a bit worried about the oil in the engine; it had been so long since it was built I figured all the oil passages were bone dry by now. Bob suggested pulling the plugs so we could crank the starter over a few times until we could get oil pressure to register. A great idea – we also discovered the plugs weren’t all consistent so Bubba re-gapped all the plugs to 0.040″ while Bob and I got the dash powered up so we could monitor the engine’s vitals. The laptop I was using to configure the dash was last used in May 2015 – so there were quite a few Windows updates that needed to happen before it became responsive – a very frustrating moment for me. Once all 6 billion updates were complete I was finally able to get the screen setup to monitor oil pressure while Bob manned the starter. We gave it the juice in spurts and oil pressure slowly crept up – SWEET! Double bonus, engine RPM was reading on the dash.
Oil – check.
I didn’t have an actual checklist to run through before going for the initial start and Bubba was getting ready to leave for the airport so I was starting to rush. Pro tip – work on your pre-start checklist before you find yourself caught up in the excitement of the first start. We made a quick run-thru of the car before going for the real deal.
Things we did right:
- Raised the quickjack and got the wheels off the ground – you know where this one’s going.
- Checked and verified the Graz was filled with oil. I had forgotten that the input shaft would be spinning even though the box is in neutral. If the case was dry I’d be giving those bearings a bit of a hurt. Looks like my box came filled from the factory.
- Went around and checked all engine coolant hose clamps.
- Verified all fuel connections tightened.
- Verified all oil connections plumbed.
- Verified engine oil at proper level.
- Verified master switch kills all power when switched to OFF.
Things we did wrong:
- Didn’t actually check all engine coolant hose clamps were secure – you know where this one’s going.
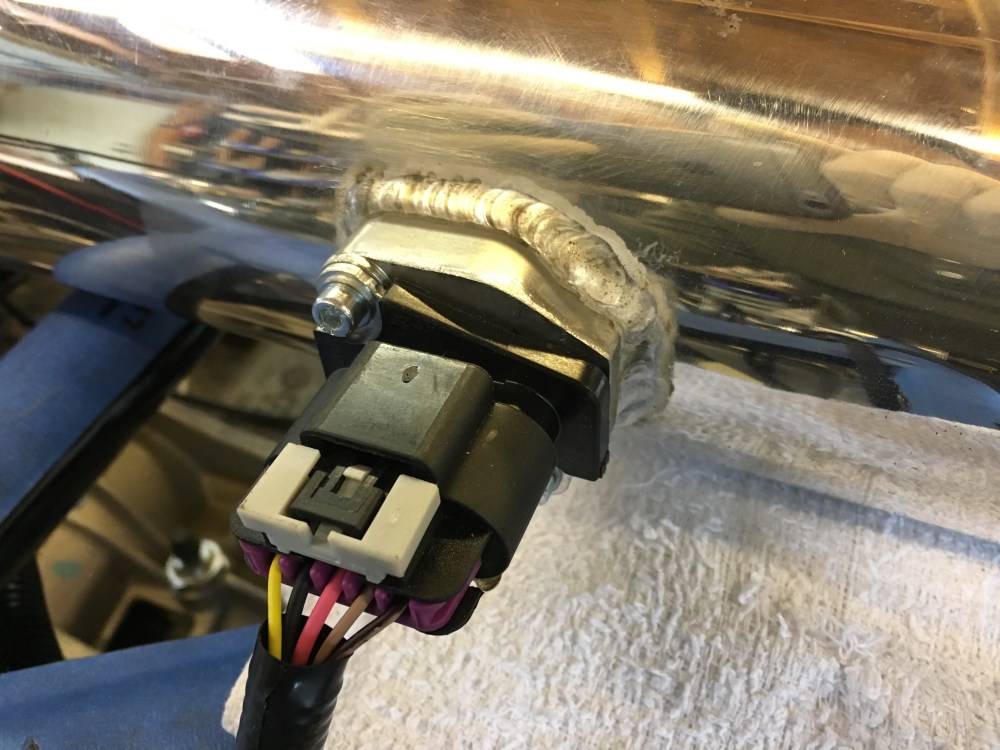
- Incorrectly wired the alternator.
Here’s the first few seconds of the first engine start – it’s actually pretty boring. The engine caught, sputtered, caught, sputtered, then ramped right into a steady idle. I don’t know if you can tell but I was pretty dumbfounded – I didn’t really expect the engine to start right up like that.
I’d heard youtube videos of the LS376/525 engine and they all sounded fairly good but I was still pretty concerned about it having too much of a lope for a street car. The cam in my blown mustang was exceptionally lopey – so much so that the car shook at idle. The SLC doesn’t use damped engine mounts so a super lopey cam would really transfer into the chassis. I’m happy to say the engine sounds REALLY good despite not having any kind of an exhaust. However, it was pretty deafening in that enclosed garage. And it was running so rich my eyes watered at times.
I didn’t care, the engine was running!! That’s the HIGH …
The WOES started pretty soon thereafter. It’s a good thing we’d raised the lift so the wheels were off the ground. In the video you can see the rear tires spinning immediately upon engine start – no, the transmission wasn’t in gear (we checked). Apparently the gear oil is thick enough to spin the tires even with the trans in neutral. I’m sure it wouldn’t have been enough torque to spin the wheels had the car been on the ground but the brakes weren’t yet functional. Maybe got lucky on this one.
We let the engine idle and revved the engine from time to time while we waited for the coolant to warm up. Bubba was manning the expansion tank and would fill it up as the fluid level went down. Temps were starting to get pretty high and I’m sure there was still air in the system but the coolant level in the expansion tank was starting to rise. To prevent mass spillage Bubba grabbed the radiator cap and tightened it down – the system began to pressurize … and promptly started spewing out of a joint near the fuel system. with the cap on coolant was blowing out the next weak link in the system. I ran over to see what was going on and could see one of the hose joints had began to separate. We killed the engine and got a closer look – yep … hose clamp free to rotate.
Coolant leak – check.
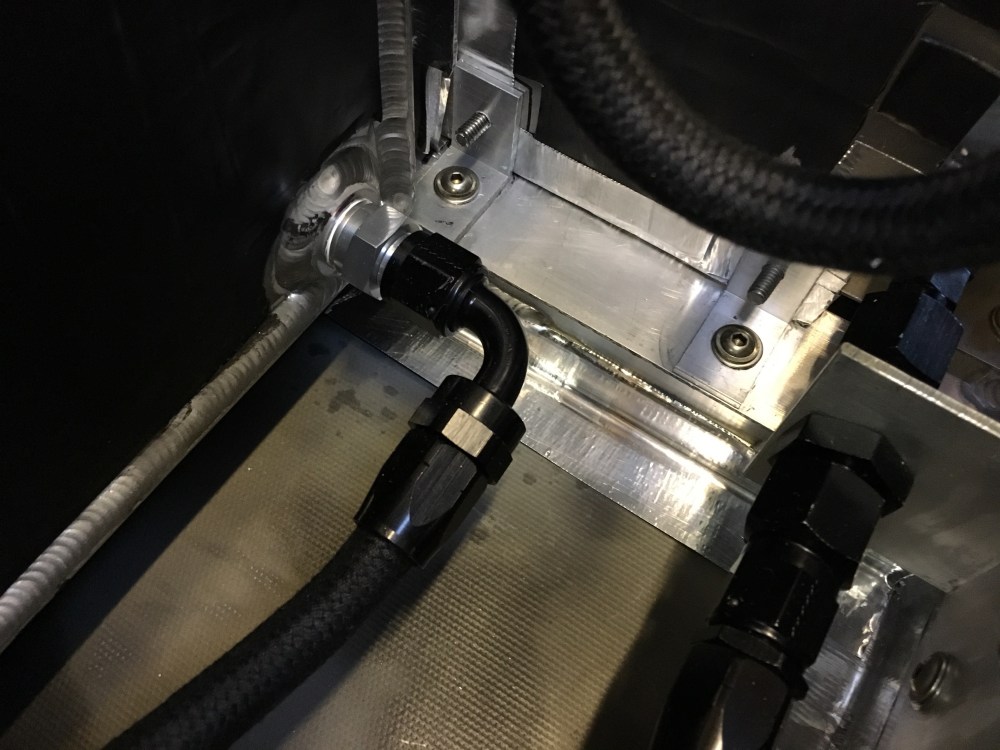
While the engine was running I’d noticed a small amount of fuel was leaking from the fuel pressure return line going into the swirl tank. Bob grabbed some wrenches and snugged it down which fixed the leak. The fitting had been tightened before, just not enough – so not quite a total miss.
Fuel leak – check.
It’s the trifecta of leaks; coolant, fuel, and yes – oil as well. I could see a puddle of oil collecting near the oil cooler thermostat. Once we shut the engine down I took a closer look and it’s apparent that BOTH fittings going into the thermostat were barely tightened down. Total miss on my part.
Oil leak – check.
We did another once over of all the fluid systems and all looked good so we gave it another go. The engine fired right up and we let the system warm back up while adding more coolant. Still got an air bubble in there and temps were on the rise. I hadn’t wired up the fans so we decided to kill it.
Flipped the master disconnect and nothing. Zero. The engine continued to run – WTH? I had connected the ignition wire to a fused location up near the front of the car and I yanked the fuse which finally killed the engine. We all scratched our heads for a bit and Bob realized we had connected the alternator to a positive junction post downstream of the master disconnect. The alternator was now producing enough current to keep the system alive despite being cut off from battery power (as it should). Jot that down – re-wire the alternator so the master disconnect will actually function as intended!
Bubba had to catch a flight so Bob dropped him off at the airport. I stuck around and mostly just sat around looking at the car. I was still feeling pretty high from hearing the engine run. I spent the rest of the time wiping the car down as best as I could; coolant, oil, and fuel was where it wasn’t supposed to be and it would make for hunting down additional leaks difficult.
Before Bob made it back from the airport I was monkeying with the dash trying to update a few of the fields. As soon as I turned ignition power on to feed the dash I could hear something not-good (that’s a technical term) coming from the back of the car. I couldn’t tell what it was. Thinking it was a fuel pump, I pulled the fuses one by one to determine which was making the not-good noise – it was neither. It then hit me the starter was engaging as soon as the ignition came on, despite not being commanded to do so.
Once Bob got back I discussed my findings with him and he’s thinking the bendix drive on the starter motor may be a dud, not allowing the pinion to disengage from the flywheel. POOP.
It was time to call it a day.
I was still feeling a bit bummed the next morning regarding the starter. I sent an email out to the team at RCR hoping I could get some help warrantying the starter. Given that it’s been over a year since I received the part I didn’t think it was likely.
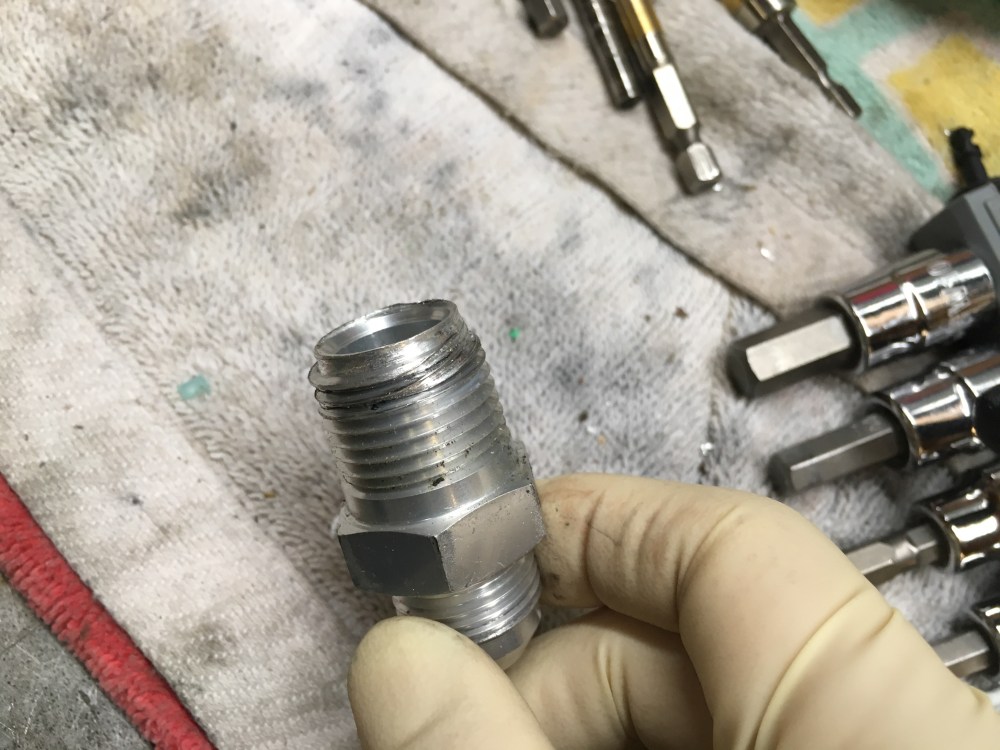
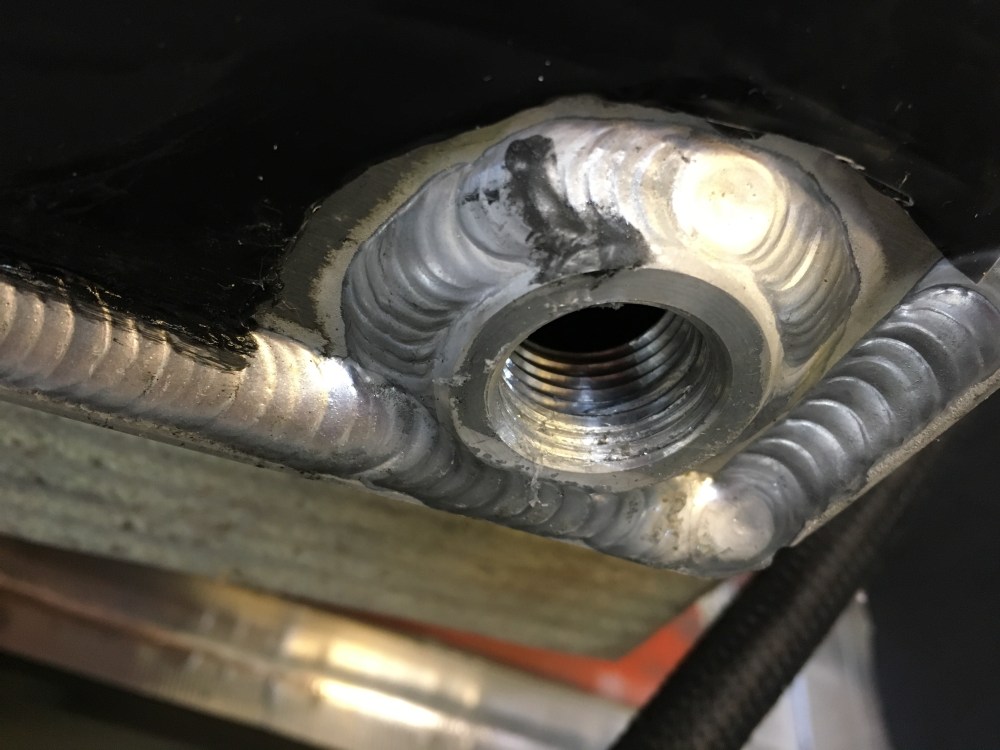
After cleaning the garage up a bit I did another once-over of the car and that’s when I noticed a fairly good sized puddle of fuel/coolant below the fuel tank. I could understand how the coolant got there, but the fuel was throwing me. The small leak we found the day before had sealed up and this was in the wrong area (the firewall separated the known leak from this puddle). I looked a little closer and noticed a drop fall off the corner of the tank. Uh-oh … the most likely source of this drip was at the fuel feed fitting located at the bottom of the tank. I ran my fingers across the fittings and they came back wet. POOP.
A wrench on the fitting wasn’t getting any more turning, it was completely bound up. Hoping a tank R&R wasn’t on deck I cycled the pumps and drained the tank. Then I pulled the access panel from the firewall and we put some real shoulder behind the fitting – it backed out pretty suddenly. Too suddenly actually – the fitting left behind a good chunk of thread! I started envisioning total loss of the fuel tank at this point. POOP. (Ellie’s just on the cusp of the toilet training thing and we’ve been trying to teach her the word POOP, so I had a lot of POOP on my mind).
Only one way to figure out the next step – time to pull the tank. You guessed it – POOP.
Upon closer inspection I was able to extract the large aluminum sliver with picks. There was enough meat left at the fitting that I could chase the threads with a tap and repair almost everything that had been damaged. I was a bit gun-shy about going back to the same local vendor who’d sold me the first fitting but I needed to know if the tank would seal again so we purchased a replacement fitting and installed it.

Fingers crossed, I set the tank at an angle and let it sit like that for a few hours, waiting to see if any fuel would leak – and it didn’t! Things were starting to look up again.
About that time I heard back from RCR – they wanted me to send the original starter back to them and they’d look into a warranty exchange; in the meantime, they were also willing to help me out by sending me a replacement starter before my original made it back to them! Things were starting to head in the right direction!
A huge thanks to Fran/Kristin/Vicki for answering my calls for assistance despite being buried by the stuff that didn’t get completed due to the holiday. I can’t say enough about the support I’ve been receiving!
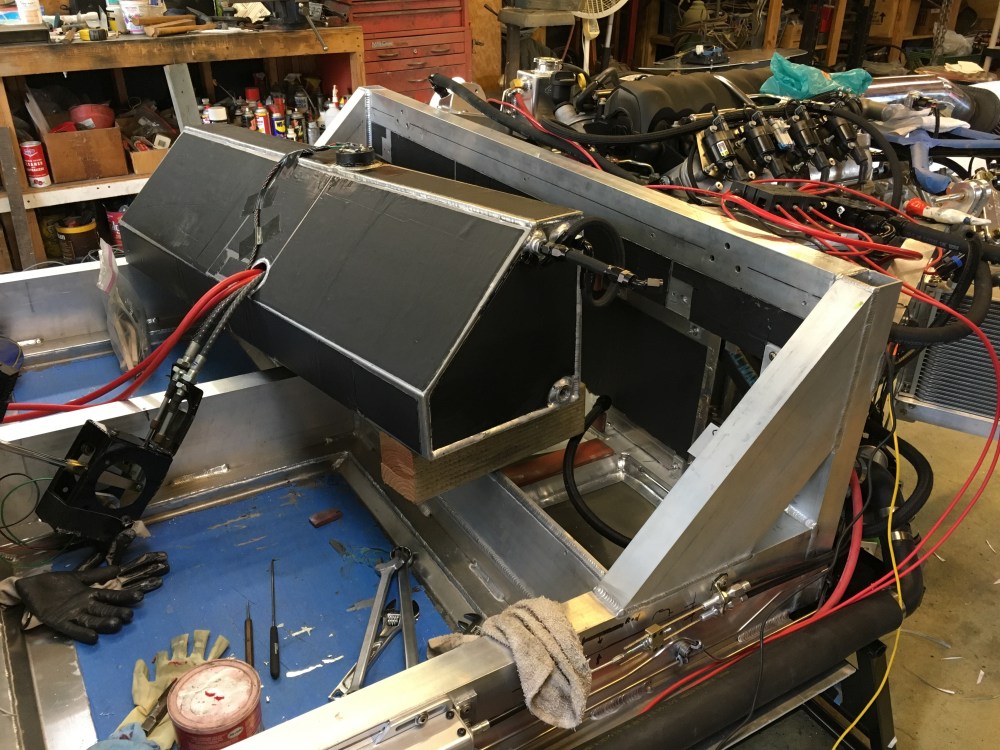
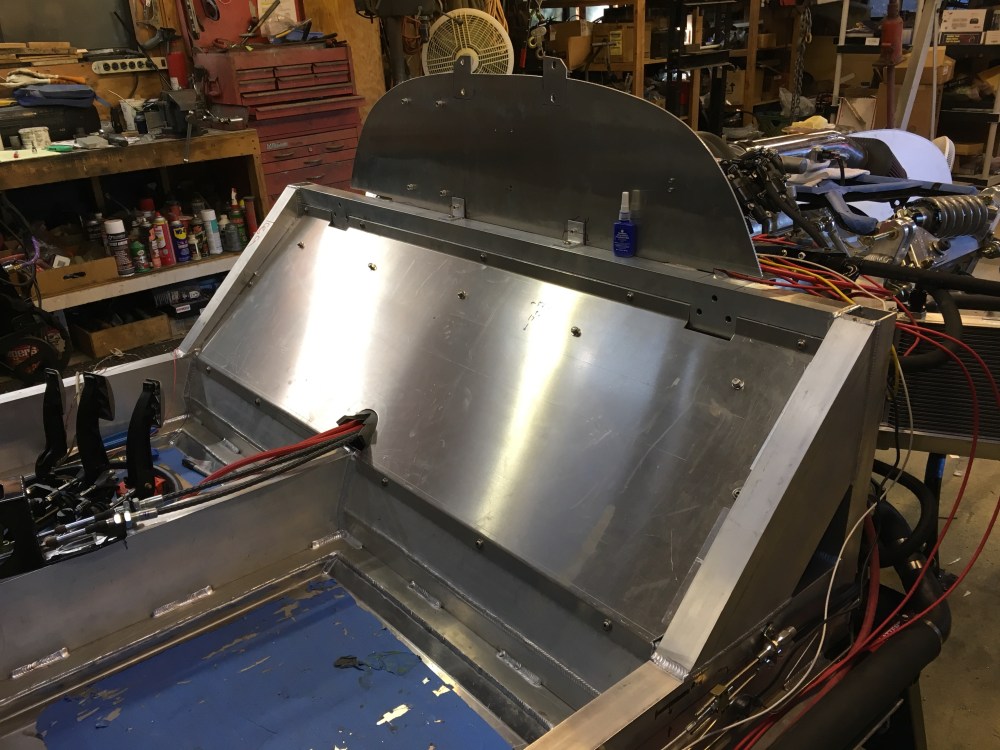
I re-set the tank and poured in about 6 gallons of fuel and let it sit overnight. Before lowering the tank I drilled a small cluster of holes in the floor pan near where the tank fittings are located. We were lucky we caught this leak before any more of the tank area had been closed off; in future, with the body on, a leak here would be very difficult to detect. These holes should allow any leaked fuel to be visible from below the car, leaving a small puddle on the floor to indicate a tank leak.

I then pressure cycled the pumps a few times, enough to fill the swirl pot and get some fuel recirculating back to the tank. The tank is non-pressurized so I didn’t expect any leakage to occur after the initial testing but figured getting some fuel cycled would be a good idea before closing out the passenger compartment closeout. Things continued to look good so it was time to re-install the tank hold-downs and passenger closeout panel!
Time to make more forward progress!
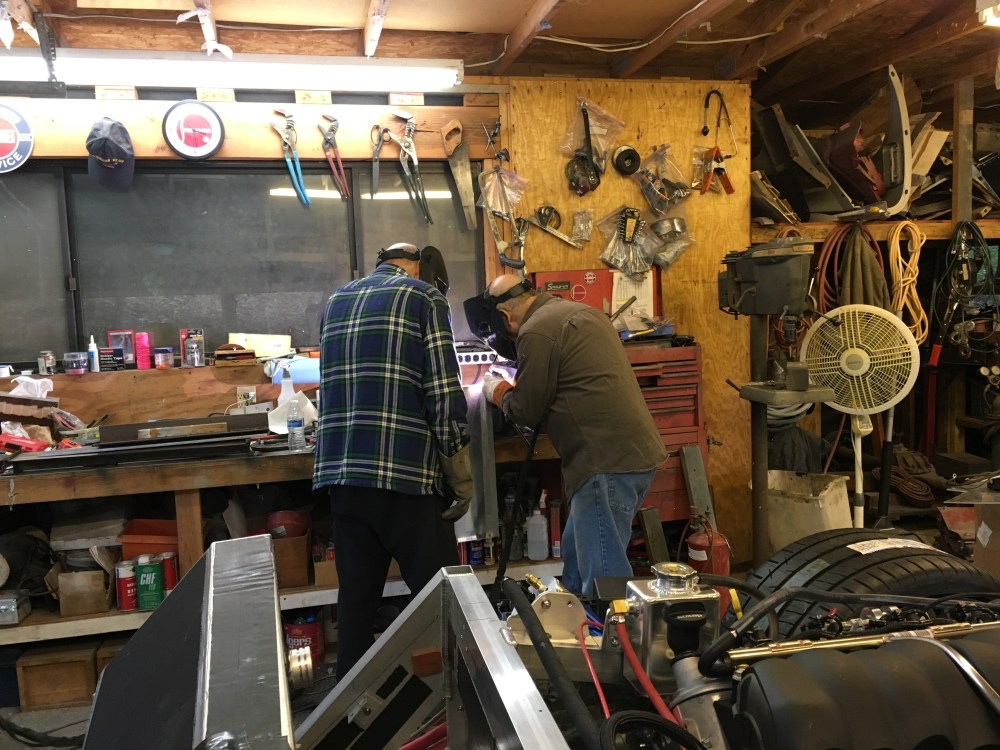
We had a lot of excitement with the first engine start but the next time we run the motor we’d like to be a bit more prepared. We enlisted Lynn’s assistance for some fabrication and welding items. Lynn was a great help while we were working on Phase 1 of the home renos and volunteered to help with the car – he’s a master welder and I’m only good for burning holes.
The aluminum intake tube got some welding love; MAF sensor and PCV air recirculation bungs installed.
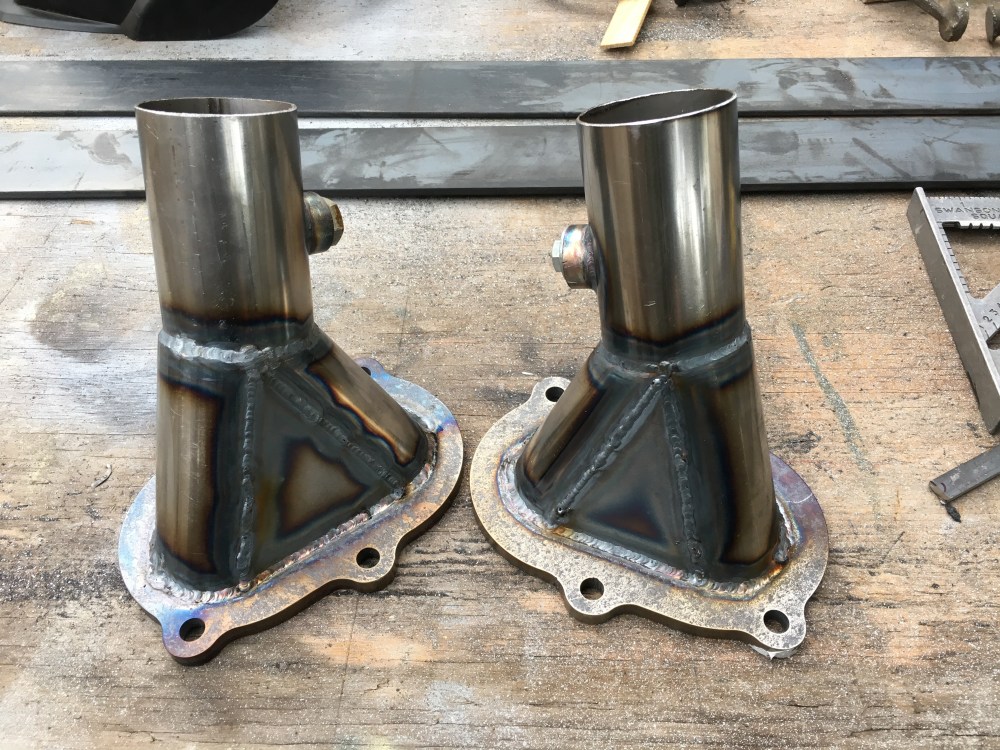
The engine was running super rich because the O2 sensors were just hanging out in the air and not getting adequate exposure to the exhaust gases. These test pipes will collect the exhaust gases and direct them down and out of the engine compartment. Welded O2 sensor bungs downstream of the collector will help the exhaust mix a midge before getting a reading. It’s a bit short to be fully effective but this will be better than hanging in the wind. Bob took all the measurements, cut the material, and tacked it up then Lynn swooped in for all the final welding. LS7 flanges were purchased from TabZone. It seems these guys are the de-facto source for these flanges.
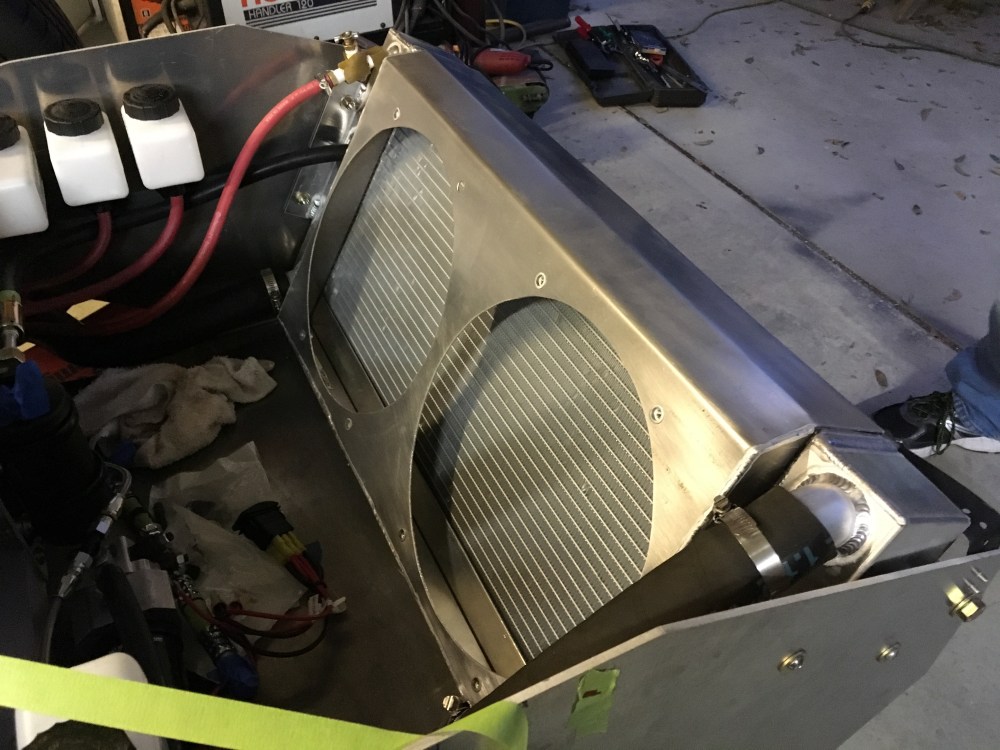
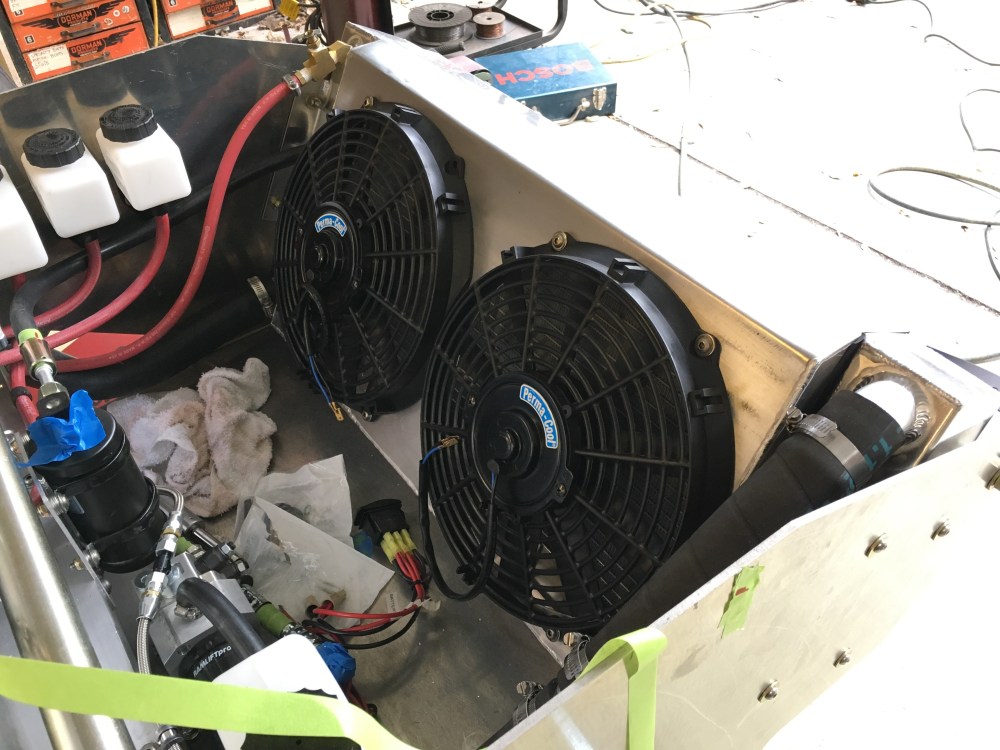
It’s pretty surprising the number of SLC builds I’ve seen that aren’t using a fan shroud of any kind. Bolting fans directly to the radiator makes whatever area isn’t covered by the fan virtually useless at idle/low vehicle speed – which is when overheating usually happens. At low speeds air will want to go to the areas of least resistance – where the fans are and around the radiator. A shroud to ensure all the fan’s suction power is being spread across the entire radiator keeps 100% of the radiator core in the game. Getting the shroud and fans installed will make getting the car up to temperature and bleeding the coolant system a little easier.


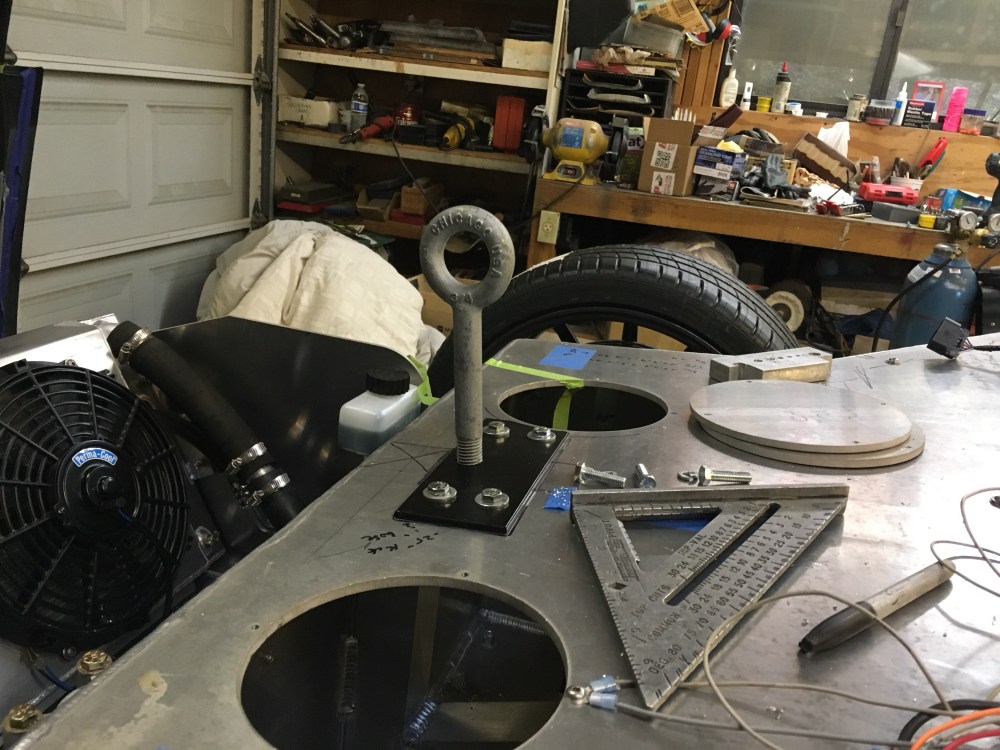
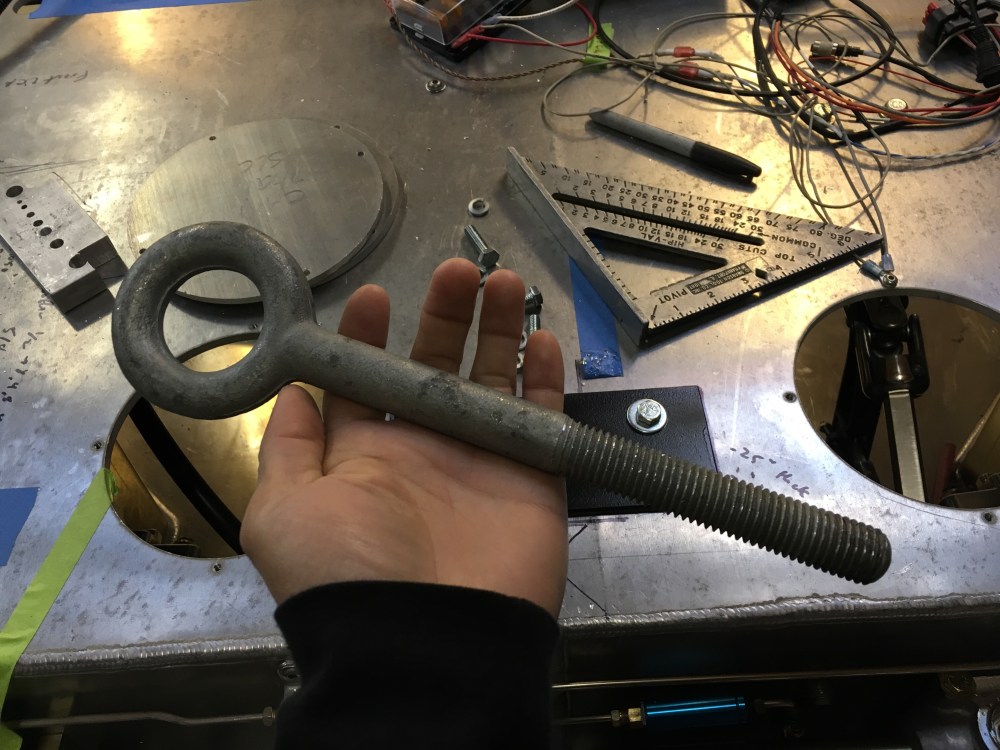
I’m hoping this will never be needed but should the need ever arise I decided it would be a good idea to have some type of tow hook. To construct, Bob used 3/16″ steel plate and fabricated a U shaped reinforcement plate that straddles the center boxed beam running along the top of the foot box. 5/16″ bolts tie the reinforcement plate to another plate located above the foot box. A 3/4″ thru-hole was drilled through the top plate, the footbox, center beam, and lower reinforcement plate. A nut was then welded to the bottom of the lower reinforcement plate. A 3/4″ steel eyebolt passes through and engages the nut; there’s very little clearance between the eyebolt and upper reinforcement plate. Any towing forces will be transferred in shear to the upper steel plate and any pulling forces will be transferred to the lower steel plate.
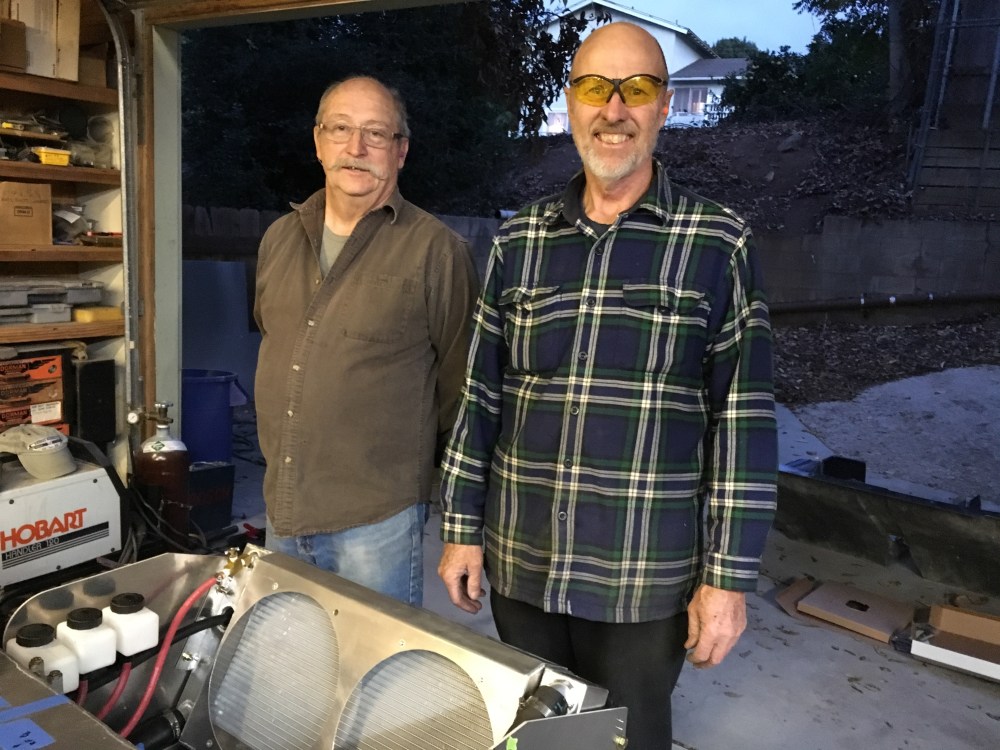
It was time for Lynn to pack it up and head back to his snow bird’s nest. We’ll call on him again once we’ve got a few more projects lined up.
