… and off, slow forward progress toward the final unveiling of the chassis.
The car came literally STUFFED with parts. Unfortunately my passenger side window was damaged during transport as one of the body pieces looks to have rubbed hard enough to leave a few gouge marks on the interior surface. Kudos to RCR for taking care of me and sending out a replacement!
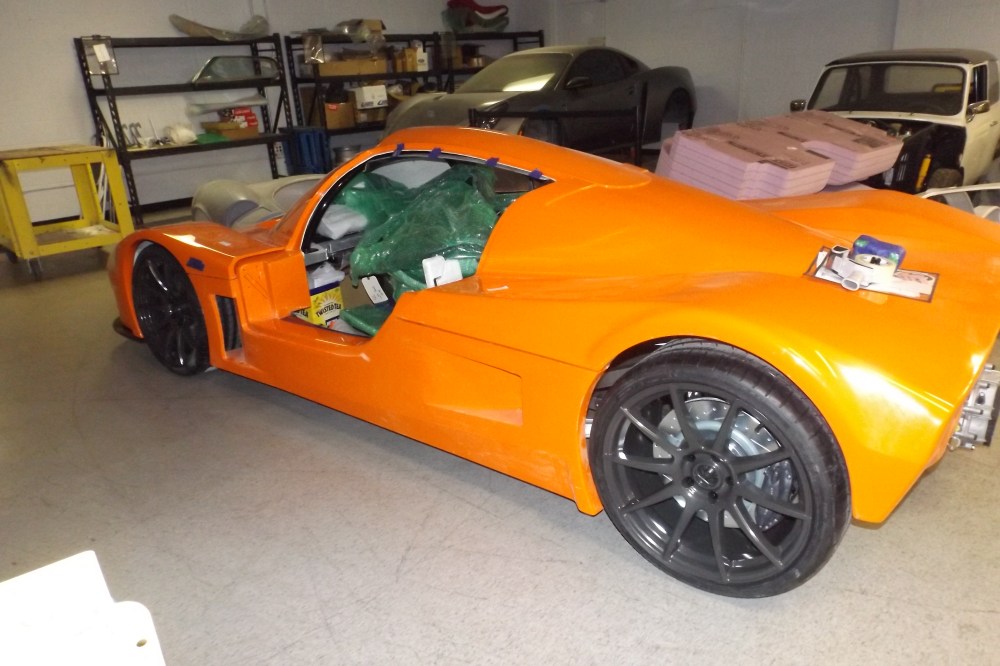

It’s been like Christmas every other day here with all the deliveries we’ve been getting. Our UPS driver must think we’re running one of those Nigerian scam operations through this house with as many packages as we’ve received for this car. It all adds up to a huge pile of boxes that all need a home; more than my 2 storage racks can take but thankfully Bob’s been pretty generous with his garage space.

It’s amazing how much space you need to work on one of these. My hat’s off to those who’ve been able to do so in a 1-2 car garage. You basically need a 3 car garage; 1 for the build itself, 1 for the bodywork, and another for all the parts that will eventually find their way into the car. Maybe you could store the bodywork in a shed or outside but it’s basically the size of a car (duh).
My plan is to eventually build a wooden buck to store each major body piece; they’ll be multifunctional. Casters to help move it back and forth within the garage, supports to help keep the body straight while aging in the sun, and as a workbench for fitting, hardware, shaping, and eventual painting. For now, they’re being unceremoniously stored outside, under some tarps.

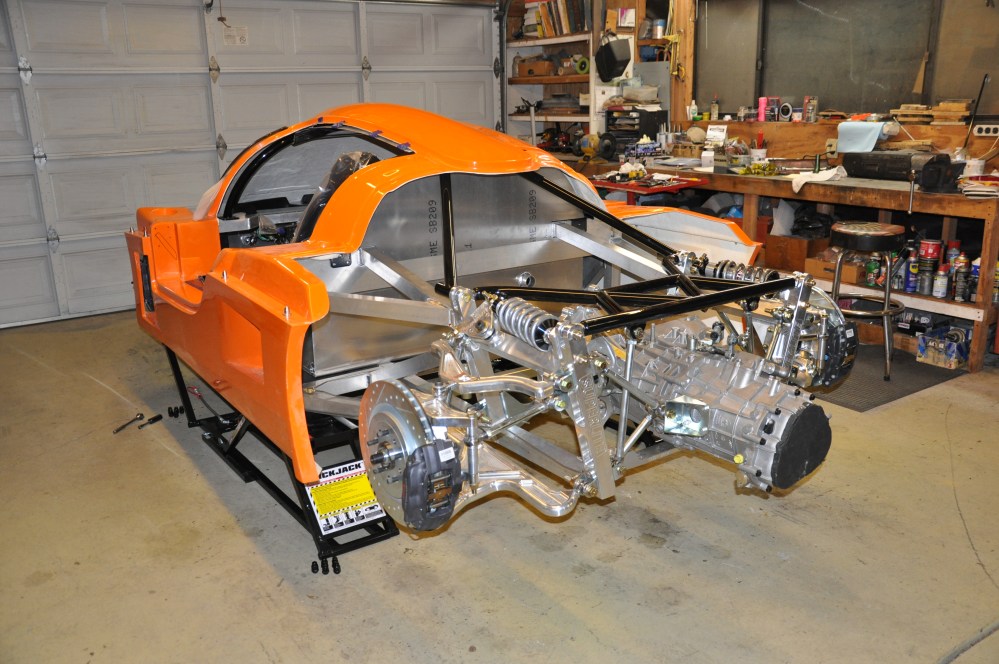
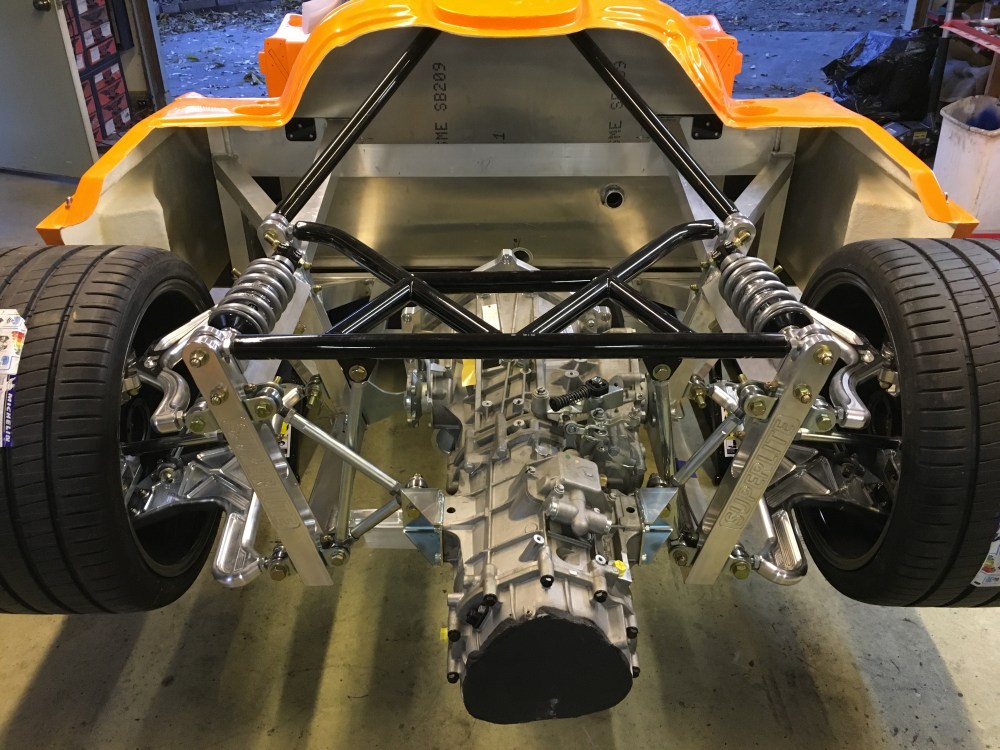
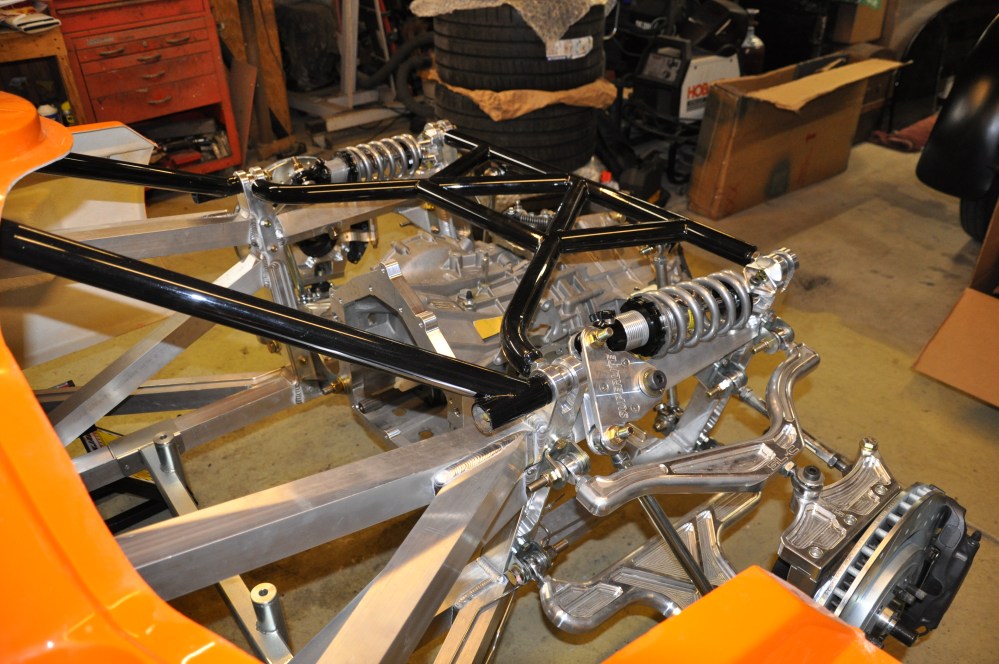


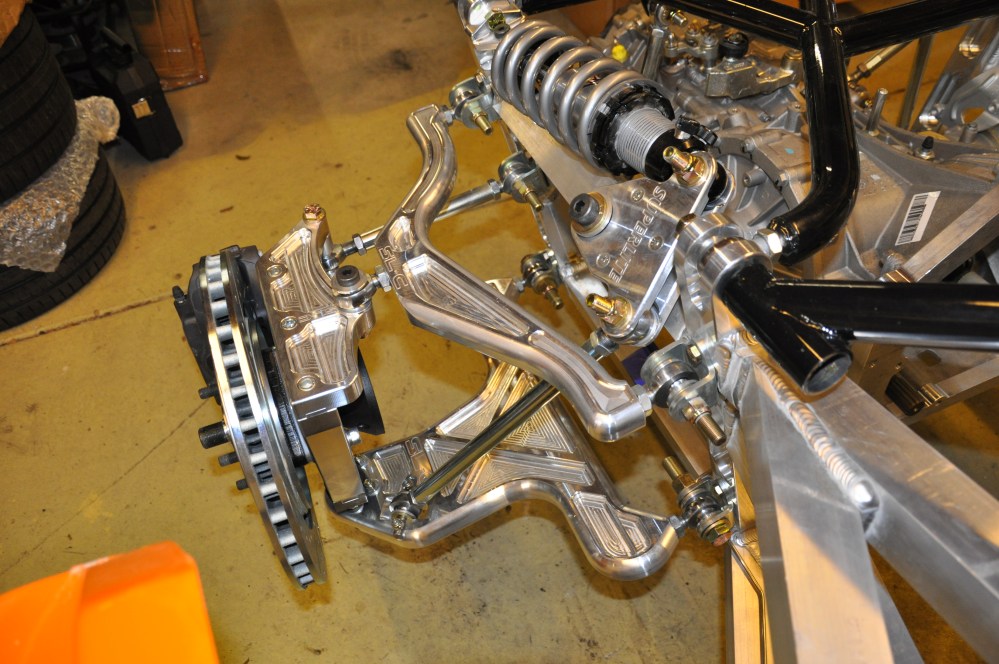
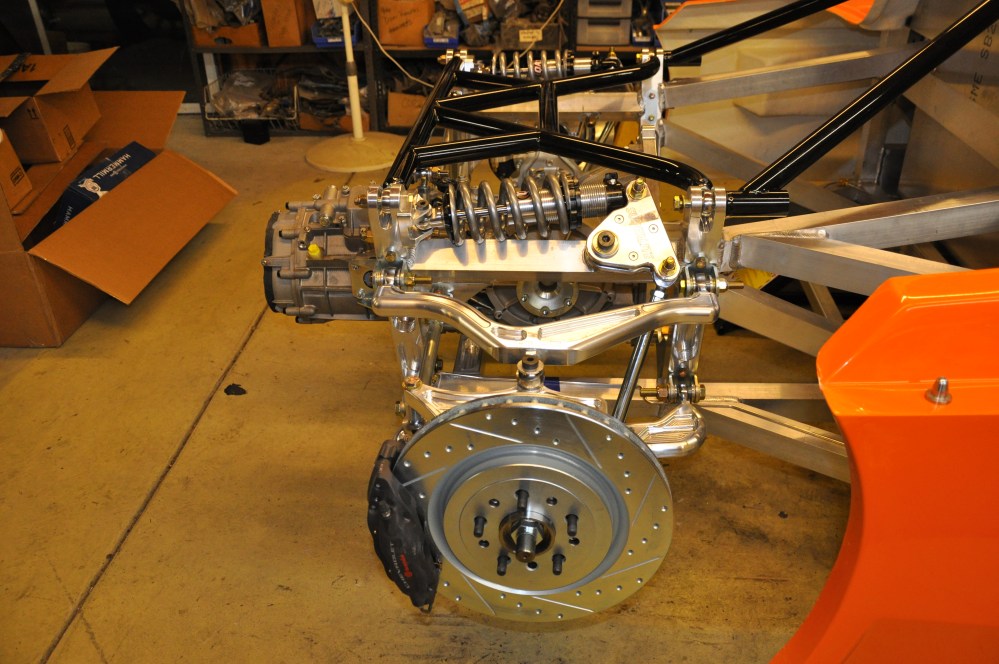
Removal of the front and rear clips finally reveals the front and rear suspension. Describing it as automotive jewelry probably isn’t too far off the mark. There’s more machined billet at one corner of this car than there is on my entire daily driver. Several pieces feature the “SL-C” or “Superlite” logos, a nice touch. The rear suspension is particularly gorgeous; large hunks of aluminum whittled down to just the right amount in the right places, spherical bearings at all points of rotation, push-rod geometry with fully adjustable dampers. For a novice such as myself I have a fear that I’ll never get this car properly dialed in due to all the adjustability the factory gives you. I’ll worry about that later! The superlite site has a great page with better photos than I can shoot but here are a few of my own.


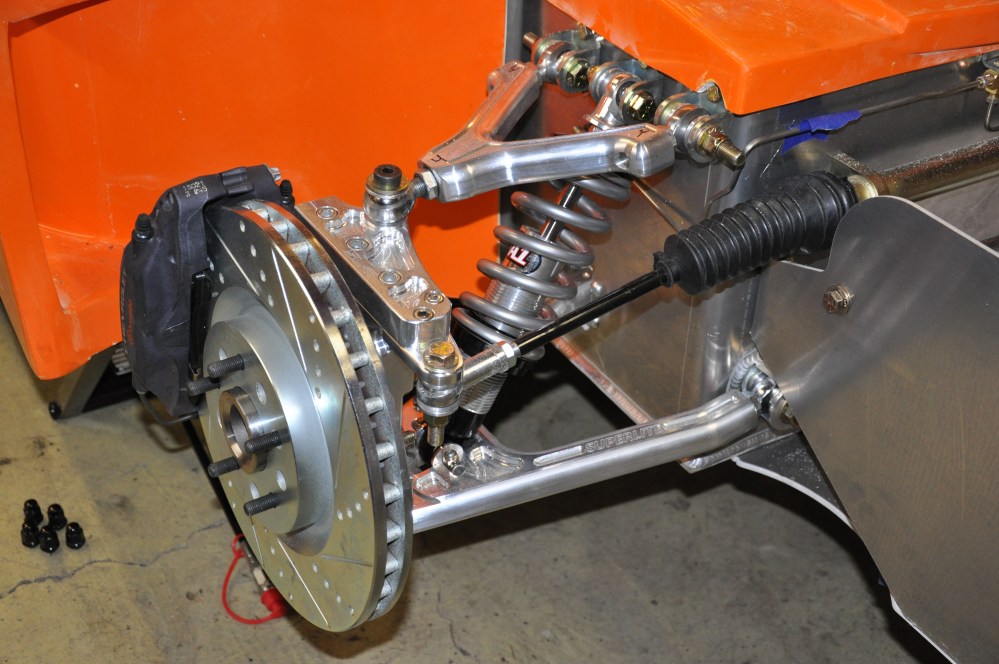
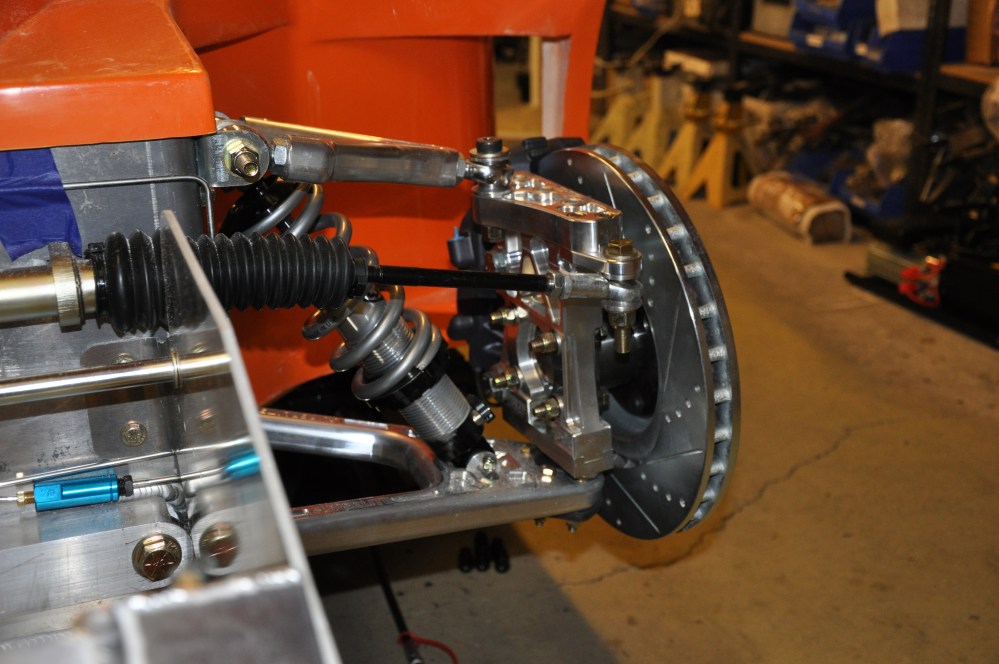

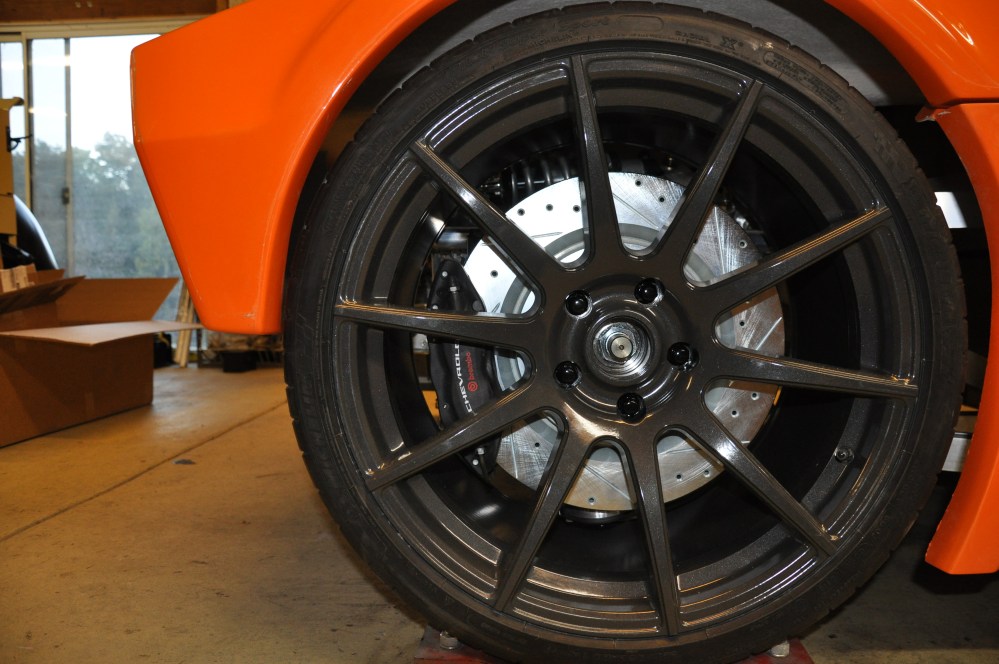
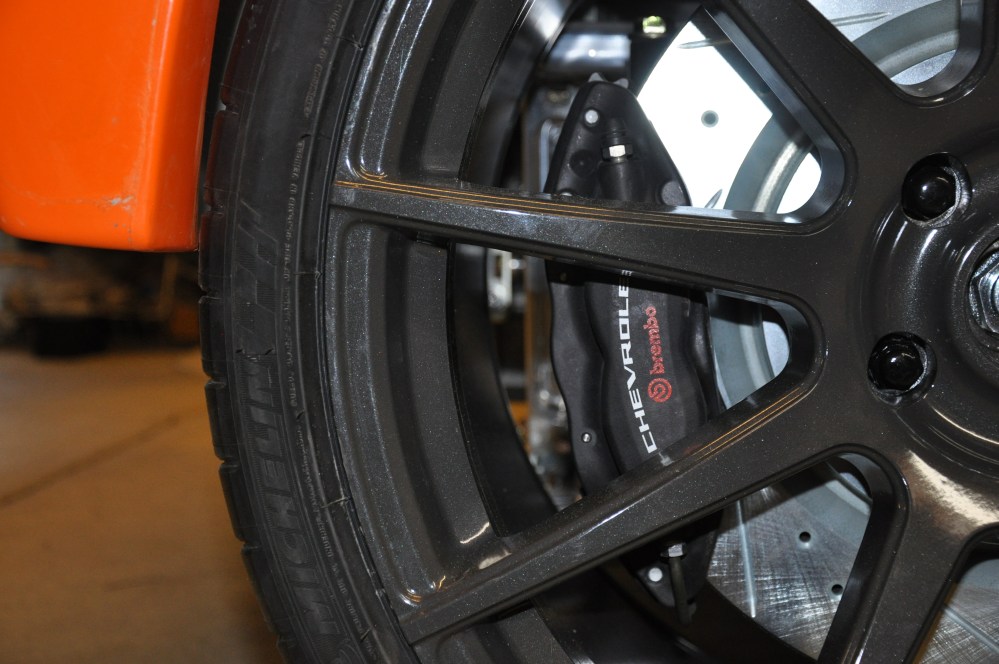
Wheels off so I can get access to the brakes and calipers. One of the great things about this project is it’s an excuse for me to buy more tools and learn new techniques/skills. I dislike the “Chevrolet” logo written across each caliper and the color black doesn’t do it for me. When I find the time the calipers will come off and I’ll try my hand at powdercoating. I purchased the Eastwood dual voltage powdercoat gun kit on a steal during Black Friday (it was an expensive day for me, lots of pent up ordering for the SLC …) It’ll either turn out really neat or a complete mess; if the latter I’ll fall back and send it out for a pro to do. Hours spent watching YouTube videos and a few nights at a Holiday Inn Express give me confidence this is something I’ll be able to pull off. Anyone care to guess on color choice?
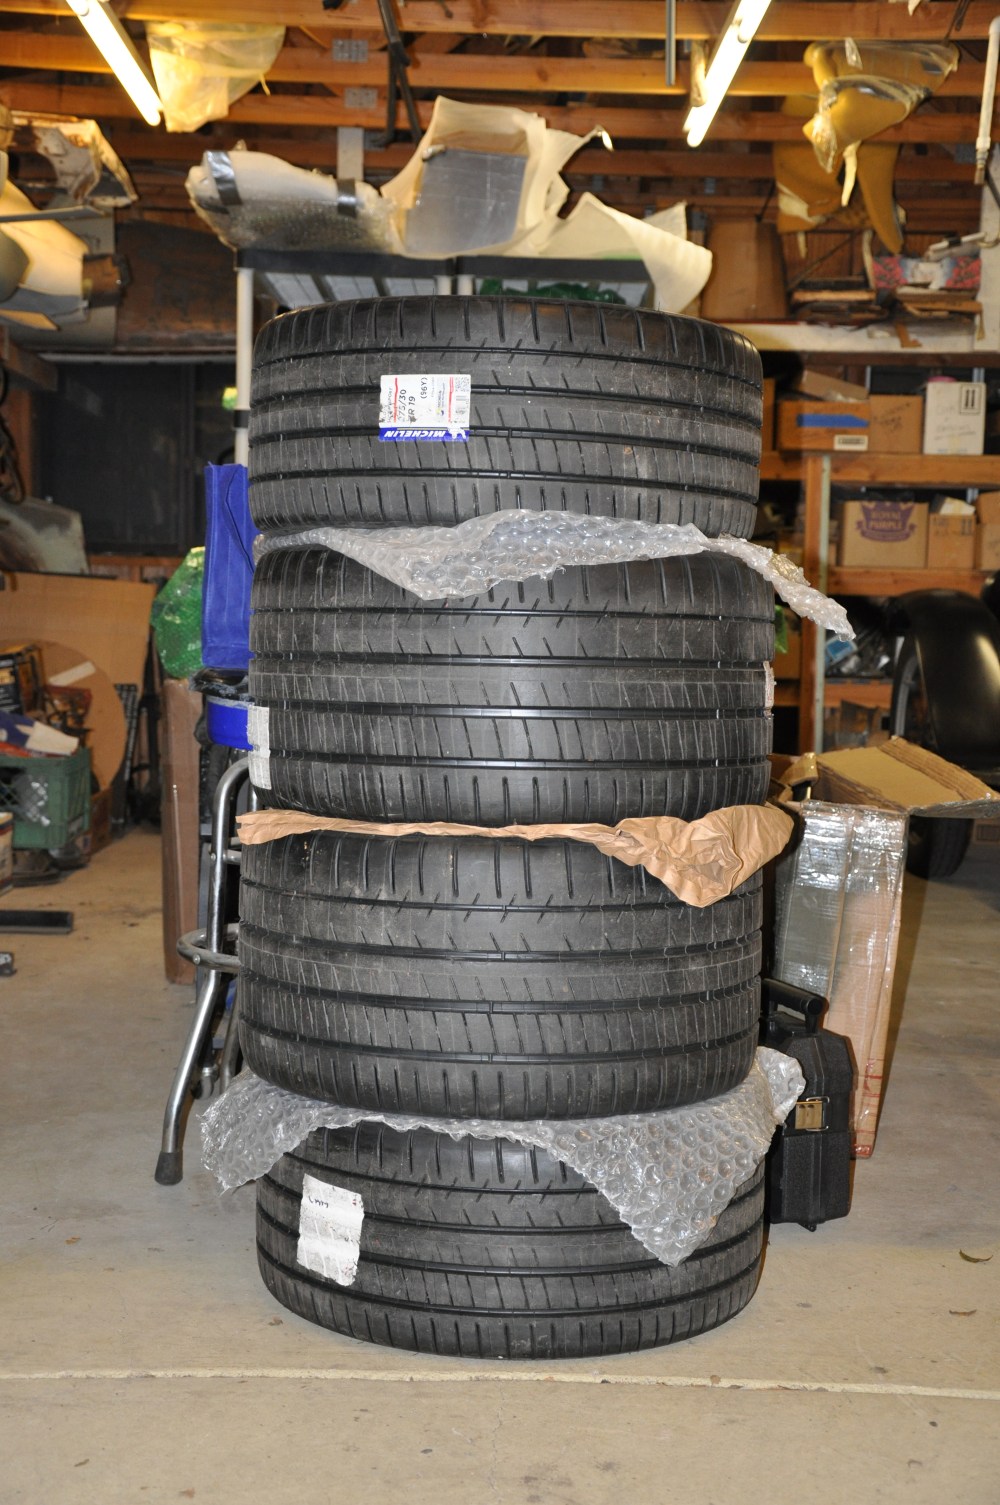


A short discussion on wheels and tires – I’ve already talked about the CF10 wheel choice and how it originally wasn’t even on my radar. Here’s a link to the original pic that put me onto this wheel – hawt, right? If you’re wondering, these wheels come in the “deep concave” variety (follow “CF10″ link above for more info / all Forgestar wheel options come in the deep concave version). At the time I placed my order it seemed the CF10s were only available as a 20″ rear and all other Forgestar options came with 19″ rears. It appears they’re now all available with a 20″ rear (or maybe they were in the past and I just wasn’t aware).
One of the issues I encountered when trying to find tires for this wheel is there weren’t very many that I liked. The rear wheel is 20×12” and there just aren’t a whole lot of tires available that meet the factory recommended sizing (325/30/20 or 335/25/20). Choices were extremely limited or were available in run-flat only (which I didn’t want). I had heard a great deal of positive feedback regarding the Michelin Pilot Super Sports so had gotten it into my head that this was the tire I wanted to run. What’s critical with the SLC is to ensure overall tire/wheel diameter does not exceed ~26.7″ overall. Given this constraint and my desire to run the PSS, I deviated from the factory recommended sizes by nudging down slightly in the direction of reduced overall tire/wheel diameter. I opted to go with Michelin PSS tires with 325/25/20 at the rear and 275/30/19 at the front. Based on what I could pull from various web searches the PSS have a fairly vertical sidewall and this was the look I was going for, I don’t think the stretched look is going to work for this car.

Note: With all Forgestar 19″ front wheel options they will come as either 19×9.5″ or 19×10″. The factory puts an order in to Forgestar at the time you place your order and front wheel width will be determined by Forgestar based on whatever blanks are available at that time. Based on rough measurements it looks like I got a 10″ wide wheel.
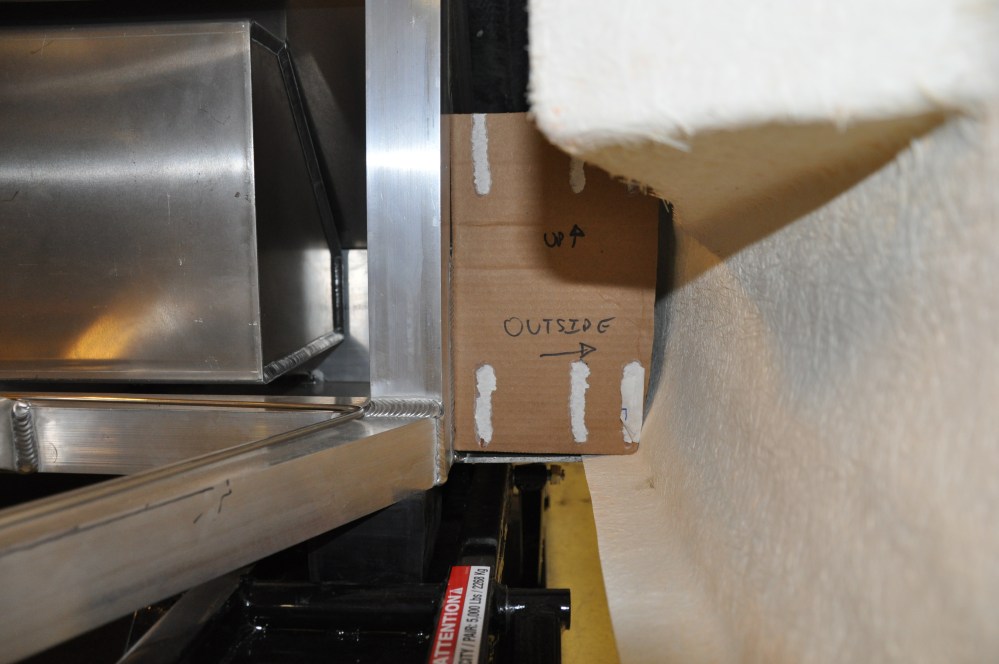
While the center spider is still on the car, I took the opportunity to make a few template pieces so I’d have a rough idea of the body outline/internal space for future reference. Lots of wiring and plumbing will run back and forth along the sides of the chassis and it would be an exceptional hassle to discover I’ve crammed too much “stuff” into one side – right when I’m ready to do the final fit-up. An SLC builder recommended I take note of the outlines now before getting into the build – a great idea!
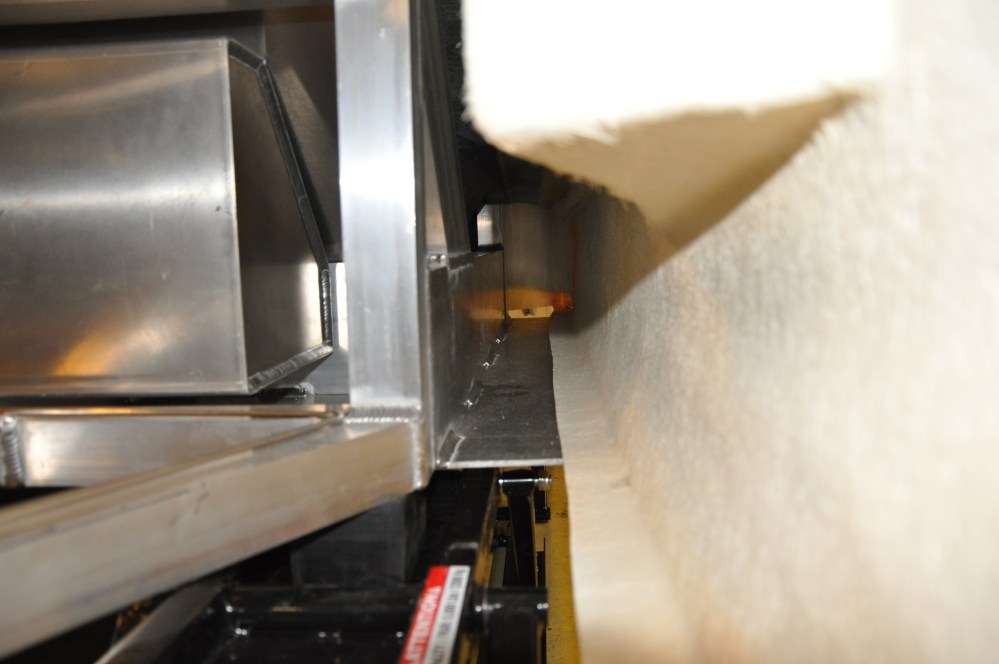


I’ve been messing around with a laser level (new tool!) trying not to blind myself. With the rear clip removed I checked a few reference points and was surprised to see the car is almost perfectly level on the lifts, just a few mm higher on the driver side. I also shot a line across a few of the suspension pick-up points and chassis cross-members and confirmed the chassis appears to be perfectly (as best as I can figure) square. Once the center comes off I’ll run a few more checks and establish vehicle centerline – this’ll be important for lining up the bodywork and making sure the suspension is correctly spaced left to right.

Next up, find a home for the center spider and remove it so I can get a full frontal view of the bare chassis!
